Using ClickUp for project management, you can handle everything from managing a team to tracking your own goals. Learn how ClickUp can be used to its fullest potential in this guide. From creating tasks to assigning them, setting deadlines, and tracking progress, everything will be covered here. Once you finish this guide, you’ll be an expert!
Setup a Clickup Account
Join with your email.
Get a ClickUp account by heading over to the official website. No worries, it’s free. Once you begin the sign-up for your account, you’ll receive a verification code in your email. After you get your code, go to the signup page and enter it.
Now — ClickUp Onboarding is in full swing.
Choose an avatar.
![]()
You can pick your first avatar, or if you don’t have a picture, you can choose a color that matches your initials. At this point, you should upload a picture. Click Save — once you’ve uploaded and adjusted anything you need to.
Pick a color for your theme.
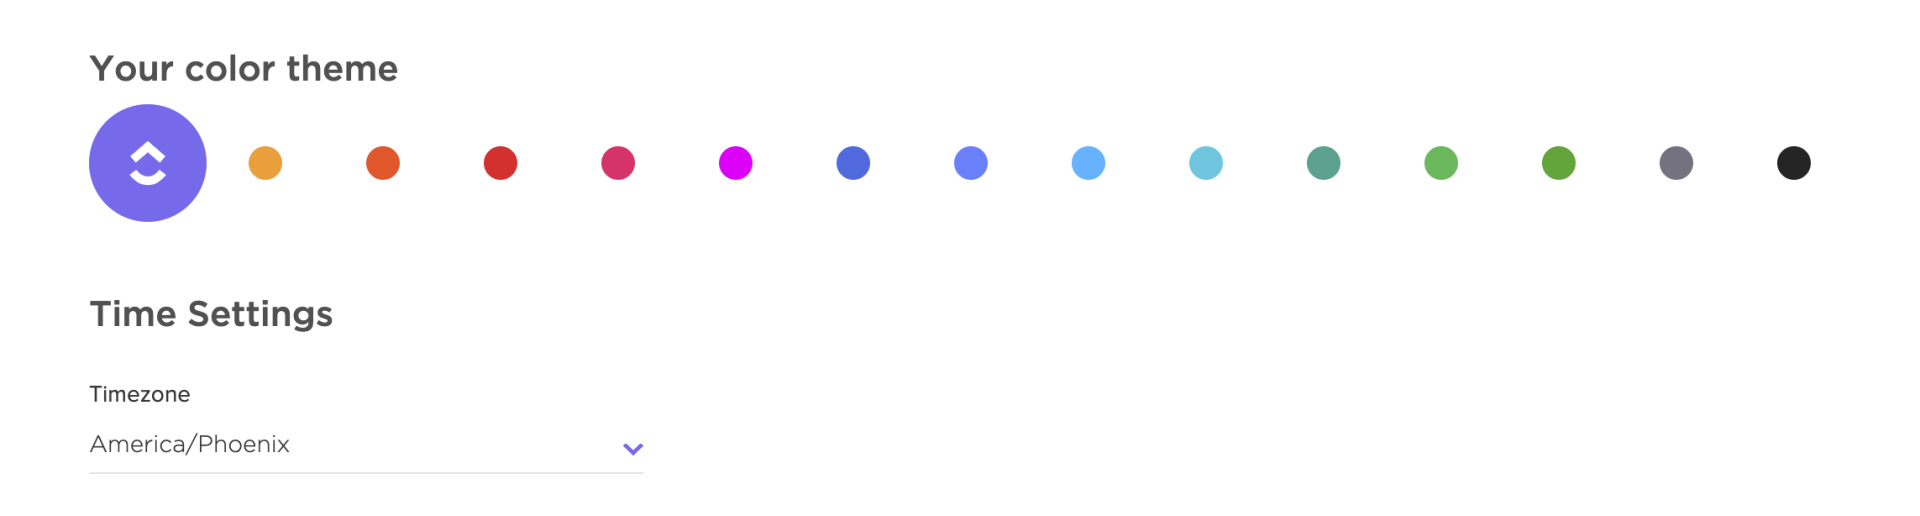
Next, pick a color for your theme. It’ll show up in your ClickUp account. Every group member can pick their own theme color, so you can use whichever you like.
Cloud storage, calendar, and time tracking integrations.
![]()
Now that you’ve chosen your shade — let’s talk integrations. ClickUp lets you integrate apps with your account, like time-tracking, Google Calendar, Dropbox, etc. Your ClickUp account needs to be integrated right away. There’s no limit to what you can do with these tools.
However, if you don’t need them, leave them unchecked. I’d leave these blank at the beginning to make things less complicated. You can always add them later after your account is set up.
Decide what size team and workspace you want.
Users will be able to customize and simplify their experience in this area. When you select “It’s only me,” all team features will be hidden. Select “Me and others” if you want all the features or want to invite others. After you set up your ClickUp account, you can customize the settings at any time.
Name your workspace.
You have to give your workspace a name. The name of your workspace usually corresponds to the name of your organization, club, company, non-profit, or anything you want.
Invite your team.
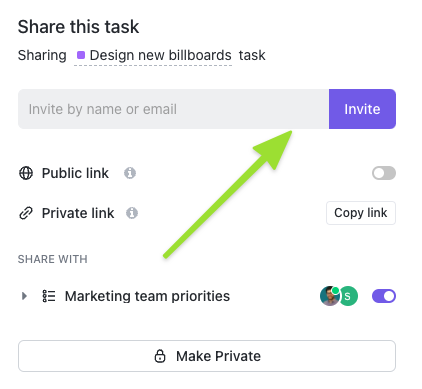
ClickUp lets you invite people straight to your account.
Choose a workspace avatar.
It’s now possible to choose a photo for Workspace. It is recommended to set the company logo since it will be visible to your entire team.
Give the first space a name.
When you’re done creating your Workspace, you’ll be asked what your first Space will be called. If you’re planning to use the first Space for testing, it’s a smart idea to give it a name you’ll remember. Keep it simple for now.
Turn On Click apps.
This isn’t the end of the setup. You’ll be asked which ClickApps you’d like to enable in your ClickUp Space. Basically, these are the extra features you’d like to enable. Depending on your workspace, you can enable or disable apps.
Add more integrations.
Your Workspace will give you the option to add additional integrations. Zoom, Slack, Zapier, etc., are some of the options here. Feel free to ignore it for now if you’re not sure what to add. For now, pick the one you use most often and move on if it doesn’t work for you.
Get your tasks imported.
Can you import data from any tools? After you’ve got some ClickUp structures set up, you can do so easily.
Click Up Apps.
You can add ClickUp’s desktop, mobile, and web apps. ClickUp’s Browser Extension lets you access it from anywhere, including your email.
Get Organized with the Hierarchy
The first thing you should learn if you’re joining a team already using ClickUp is how the hierarchy is set up. Regardless of whether you use ClickUp on your own, deciding your hierarchy should be your top priority.
There are Workspaces, Spaces, Folders, Lists, and Tasks in the ClickUp hierarchy.
Workspaces.
In the hierarchy, Workspaces are at the top. The first thing you’ll do when you create a ClickUp account is to create a workspace.
You can’t transfer work between Workspaces, so make sure all teams or departments using ClickUp are in the same Workspace. Just note that there are no limits to how many Workspaces you can create.
Spaces
The next level down is Spaces. It’s a must-have for everything project management. You can share one Workspace, and every department has its own Space. As such, anyone can share work with anyone else, but every department can customize its own Space.
A couple of Space features worth mentioning are Statuses and ClickApps. The statuses will appear in your Space’s tasks so you can control and track your workflow. You can think of it this way: “To do” > “In progress” > “Review” > “Complete.”
ClickApps let you customize your Space however you want. With each ClickApp you add to your Space, you get some brand-new features, like Task Priorities, Tags, Custom Fields, and Time Tracking.
Folders
Under Spaces are Folders, which are containers for organizing your projects. They’re totally optional. However, if your Space is getting cluttered, Folders can help.
Lists
Lists are next. In the hierarchy, lists aren’t below folders because you can add lists to folders or put them directly in spaces! Lists are basically task groups.
When it comes to visualizing information, Lists are the default option. Tasks can be represented in many different ways, called Views, each with its own features. Overall, List view is a convenient way to manage tasks since it’s comprehensive and highly customizable.
Tasks
Lastly, we’re going to talk about Tasks. They’re at the bottom of the hierarchy, but they’re the backbone of any project and can be customized to fit your needs.
A task can be assigned to as many people as you want. You can also make someone a watcher if they just need visibility into a task. You can set a start and due date (or even a time). Also, you can add subtasks, which are basically tasks inside tasks. A checklist can be added to a task, and attachments can be added, ClickUp Docs can be added, the list goes on.
For now, though, let’s move on since we’ll talk about tasks a lot more.
Keeping Track of Tasks and Home Trays
Hopefully, you have a clear grasp of the hierarchy. Also, your Workspace is ready. You’ve even been assigned some tasks. Naturally, you may feel overwhelmed.
Home.
The ClickUp platform contains so many Folders and Spaces that, if you work in a large organization, most of them aren’t relevant to your work. It’s okay. Every time you need to organize your work, just tap the Home button.
Your Home shows all the tasks you’ve been tasked with. Additionally, you can see comments that have been assigned to you, as well as reminders. Basically, if you assign each task, give it a due date, and monitor your Home, and others through their profiles, you won’t let anything slide.
Home makes it easy to see all your tasks.
Plus, you can access all your pressing tasks with the Task Tray.
Task Tray.
The Task Tray can be accessed by clicking on each overdue or due task in My Work [located in Home] first thing in the morning. By doing that, you’ll never lose sight of what you need to get done that day. Whenever you’re done with a task, remove it from the Task Tray so the tray can be cleaned up.
However, distractions happen all the time, no matter how well-organized your system is. You know, that coworker who’s slacking on a project. Perhaps it’s a random thought, like “Did I switch my clothes over to the dryer?” or “I need to update the data in the presentation for the meeting.” Whatever it is, don’t let it slow you down.
Use reminders. You can create them by clicking the rainbow icon next to “+ Task” or by using the r hotkey. With ClickUp reminders, you can just jot down a thought so that you can keep your focus.
You can find all your reminders in your Home whenever you find a gap in your schedule — or at the beginning or end of the day.
Docs Anywhere, Anytime
Documents integrate seamlessly into ClickUp’s ecosystem. That means inside a Doc; you can mention a user, task, or even another Doc. Embedding other resources from within and outside ClickUp is also possible. The Doc lets you create as many “pages” as you want, which is great for creating glossaries and wikis.
Plus, you can add a table, comment, or table on top of the “normal” word processor functions. A Doc can be edited or added to by anyone with access, so it’s perfect for collaboration.
Furthermore, docs can be attached to tasks. In a task, click “Add” next to “Attachments” and choose “New Doc.” When you have a lot of text to work with, this is a helpful resource.
The Docs view can also be added to a list or folder. You can use this to make a glossary, a best practices document, or a standard operating procedure people can reference and edit.
Use Hotkeys and /slash Commands to Save Time
We’ve mostly talked about features or workflows that make your life easier so far. Testing and integrating these resources into your existing processes take time and practice, but they’re incredibly useful.
For a minute, let’s focus on something easy: shortcuts. You can save hours by adopting these things, and they’ll take almost no time.
Some examples include:
- You’re automatically assigned a task when you hover over it and type m
- You can make a new reminder by typing r
- Entering s opens up a search window that lets you search all your resources
If you enable the hotkeys ClickApp, you’ll spend less time clicking. After that, you can start clicking less with ClickUp.
ClickUp’s time-saving arsenal includes hotkeys. One of my favorite time savers is /Slash Commands.
The /Slash Command menu is displayed when you type a forward slash, /. There are /Slash commands for tasks, documents, chats, and views.
It depends on what you’re working on which /Slash Commands you find the most useful, but some of the ones I find most useful are:
- To create a table of contents, type /tc
- Create headings with /h1, /h2, and /h3
- You can embed anything into a task or Doc with /em
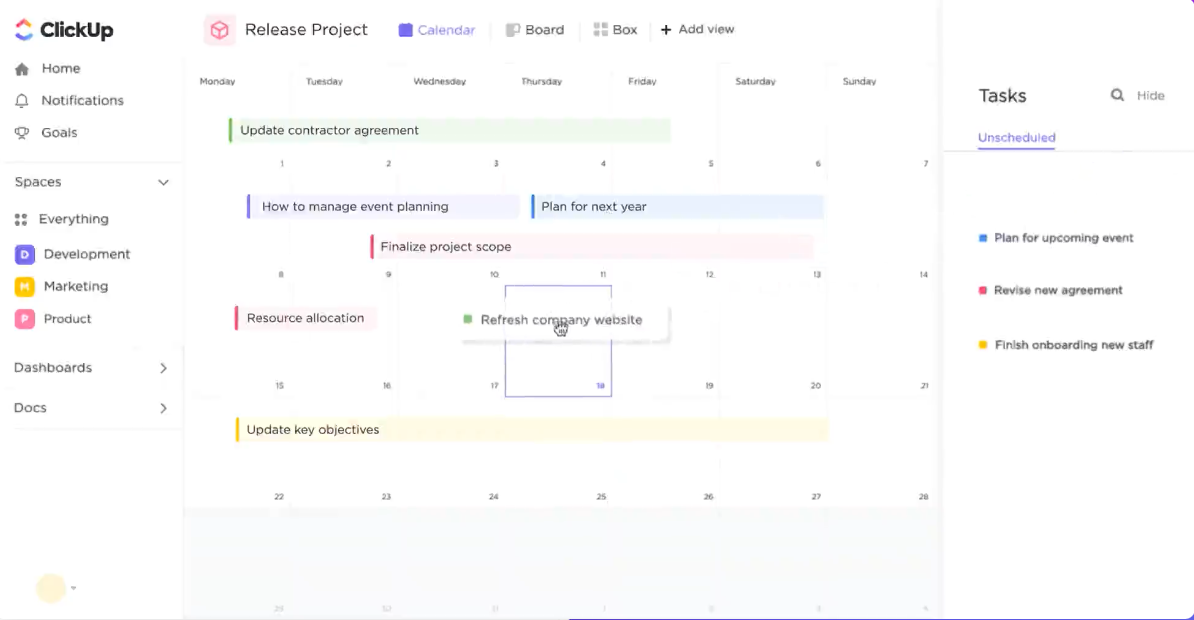
ClickUp Calendar Overview
Using Calendar view, you can plan, schedule, and even manage resources. Organize your week by dragging and dropping tasks, or plan your month in advance by dragging and dropping tasks.
To consolidate tasks in one place, you can also sync your Calendar view with your Google, Outlook, or Apple calendar. For your information, all ClickUp plans include unlimited calendar viewing. Moreover, everyone with edit or full permissions can create Calendar views.
Create a Calendar view.
To create a Calendar view, you’ll need to take the following steps:
- Select the location where the Calendar view should be displayed. With Everything view, you can view all of your tasks or a single List, Folder, or Space.
- At the top of your screen, click + View.
- Click on Calendar.
- Select Add View.
- To the far right of the tasks search bar, select the Month dropdown to choose how much time you want to see on your calendar. The following options are available:
- Day. Schedule tasks for the entire day or for a specific period of time.
- 4 days. This period spans four days.
- Week. You can move tasks from day to day by looking at a week.
- Month. You can move tasks around as needed from day to day based on your entire month.
To go back to the previous time period or forward to the next, use the arrows next to the tasks search bar. By clicking Today, you can quickly jump back to the current day.
Move or delete a Calendar view.
If you want to move or delete a Calendar view, follow these steps:
- Select the ellipsis… at the top of your Workspace next to the name of the view.
- From the dropdown menu, choose Move or Delete.
Schedule tasks.
You’ll automatically see all tasks that have a start or due date on your calendar by default. By dragging and dropping a task, you can change the date. Prior to dragging a task onto the calendar, you can set a time estimate for it.
You can view unscheduled and overdue tasks by clicking the following:
- Expand the Tasks section of your calendar.
- Then click Unscheduled or Overdue.
- Adding tasks to the calendar is as easy as dragging and dropping.
In your calendar, click Me to view only tasks assigned to you. Additionally, you can include tasks with a comment, subtask, and checklist in Me Mode.
Create, view, and select tasks.
The + plus icon can be clicked when hovering over a day in the month view to create a new task.
If you select an empty space on the day at a particular time on all other views, you will be able to create a task quickly.
Bulk Action Toolbar helps you change multiple tasks simultaneously. If you are using a Mac, press command or control to select the tasks. If you hold down an appropriate key command as you click the tasks, you will be able to select them more accurately.
In addition to the diamond icon, Milestones have bolded task names for easy identification.
Customize your calendar.
- Customize and categorize tasks. You can select how your calendar will appear from the Show menu. Create your own task visibility, time format, and task dates.
- Filter tasks. You can use multiple filters to reduce clutter in your calendar by using the Filter dropdown menu.
- Add national holidays. In the right sidebar, select Your Calendars and add national holidays.
Google Calendar Syncing
Your ClickUp account can sync events or tasks from your Google Calendar as soon as you add them.
Events can be synced to ClickUp and tasks to Google between the same ClickUp and Google accounts, but each sync must be set up separately.
Sync events to ClickUp.
Each Workspace you create or join displays synchronized Google Calendar events.
ClickUp syncs Calendar events from Google Calendar as follows:
- Your calendar in ClickUp will be updated whenever you make changes in Google Calendar.
- The event can be viewed in ClickUp and edited in Google Calendar by clicking the link.
- These calendars are only available in Google’s My Calendars section.
- It is possible to toggle on or off your specific Google Calendars.
- ClickUp does not create tasks for events created in Google Calendar.
- ClickUp does not sync Google Calendar tasks.
Sync tasks to Google Calendar.
The syncing of tasks across Workspaces, Spaces, Folders, and Lists is possible.
Tasks that sync.
The following tasks can be displayed in Google Calendar if they meet the criteria.
- Tasks from specific Workspaces, Spaces, Folders, and Lists from either all tasks in the selected location or only tasks assigned to you in the selected location.
- Tasks with a start date and/or due date.
- You can bulk sync tasks to Google Calendar for up to 60 days in the future.
Task updates.
Google Calendar will be updated with the following task updates.
- Task name. If you rename a task, the event associated with it will be updated in Google Calendar.
- Start date. When you update the due date of a task, your Google Calendar event will be updated as well.
- Due date. The Google Calendar event for the task will be updated if the due date of the task is updated.
ClickUp does not update tasks associated with events in Google Calendar.
Tasks that don’t sync.
A task that meets the following criteria won’t appear in Google Calendar.
- Future recurring tasks. A recurring task will only appear in Google Calendar when it is active at the moment.
- A task without a start or due date.
- Past-due tasks.
- The start date of the task is more than 60 days from now.
Set up Google Calendar sync.
In order to sync Google Calendar with ClickUp, follow these steps:
- ClickUp offers two ways to sync:
- You can add a calendar from anywhere in a Calendar view by clicking the Add Calendar button in the right sidebar.
- Choose My Settings from the Profile avatar menu, then select Calendar from the My Apps list.
- Then, click Add Account.
- Click on your Google account. To authorize ClickUp to access your Google account, select Connect new account and follow the steps.
- Choose between syncing events with ClickUp or syncing tasks with Google.
- Selecting Sync tasks to Google requires the following information:
- Your Google account.
- The Google Calendar to sync to.
- ClickUp locations from which to sync.
- Choose whether to sync all tasks assigned to you or only those in the location.
- Select Next.
- Click Got it!
- Follow the same steps to set up the other sync option.
Authorize ClickUp.
Upon authorizing Google Calendar, a popup appears requesting all calendars you can access through Google Calendar be visible, editable, shareable, and permanently deleted using ClickUp. In order to sync Google Calendar, this permission request must be accepted.
Sync ClickUp Calendar with an External Calendar
Keep track of your due dates by connecting ClickUp to an Outlook, Apple, or another calendar that lets you subscribe using a URL feed. However, synchronization is one-way only. In ClickUp, changes are reflected in your external calendar app, but not the other way around.
Set up calendar sync.
It is possible to sync tasks with upcoming due dates so that they appear on an external calendar. The external calendar will not sync with tasks with past due dates, though.
You can sync your calendars by following these steps:
- In the lower-left corner, click on your avatar.
- Go to My Settings.
- From the left-hand sidebar, select Calendar.
- Next to the Apple Calendar, Outlook option, click Connect.
- Sync tasks from the location of your choice.
- Choose what you want to sync: All tasks or Tasks assigned to me.
- Click Save.
- Select Apple Calendar or Outlook, then sync your calendar automatically.
Sync using a URL.
By using a Calendar Subscription URL, ClickUp Calendar can be synced with other apps.
Using the subscription URL, sync your calendar:
- Go to the lower-left corner of the page and click on your avatar.
- Click on My Settings.
- On the left sidebar, click Calendar.
- Then, next to the Apple Calendar, Outlook option, click Connect.
- Select the location where tasks should be synced.
- Choose what you want to sync: All tasks or tasks assigned to me.
- Click Save.
- Select Copy in the Calendar Subscription URL (iCal) field.
- In your external calendar app, paste the URL.
Mobile
It is also possible to generate URLs for your mobile device calendars. These calendar subscription URLs can also be imported into most third-party mobile calendars.
John Rampton
John’s goal in life is to make people’s lives much more productive. Upping productivity allows us to spend more time doing the things we enjoy most. John was recently recognized by Entrepreneur Magazine as being one of the top marketers in the World. John is co-founder of Calendar.