Introduction: What is Doodle?
Setting up meetings can be a real drag. Whether you’re trying to arrange a meeting of the board of directors, get the department together to plan the following semester, or organize a birthday party for a relative, you’re left making calls and batting dates ’round and ’round — until you can find a gap in everyone’s calendar. The process can take days, and even weeks, and often ends with someone being disappointed and either having to change their schedule or miss the event.
In 2023, Doodle tries to make scheduling much more comfortable. It lets an event organizer select a range of times and dates, then sends the timeframe possibilities to attendees. Doodle calls those options “polls.” The attendees can then check the times that suit them, and the organizer can choose the hours that everyone can attend — or at least the time that disappoints the fewest people.
It’s all remarkably simple, at least in theory, and Doodle has done a great deal to make the process fast and straightforward. But as we’ll see in this guide, it also limits the system. Doodle is a solution for some scheduling problems, but it’s not a solution for every scheduling problem.
1. Setting Up Your Doodle
The first thing to note about Doodle is that you don’t need to set it up at all. You don’t need to create an account to use its most basic features.
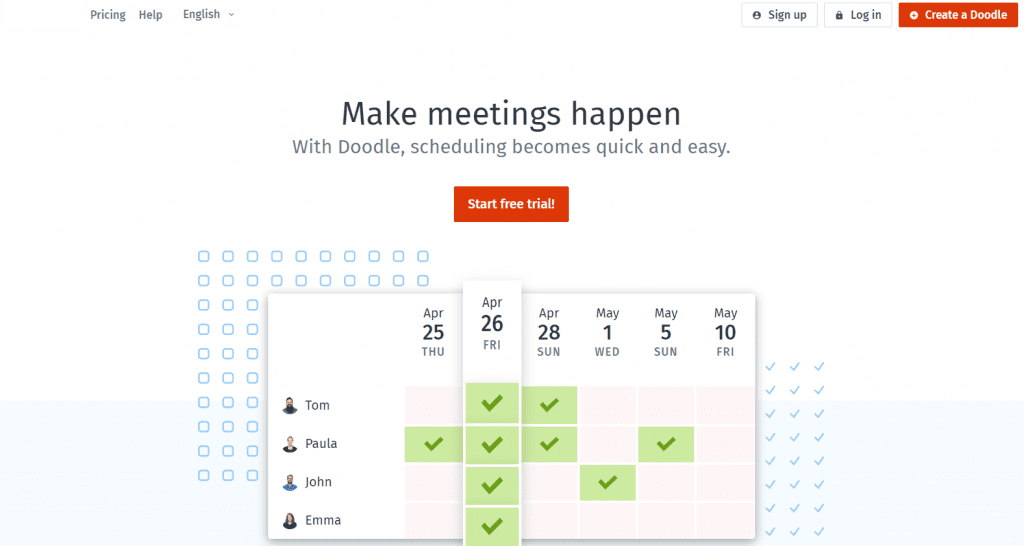
When you reach Doodle for the first time, you’ll see a big, red “Start free trial!” button in the middle of the screen. But you’ll also see in the top right corner, buttons that let you sign up, log in, and even “Create a Doodle.”
Press the last button — the big and inviting red button –, and you’ll be straight into Doodle’s main feature. You can start creating an event, add a location and a note, pick times, and send this information to participants. There will be a few things that you can’t do without creating an account, but it is remarkable that you can already be up and running without even giving Doodle a username and password.
The benefits are both clear and two-sided.
Users get to make use of Doodle without having to register first. They don’t have to give their personal data details to a company or waste time trying to dream up a password that they won’t forget. Doodle gets the viral effects that come when users send emails to their friends. If every user who uses Doodle without registering first invites five friends to an event, the company should grow steadily. The site seems to work. The tool has been around since 2007 and now serves more than 25 million people every month.
But usability doesn’t mean that you shouldn’t create an account with Doodle. You may want to make an account because even the free version of Doodle lets you do even more than the non-registered version.
To start:
Hit the “Start free trial!” button, pick “Sign up for free,” and register your account. You can do that by email, entering your name, email address, and password, or through Microsoft, Google, or Facebook. Once you’ve confirmed your email address, you’ll be straight through to the Doodle dashboard.
Connect Your Address Book
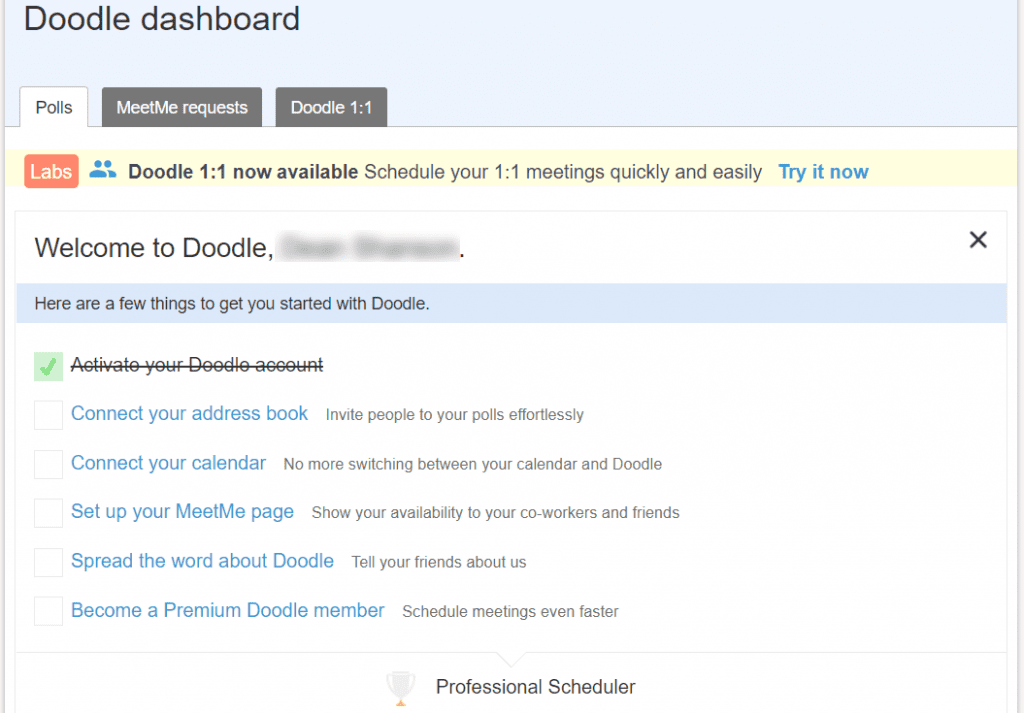
The central part of the Doodle Dashboard is a list of actions that Doodle wants you to take. None of these steps are necessary — and some of them are intended to benefit Doodle more than you. The first request is to activate your Doodle account. If you’ve clicked the link in the confirmation email, that checkbox will already be marked.
The next action is to connect your address book.
You can’t just click the checkbox to complete this task. Doodle will do that for you after you’ve made the connection. But if you select the link next to the check-box, you’re not actually taken to a page that lets you connect whatever address book you might be using. Instead, you’re taken to your Settings page.
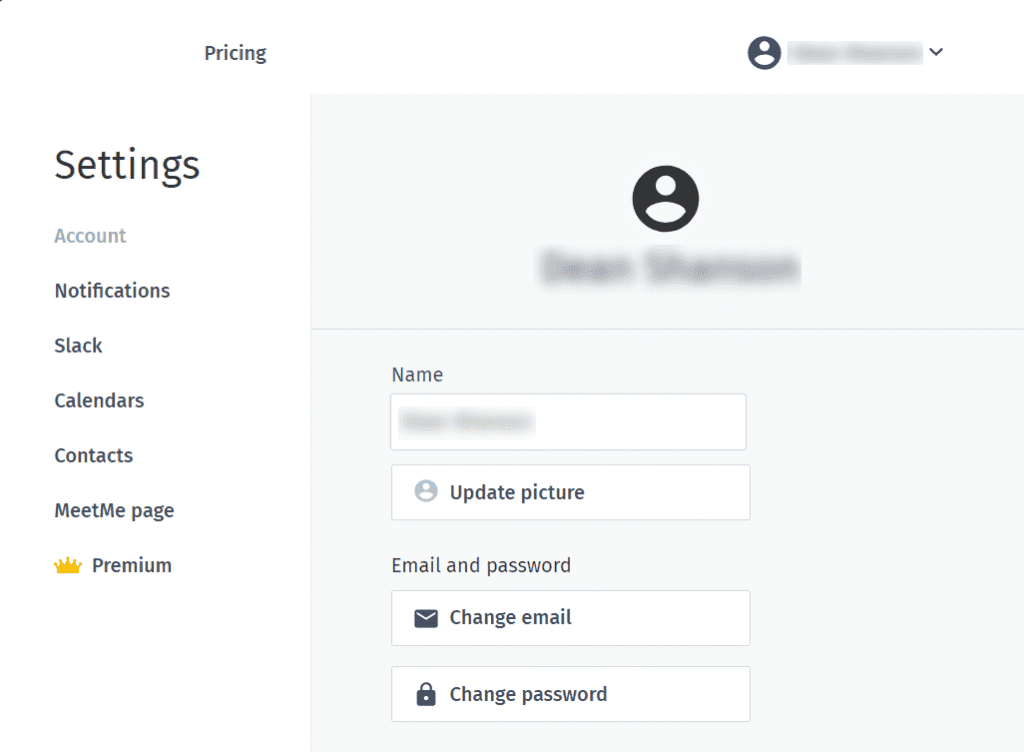
There are all sorts of settings here, but to fill Doodle with the contact details of people you know, you’ll need to select “Contacts” on the left. That brings you to the Contacts page. (Why Doodle doesn’t just send you to that page automatically isn’t clear.)
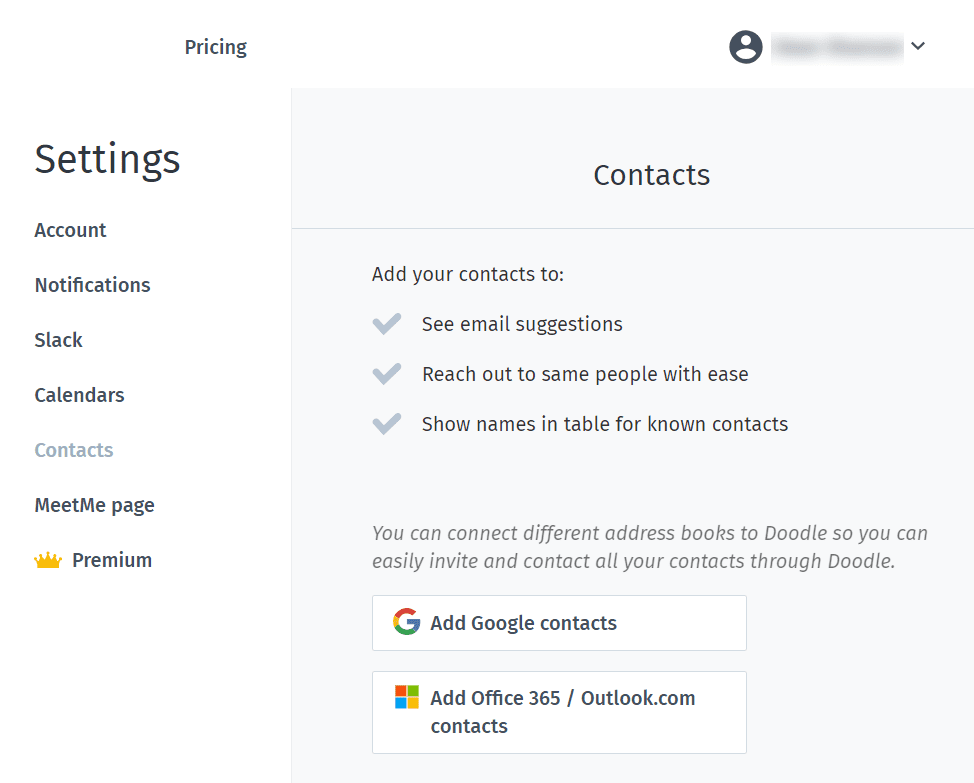
You can now add your contacts from Google or Office or Outlook.com.
The question is whether you should, and the answer isn’t entirely definite. The main benefit that uploading all of your contacts from Google or Office to Doodle is auto-completion when you invite people to your polls.
If you’re going to be inviting lots of people to your meetings, then adding contacts might save you a little time. But if you’re only planning to invite a small number each time or you’re only planning to use Doodle occasionally — then you can probably skip this bit.
There aren’t enough benefits to justify giving Doodle access to all of your friends’ and associates’ contact details.
Connect Your Calendar
More useful is the ability to connect your calendar. Again, clicking the link doesn’t take you to the calendar connection page. Like connecting your contacts, it takes you to your account settings, and from there you’ll need to choose “Calendars” from the menu on the left.
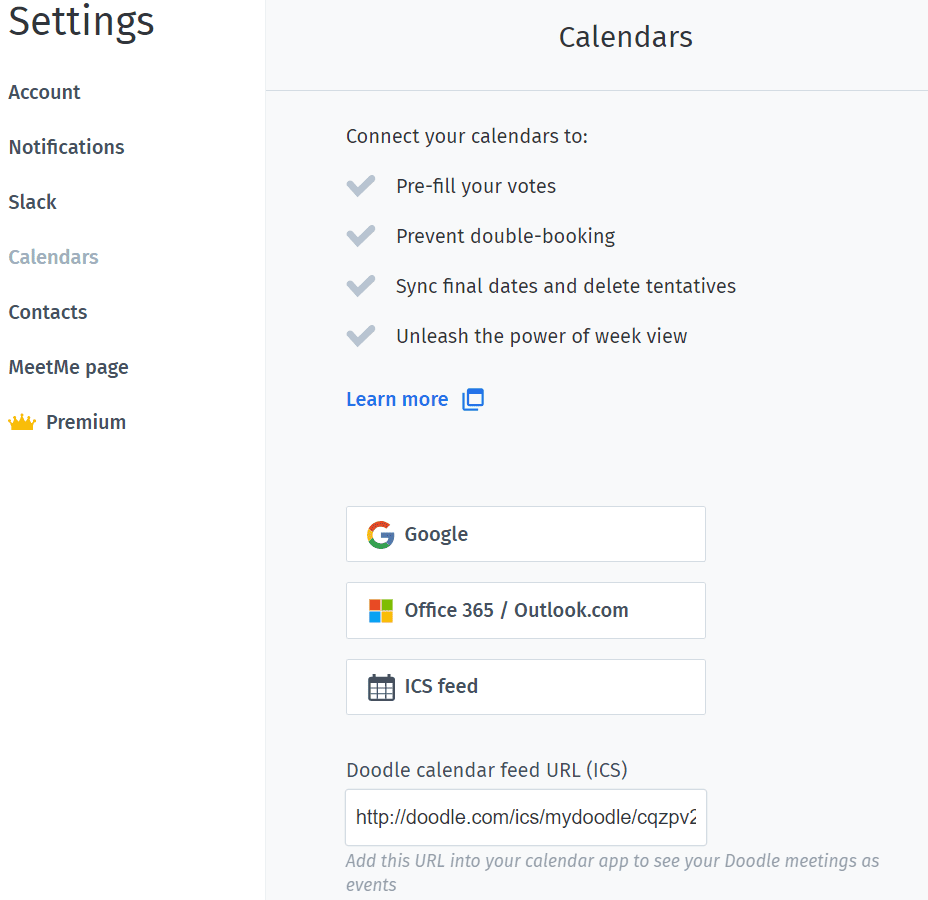
This setting is more useful. The page lists several vital benefits that linking your calendar can bring.
It can “pre-fill your votes,” “prevent double-booking,” “sync final dates and delete tentatives,” and “unleash the power of a week view.” (Don’t worry about clicking the “Learn more” link to learn more about those benefits; the link doesn’t work.)
Linking your calendar lets Doodle check your own schedule before you start setting dates for invitees from which to choose. Instead of having to go back, check your calendar and make sure that each possible time is free for you, the calendar you see on Doodle will already have blocked out those times you’re not available. That will save you time and reduce the chances that you’ll accidentally double-book yourself.
You can connect a Google Calendar or a Microsoft Calendar simply by clicking the appropriate button and signing in. If you use the calendar on an iPhone to manage your schedule, you’ll need to work a little harder.
Connecting Your Apple Calendar to Doodle
Open the calendar in iCloud and click the subscribe icon to the right of the calendar name to share your schedule.
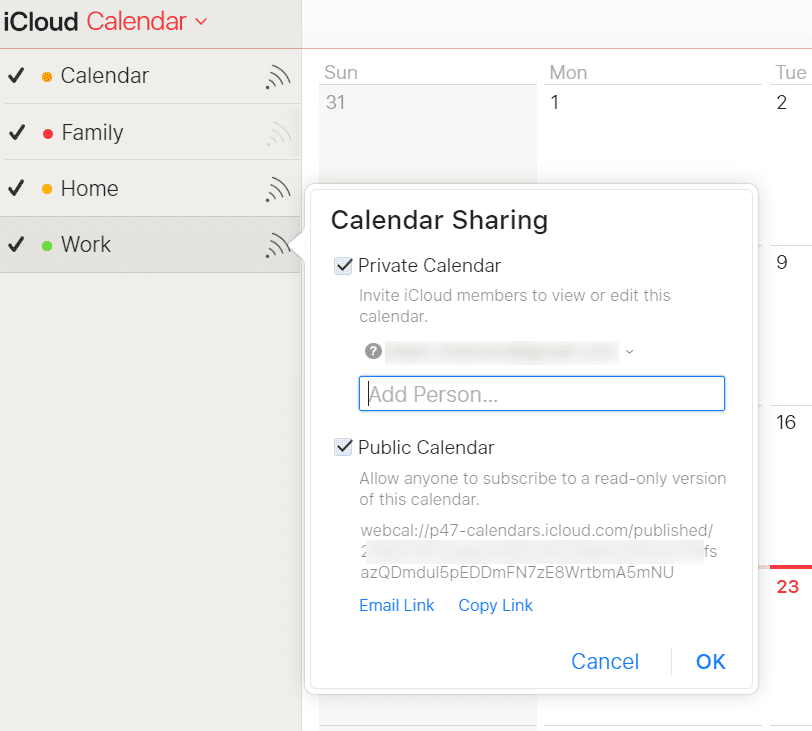
You can share an iCloud calendar in two ways.
One way is to send an invitation by email directly from iCloud to someone else. Only the recipient can see the calendar, and it remains private. That’s not how you’re going to add your Apple calendar to Doodle. Instead, you’ll need to use the link under the public calendar.
This link under the calendar is a long URL you can share with others. Anyone who has this link can see your calendar.
In theory, you should be able to press the “Copy Link” link under that URL, return to Doodle, press the button that says “ICS feed,” and paste in the URL. But that doesn’t work.
Instead, you’ll need to press the “Email Link” link, and send the URL to yourself. You can then copy that link and paste it into Doodle. When you’ve finished copying your link and pasting into Doodle — you’ll be able to see your list of connected calendars at the bottom of the page.
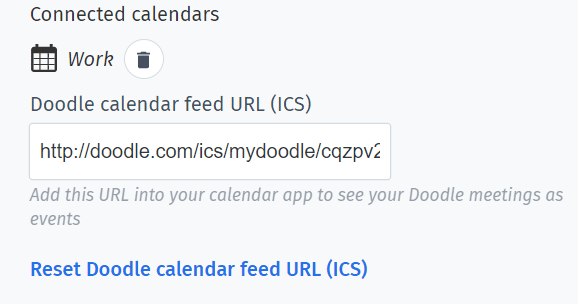
You’ll notice that there’s one more field on this page. Right at the bottom is the “Doodle calendar feed URL (ICS).”
That sounds complicated, but it’s the URL of the calendar you create on Doodle as you close out polls and schedule events. If you take that URL and import it into your own calendar, whether that’s a Google Calendar, Apple Calendar, or any other calendar, those events will automatically be added to your calendar.
Keep in mind: this doesn’t just save you from having to add those dates manually. It also ensures that you don’t forget the date you’ve scheduled (similar to Calendly) — that you don’t book anything else at those times. If you’re sharing your calendar with Doodle — it makes sure that those times are blocked out when you come to create new polls.
Even if you’re not sharing your calendar with Doodle — it’s worth taking that URL and sharing Doodle with your ecalendar. Connecting your address book and your calendar are the two different main settings that you need to pay attention to on your dashboard.
Setting up your MeetMe page is essential and complex so we’ll come back to it. Spreading the word about Doodle is something that benefits Doodle more than it will help you. If you decide that you like Doodle — you can press that link and share information about the platform by email, Facebook or Twitter. But you don’t have to this step, and you may wish to try it out first — then decide before vetting the service.
Becoming a Premium Doodle Member
Doodle has a pretty broad free trial service which is supposed to be for friends and family. But it also has a paid platform with different levels for “casual organizers” and “busy professionals.”
The “Private” service removes ads from the website and mobile apps; lets you send reminders to participants who haven’t responded; request additional information, and send calendar invitations. The “Business” service adds branding; customized invitations; a subdomain on Doodle; and the ability to allow multiple users access to the account. The business service costs about $66 a year — about $18 more than the Private service.
In general, if you’re only going to use Doodle to arrange the odd social event, then the free service will be sufficient. If you’re going to use Doodle professionally, and especially if you’re going to use it to interact with customers — then you should be thinking of using the business service and branding your invitations.
2. Creating a Doodle Poll
The core of Doodle is the ability to create a list of dates, send them to potential participants, and lets them vote for the times that suit them best. You then get to pick the date on which the most significant number agree. The process of creating those polls is remarkably straightforward.
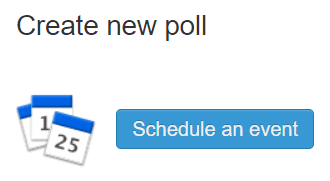
Start by pressing either the “Schedule an event” link on the dashboard or the big, red “Create a Doodle” button at the top right of the page.
You’ll be taken to the first of four steps.
What’s the Occasion?
This step asks for three pieces of information. Only the first is obligatory.
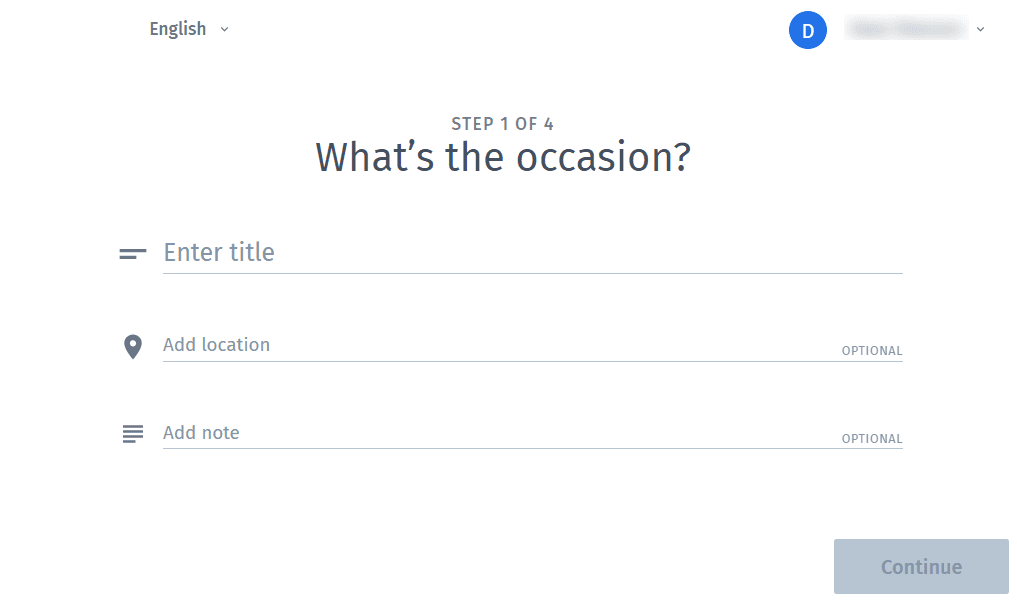
The title of the event (or the “occasion” as Doodle puts it here) is more important than it looks.
You have to assume that anyone receiving the invitation won’t look much beyond the title. Even if the invitee does look beyond the title — that first line will be what determines how they feel about the occasion. Make sure that you write a title here that people will recognize and understand.
“Planning Meeting for Summer Activities” is better than just “Planning Meeting,” let alone, “Meeting.” If you really want to up attendance and participation choose, “Planning for Sizzling Summer Activities.”
Although the location is optional, you should treat it as mandatory, even if you don’t know where the event will be held. Start typing, and Doodle will offer some suggestions, including a conference call, Skype, WebEx, and Zoom.
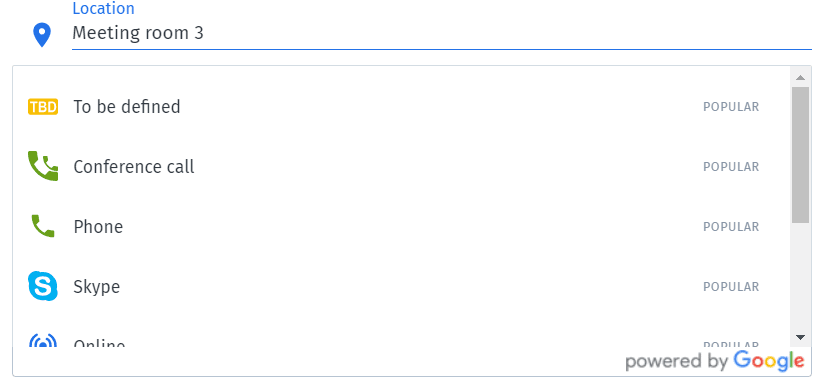
Your recipients will want to know where the meeting will be located.
The location might even affect if they can make it. An online meeting may well give participants more options than a meeting that forces someone to drive somewhere. Even if you don’t know exactly where the event will be held — make an effort to complete this field so that participants have an idea of what the event will involve.
The third field is the ability to add a note. Adding a note is the most demanding field, and you’ll be most tempted to skip.
You can skip it but bear in mind that the more information you supply here, the more you’ll get out of the event itself. Participants will have a chance to prepare themselves. They’ll know what questions to bring, and which solutions. You can supply this information later, though, so if you want to leave the note field blank, feel free, and press “Continue.”
What are the Options?
The second step is where things start to get a little more interesting — and more complex. Doodle will present you with a calendar. The default view shows a week with each day beginning at 8 am and ending at 6 pm.
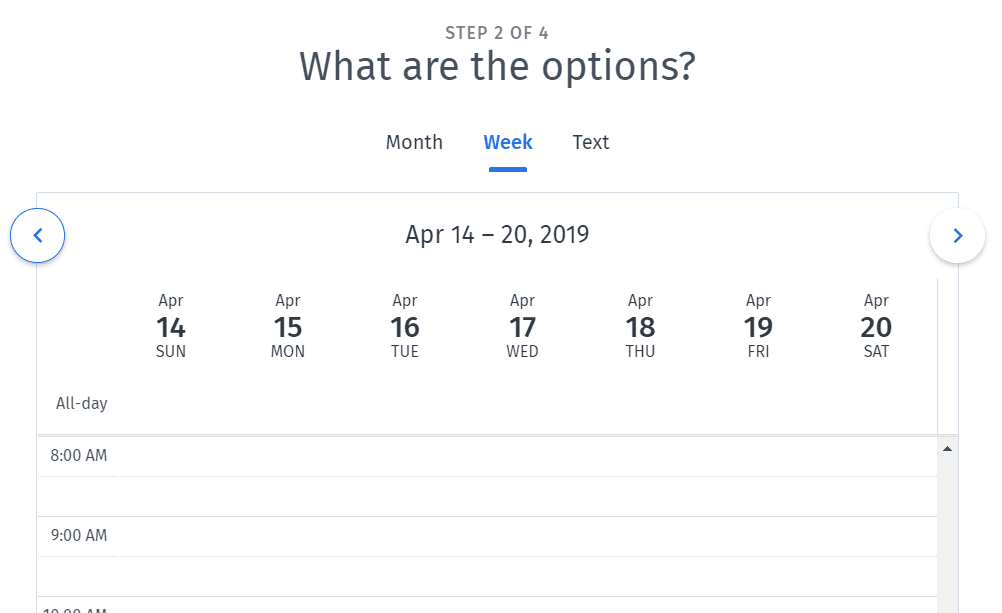
To enter possible times for the event you’re planning, all you have to do is click on a specific time and drag it down. As you move down the day, the time increases in fifteen-minute increments. You can move from day to day and from hour to hour, adding selections.
To move back and forward through the weeks, click the arrows at the top of the window. If you want to hold meetings before 8 am or after 6 pm, you can scroll the window up and down.
If you prefer, you can switch to the monthly view and enter the times manually.
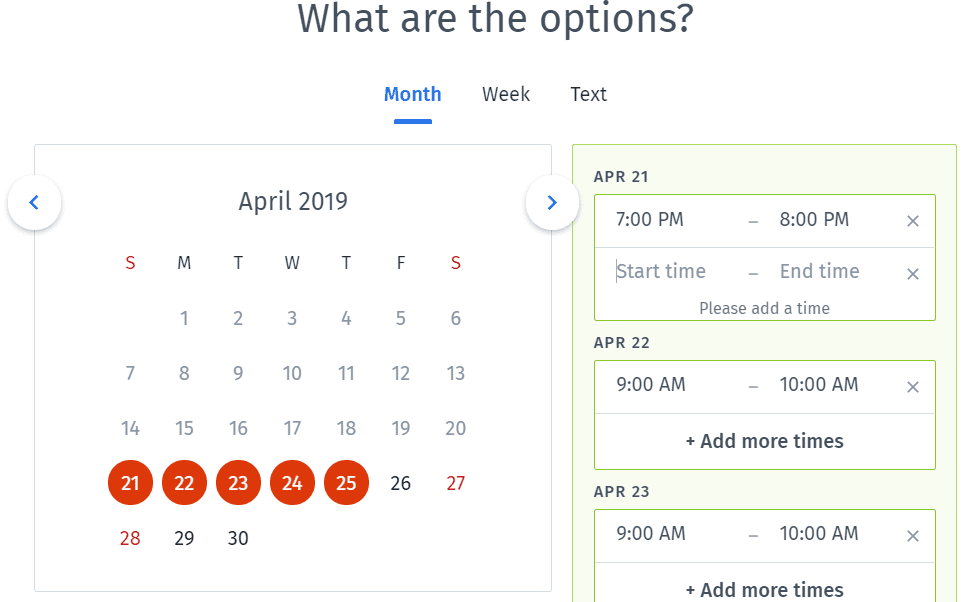
Any days on which you’ve already created events will appear as red circles.
You can add extra times to those days, and you can click a day to create some new times. If you don’t have a mouse handy or don’t want to fiddle around with graphic interfaces, the month view is a pretty good solution.
The third way to create a poll is even more comfortable for invitees. Click the “Text” option, and you’ll be shown a pair of text fields. You can use those fields to give your recipients a choice. As soon as you start typing, Doodle adds another field so that it’s always ready to accept another option.

Whichever method you choose, it’s all straightforward — and that’s a problem.
When adding an additional date or time is so simple, you might be tempted to keep giving your participants choices. You want to do the opposite. Professionally — and psychologically — you’ll want them to be able to choose between as few options as possible. The more options you give them, the greater the odds that you’ll end up with everyone wanting a different date. If they can only choose between two times, it should be easy enough to pick the winner.
There are a couple more things that you need to look out for in this step, and they’re both at the bottom of the window.
The first option to watch out for is the time zone.
Doodle automatically uses the time zone based on your IP address. Usually, that’s fine, but if you’re using a VPN or an assigned IP address, Doodle might not be able to figure out where you are. The location settings you chose in your profile will override those IP settings. This explanation makes it a good reason to make sure that you’ve created an account, entered your location, and that you are logged in when creating your event.
But you can override that setting too by clicking the link that says “Use time zone for this poll.” You’ll then be able to choose your time zone.
All of that is important, but it’s not as crucial as your participants making sure that they’re looking at the right time zone. If you’re sending the invitation to people who aren’t in your time zone, add a note telling them to check the time zone of the calendar. It will be at the bottom of the page.
The other feature you should notice — only appears in the weekly view. It’s the Calendars pulldown menu. It’s also easy to miss this feature — because down there at the below the calendar but if you press it, you’ll see a list of the calendars that you’ve connected to your Doodle account.

Click that calendar, and you’ll bring in the events on your other calendar. That will help to ensure that you don’t double-book your time, or give your participants choices that you can’t make.
Doodle Poll Settings
The third step defines what the participants can do. Doodle provides four options here, and they’re all interesting.
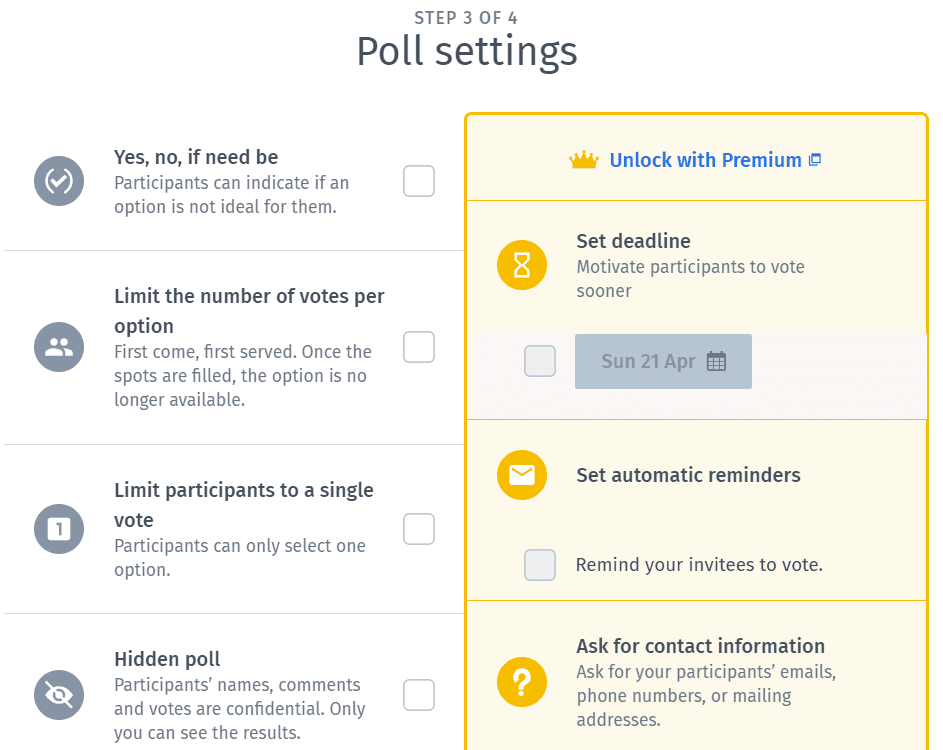
The first option, “Yes, no, if need be,” adds a useful third option to a vote. It’s usually worth clicking so that you’ll have more flexibility when you come to make your choice. It’s particularly useful if you’ll be inviting a lot of people.
Limiting the number of votes per option.
Limiting the number of votes a person can choose is something you might not be doing too often. Click the box, and you’ll be asked how many votes each option can receive. It’s a good option and indication if you’re not trying to choose a date, but are working to fill places at certain times. If you were running a workshop with only ten spots, for example, you could limit each time slot to ten votes. Once a slot has received ten votes, it disappears as an option. It’s something you’ll probably want to combine with the next feature.
Limiting participants to a single option.
If you want, you can limit each participant to a single option — ensuring that each participant can’t vote twice. If you were running a workshop, you wouldn’t want people to be able to keep their options open by choosing every time slot available. They’d attend one event, and you’d have plenty of empty seats. But this option is also useful if you’re trying to set up a number of one-to-one meetings.
A teacher trying to book meetings with five sets of parents, for example, could send out five time-slots and allow each set of parents only to select one time each. The last parents to act will have the fewest options, but everyone will get a time. Using these two features together lets participants choose from a range of time slots instead of you selecting a one-time slot for everyone.
The hidden poll.
The hidden poll hides the names, comments, and votes of other participants. It’s something you’ll want to choose if you’re sending a poll to the public. And it’s something you’ll probably want to leave unchecked if you’re sending a poll to friends or work colleagues.
You’ll notice here that Doodle also offers a bunch of other useful features but only if you’re willing to pay. You don’t have to dip into your pocket if you don’t want to, but many of those features are useful. The ability to set a deadline for your polls increases the chance that everyone will participate, as does setting automatic reminders. You could add these features yourself just by adding in a deadline in the note and emailing people a few days before they need to have answered but paying the 43 Euros a year subscription fee will let you do it all automatically.
Paying that fee will also let you ask for your participants’ contact information.
The participant’s data is likely something you have already, and maybe you don’t want Doodle to have all of your contacts. Take a moment and remove advertising from your Doodle polls — making your invites and meetings look more professional.
The most useful feature is the last one — the ability to see “every invitee’s move.”
Being able to see every invitee’s moves lets you keep track of who received and opened the invitations. If you’re sending the poll to lots of people and you need everyone to respond and are you’re concerned that not everyone will respond, you may want this option. If you want to see the above information and which members of your contact list are least likely to respond — that data is worth buying.
Finally, when you’re satisfied, press “Continue.”
The last step is to tell your participants who you are.
Tell Your Participants Who You Are
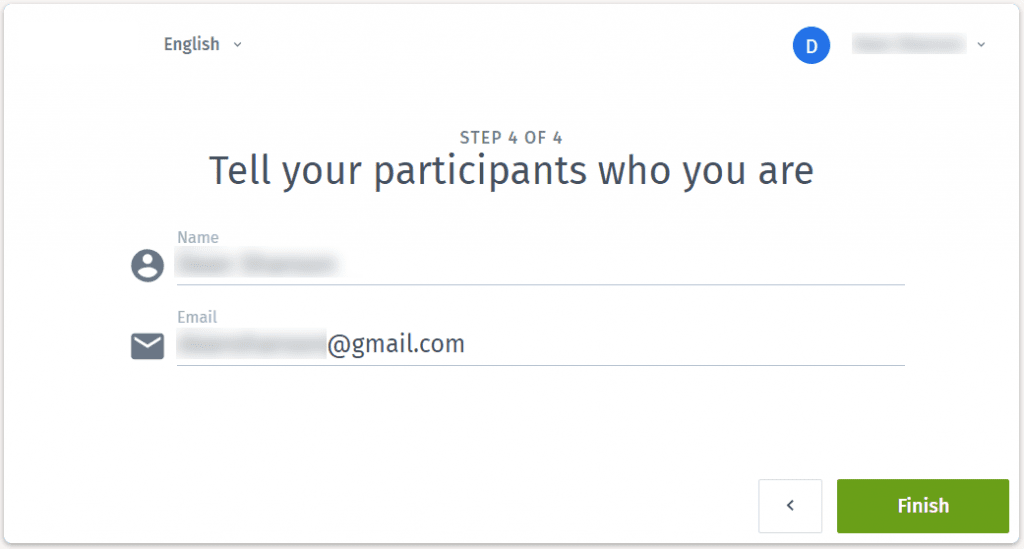
This last step is straightforward enough. All you have to do is enter your name and your email address.
This step lets you enter a different address from the one you used to create your account. So you could create a Doodle account using your personal address — then use a different account it to send out polls to events at work. Both those fields will already be auto-filled, so you’ll just have to hit “Finish.”
Once you’ve done that, you aren’t finished — so keep going.
You’ve still got a quite a bit of work to do — now have to invite participants.
Invite Participants
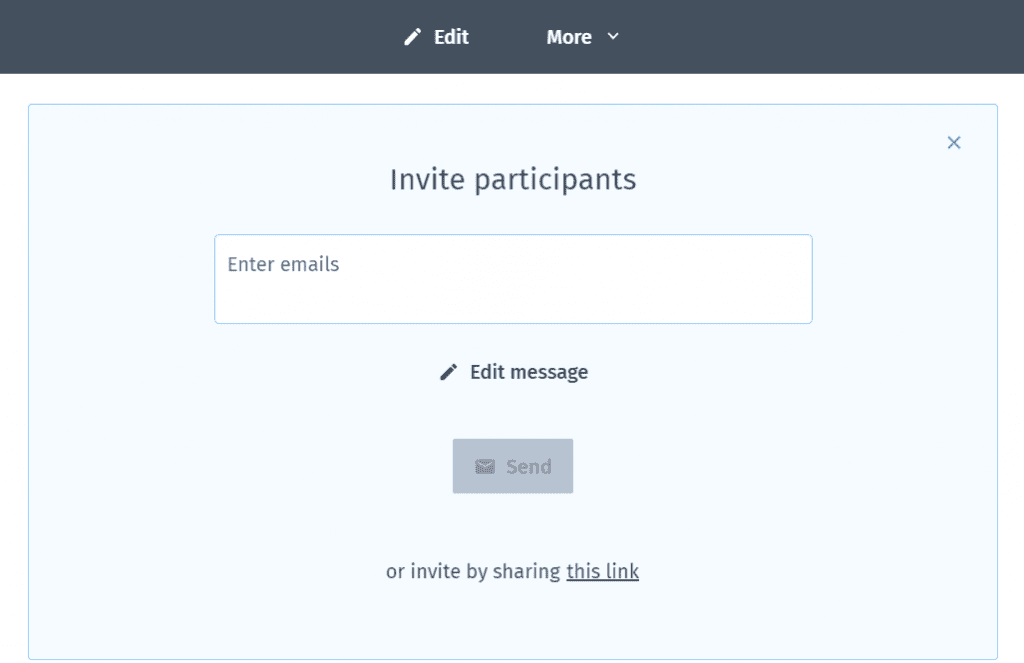
As you start to type, Doodle will ask if you want to receive suggestions from a contact list on Google, Outlook or Office 365.
If you’re going to be inviting lots of people, then clearly you’ll want to make your life easier by being able to click suggestions. But you do have an alternative. Press the “this link” link under the email field, and you’ll get a URL that you can send to people directly.
The link looks like this:
https://doodle.com/poll/4x4sxxx5xxxxkvnug
Alternatively, you can add the emails of the recipients, then click “Edit message” to personalize the message that the participants would receive.
When you press send, recipients will receive an email that looks like this:
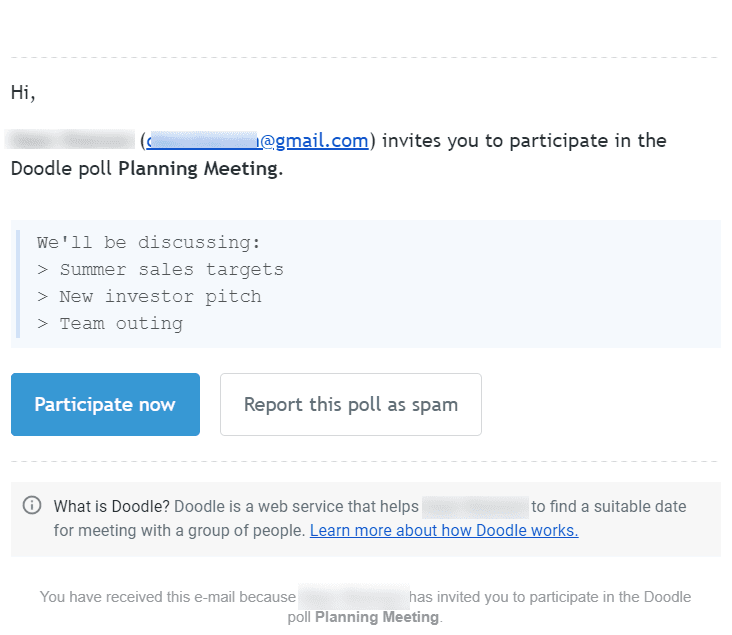
When the participant clicks “Participate now” or follows the Doodle link, they’ll be taken to a page showing the possible event times, with checkboxes that they can mark.
That’s all you have to do to create your poll — and it’s straightforward. For the main feature of a platform, it’s remarkably straightforward. But you’re not entirely done yet.
3. Choosing Your Date
Once you’ve created a poll and invited your participants, that poll will be added to your dashboard. You’ll be able to see how many people you’ve invited, and when someone last interacted with the invite (poll). If you created a free poll, you’ll also see some encouragement to pay for a Premium plan, which is understandable.
You’ll also be able to see the polls you initiated yourself and the polls to which you were invited or in which you have participated.
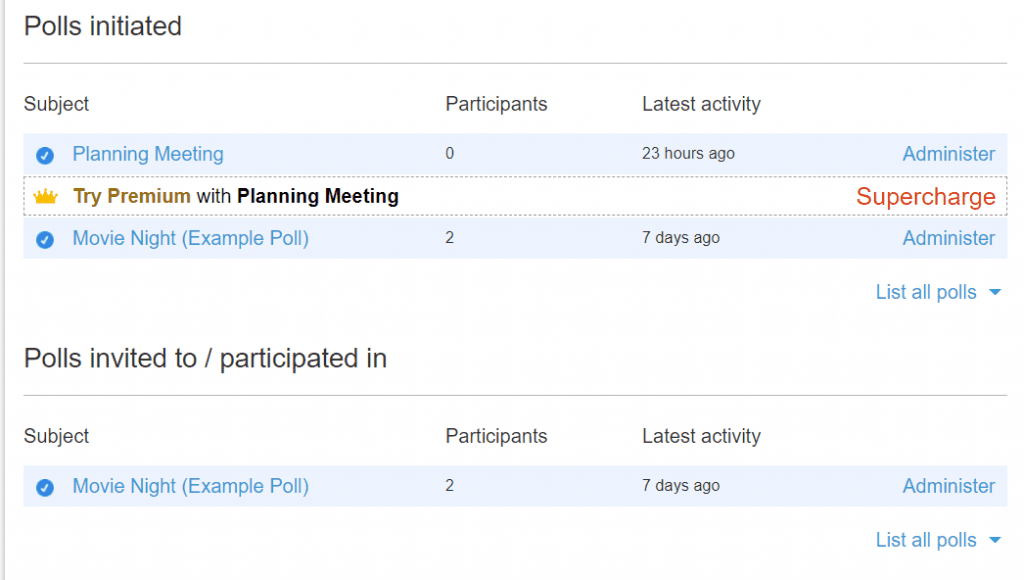
Click the poll, and you’ll be taken to its page. Initially, you’ll be able to see the options laid out in a table. You’ll be able to see how each participant has voted for each of the options.
You can also click the “Calendar” link above the table to see which dates and times on the calendar have been selected. The table view is usually more natural.
At the top of the page is a big red button that says, “Choose the final option.”

Now you’ve got a decision to make. Doodle tries to make it easier for you by pointing out the best time. At the top of the page will be a recommendation that looks a bit like this:
Choose final option
The most voted option so far is Sunday, May 5, 2019, 10:00:00 am – Sunday, May 5, 2019, 12:00:00 pm but you can choose any others below. At this point, it closes the voting and lets you book the appointment in your calendar.
Make your choice, then press “Done,” and you’ll close the poll.
Doodle doesn’t automatically tell everyone who participated in which date you have chosen. You’ll now send that out manually. Doodle provides you with a form to enter the email addresses, and also some pre-written text.
That’s a bit of a pain—and another reason to share your contact list with Doodle.
Re-Opening the Poll with Doodle
In theory, you should be done now. You’ll have selected some possible dates. Your participants will have cast their votes. You’ll have made your selection, and told them when you expect to see the results.
But things happen. You may need to change the date. The participant list may grow and have additions. You could find that you need to re-open the poll.
If you need to re-open the poll: Click the “More” link at the top of the page, and you’ll open a drop-down menu.
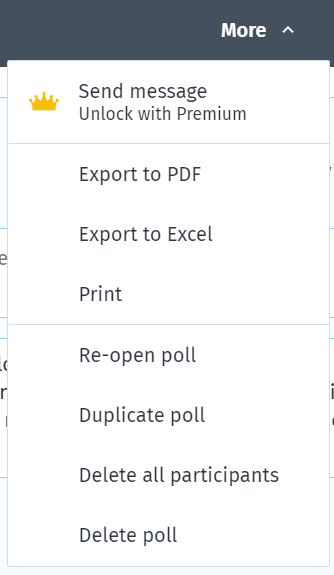
Click the “Re-open poll” option, and the poll will be open again. You’ll be able to select a different date or press the “Invite” option at the top of the page to invite more participants to take part in the poll.
4. MeetMe Requests
Look at your Doodle dashboard, and Polls will be the first tab at the top of the page. Next to that tab is another tab called, “MeetMe requests.”
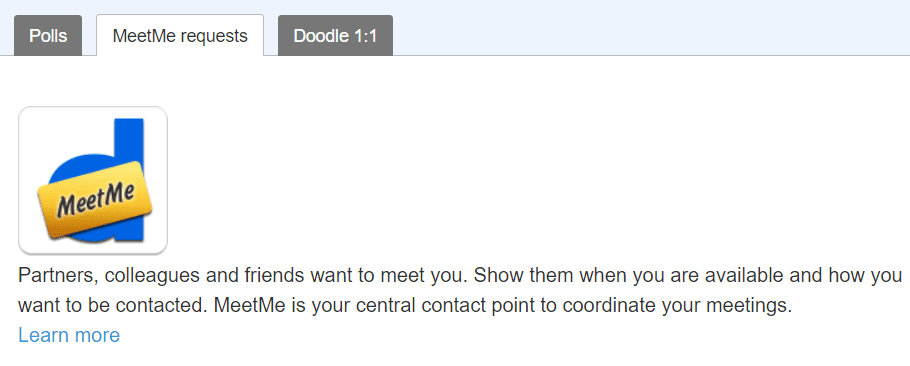
This tab is where things get a little more interesting. Polls let you give participants a list of possible dates and times to meet. MeetMe requests let you share your calendar and allow others to book your times.
The MeetMe requests change the way you use Doodle significantly.
Now you’re no longer working through email and calendar schedules. You’re presenting the public with a page that represents you and your business. That page needs to look professional, and it needs to be inviting. It’s the reception desk where the public meets your business.
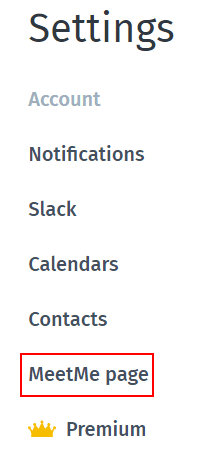
You can’t create MeetMe requests from the “MeetMe requests” tab. You’ll need to choose “Polls” then select the “Set up your MeetMe page” link.
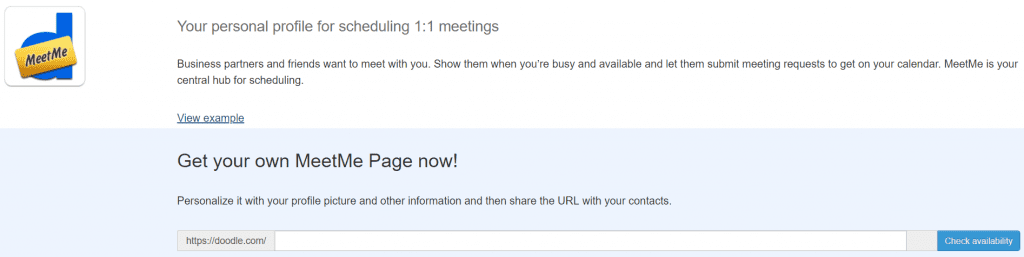
The MeetMe Page will have its own URL. That URL will start with Doodle.com, but you’ll be able to choose the suffix and check that it’s available.
This stage is a bit like selecting a domain name. It should be easy to remember and represent your business. Choose carefully, select “Check availability,” and when you’re asked to confirm your choice, press “Yes.”
Once again, Doodle’s usability goes a little wonky here. Instead of sending you straight to the MeetMe page so that you can start designing and personalizing, it sends you to your account settings. It’s another click on the menu on the left to reach the MeetMe page. It’s not a big deal, but it is an unfortunate bit of design.
Building Your MeetMe Page
Doodle doesn’t give you a vast amount of options when you’re preparing your MeetMe page. You’ll have just four fields to complete.
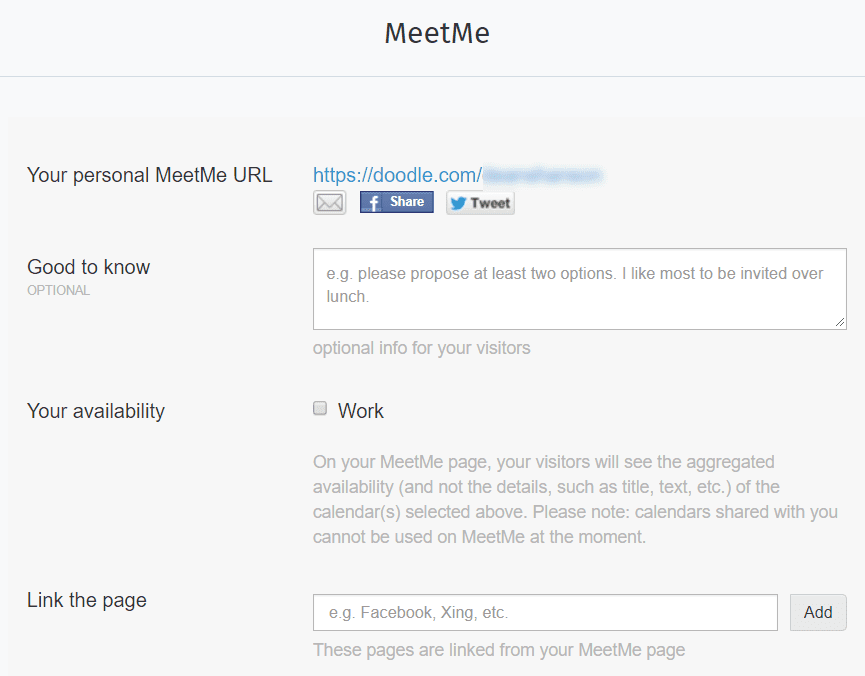
The first is the URL, which you’ll have already completed and won’t be able to change. What you will be able to do here is email it, or share it on Facebook or Twitter. Click those Share buttons, and Doodle will connect you with your Facebook or Twitter account, and use some prepared text to invite people to make a booking.
Beneath the URL, is an optional field called “Good to know.” This option is the only place that lets you add text to your MeetMe page. Doodle makes it optional, but it’s not something that you’ll want to skip. The prepared version that Doodle offers is:
e.g., please propose at least two options. I like most to be invited over lunch.
You can probably do better than that. You can also use that field to pitch your services. Explain why people should book with you. Also, thank them for booking with you, and give them the advice they need to ensure that they get the most out of the meeting.
The third field is a checkbox. Called “Your availability,” it offers a list of the calendars that you’ve shared with Doodle. Users won’t be able to see the events that you’ve marked on that calendar. They will only be able to see whether or not a time in a calendar is available.
The problem here is that you can only check or uncheck a box next to a calendar. You can’t add more calendars to share here. If you haven’t shared with Doodle all of the calendars on which you make bookings, you’ll need to go back to Settings and add those calendars in there first. Otherwise, the calendar won’t be accurate, and people will be able to book times that have already been taken by another calendar.
Alternatively, you can hit “Save” for now, then go back later and add any calendars you haven’t yet included.
The last field lets you add links to the page. Doodle suggests Facebook and Xing, but you can add any URL you want. Press “Save” and… nothing happens. The page is actually saved, but you won’t be taken directly to your MeetMe page. To see what you’ve made, you’ll need to press the link to your URL at the top of the page.
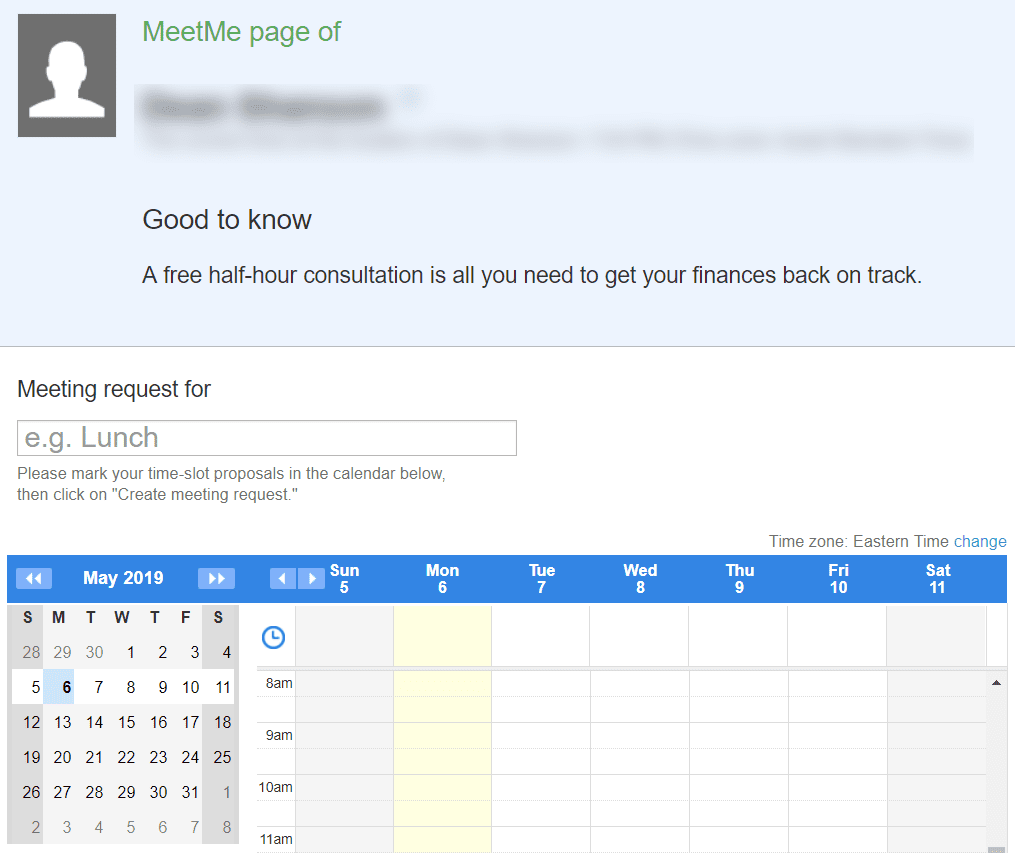
This free version looks reasonably basic. The avatar that you’ll have uploaded won’t appear on the page.
Your name will be there and the current time in your time zone. Any URL that you’ve included will appear as a small globe next to your name, and that hard-hitting sales pitch that you wrote when you were creating the page will still seem under a poorly capitalized “Good to know.” You won’t be able to change that heading — so use careful consideration before entering something in this area.
Beneath that bit of text will be a field for users. Again, the copy that Doodle provides here is less than inviting. Users are asked to make a “meeting request for” lunch, for example, and can make their “time-slot proposals in the calendar below.”
It’s not the most exciting call to action you’ll ever read, and the example of lunch is more likely to put potential clients off booking a meeting than scheduling one. If you’ve included all your calendars, at least in the schedule below that field, everything should be accurate. Users should be able to see precisely when you’re available.
But again, there are limitations here. The calendar will only show the hours that have been booked on other calendars. You might not want to accept bookings at any available hour. You might only want to accept Doodle bookings on weekends or in the afternoon.
Doodle doesn’t provide a way to block out groups of hours, but there is a hack that you can use.
Helpful hack: Create a separate calendar on your iPhone or Google specifically for Doodle. Block out all of those times on which you don’t want to accept bookings — all of the morning hours, for example. Finally, in your Doodle account, add your new calendar.
Users will be able to select hours that they want to book and send them to you make a choice.
Branding Your MeetMe Page
The MeetMe page options available in a free account are reasonably limited. You can create the page, and you can show your calendar. You can add a little bit of marketing copy — and that’s about it. Even your profile avatar doesn’t appear on the page. You get a very simple — and not very inviting — silhouette.
The decision of silhouette and avatar is because Doodle really wants you to buy a premium business subscription, which includes Advanced Branding. Using the words, “Advanced Branding” is a bit of an overstatement. Even the premium business subscription only lets you upload a logo, create a new background, and set the background color. It’s more basic than “advanced.”
Whatever branding you choose here will also apply to your polls. You can’t create one brand image for your polls and a second brand image for your MeetMe page. Just because you can’t do more than one branding image doesn’t mean it’s not worth doing. The free MeetMe page looks so unprofessional that it’s still worth paying for the additional customization if you’re using Doodle to accept professional bookings. But it could be a lot better.
5. Using Doodle 1:1
Doodle is intended to be used by groups of people. The standard use is for one person to send a group of people a set of dates — for those people to vote on the dates — and for the sender to make a selection. Doodle 1:1 is a premium feature that allows just two people to arrange their schedule. Instead of sending a number of dates to multiple people, you can send those dates to only one person. They can make their choice, and the selected date is added to both people’s calendars.
Doodle 1:1 is the third tab that appears on your dashboard, after “Polls” and “MeetMe requests.” Click that tab, and you’ll be taken to a page that lists your Doodle 1:1 meeting — and if you don’t have any meetings, it explains the three steps needed to create a Doodle 1:1 meeting.
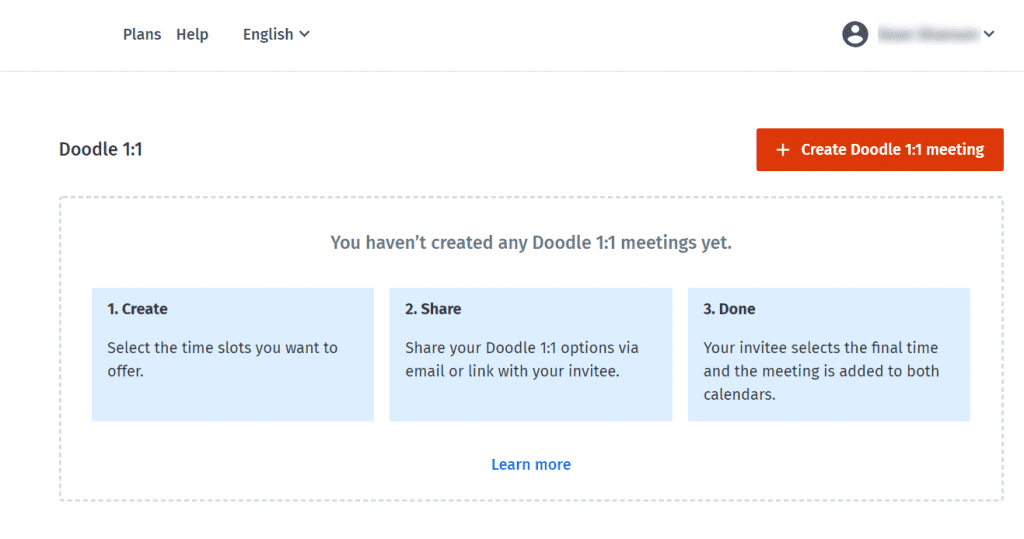
How to Create a Doodle 1:1 Meeting
This process is accomplished in the same way a poll process is done. Creating a Doodle 1:1 meeting is very straightforward. Click the big red “Create Doodle 1:1 meeting” at the top right of the page and you’ll be taken to a page that’s very similar to the page used to create polls.
The first step will be to add a meeting title.
Again, it is essential to make sure that the meeting title you use here is clear and accurate. Even if you’re trying to arrange a social meeting with a friend, remember that the title that you use will appear in their calendar. That calendar might also be shared with other people. Respect that space and don’t use shorthand or abbreviations. Make sure that the title is clear and that when your contact sees it, they’ll know exactly what the meeting is about, and who they’re meeting.
The next piece of information is a meeting description.
You don’t need a call to action here, but you should explain what the meeting will be about so that your contact will be more likely to respond. It’s difficult enough to have to pursue one of a group of people when they haven’t cast their vote in a poll, but if someone doesn’t reply — you can still go ahead, pick a date, and hope that they can make it.
When you’re trying to arrange a meeting with just one person — it is much harder to pick a date and hope they’ll come at your bidding. Use this space to explain what you’ll be doing at the meeting, and give your contact a deadline of when you’ll need to have an answer. You don’t have to be harsh, but you should do your best to encourage people to cast their votes.
One option is to tell them which date you’ll be choosing unless you hear otherwise. If the invitee can’t make that date, they’ll have an incentive to vote for something else. In this step, you’ll have to add a location.
Again, even if you don’t know where the meeting will be taking place, and also if it will be taking place online, you should tell your contact what you know about the location. The location may affect their availability.
The next step will be familiar; you have done this process before. You’ll be selecting times on your calendar. You can choose your starting hours, then choose the duration of the meeting from a dropdown menu. Or you can drag your cursor down the calendar.
When you create a poll, you’ll want to limit the choices of hours as much as possible to increase the chances that you’ll have a clear winner. When you’re trying to arrange a meeting with just one other person, you can offer a broad range of options. You’ll want to increase the chances so that the person you’re meeting with will be able to find at least one suitable hour.
Finally, you add the email address of the person you want to invite or paste the link into your own email and wait for the recipient to take their pick.
Do You Need a 1:1 Meeting?
You’ve probably noticed that a 1:1 meeting is pretty similar to polls. Both involve creating titles, setting locations, picking times, and sending invitations. Doodle 1:1 even lets you send invitations to more than one person at a time. Each hour will be selected on a first come, first served basis.
You can do almost the same thing with a poll — the process is the same. You’ll still be playing with your calendar, and looking for available hours. If you choose to invite just one person, you’ll have created a 1:1 poll. You could even invite lots of people, allow only one vote for each time slot, and see who picks which times. Both those strategies would work, and they’d save you money, but they’d also force you to make a bit of effort.
Doodle 1:1 avoids the need to pick winners. If you’re using a poll to organize a meeting with one other person, once they’ve voted, you’ll still need to close the poll to confirm the meeting. A Doodle 1:1 meeting closes the poll as soon as the recipient picks a date.
If you’re trying to create meetings with lots of different individuals, you’ll have to review each vote that you receive and notify them all manually. A Doodle 1:1 meeting would just put each meeting into your calendar as soon as the participant casts their vote.
Whether that extra convenience is worth paying Doodle’s premium rates is up to you.
6. Doodle Integrations
Doodle is a pretty simple platform, but its functions can be expanded through integrations. We’ve already seen how integrating calendars and contact lists can make arranging schedules a little easier. Doodle also offers a couple more options.
Integrating Doodle with Zapier
Zapier lets users create scripts that automate processes. The main idea is based on the principle that says when one action takes place — another action is triggered — on another application integrated with Zapier. Altogether Zapier has about 1,500 applications that you can connect to Doodle.
Doodle’s integration allows you to trigger an action when you create a new poll; when a recipient completes a poll; and when you close a poll. Instead of telling each of your participants about an upcoming meeting — you could use Zapier to add a Trello card to a board whenever someone participates. Everyone would be able to see everyone else’s votes on a schedule.
You could link Doodle with Zoom to create video conferences as soon as you close a poll. You could collect all of your responses in an Excel spreadsheet, add them to Microsoft Tasks or even send the date and time of a closed poll by SMS to participants.
Zapier won’t host the meetings for you or take the notes, but you can automate some of the organization surrounding the meeting planning. To integrate Doodle with Zapier, open Zapier at the Doodle page, and press the big blue button marked “Connect Doodle to 1,500 Apps.”
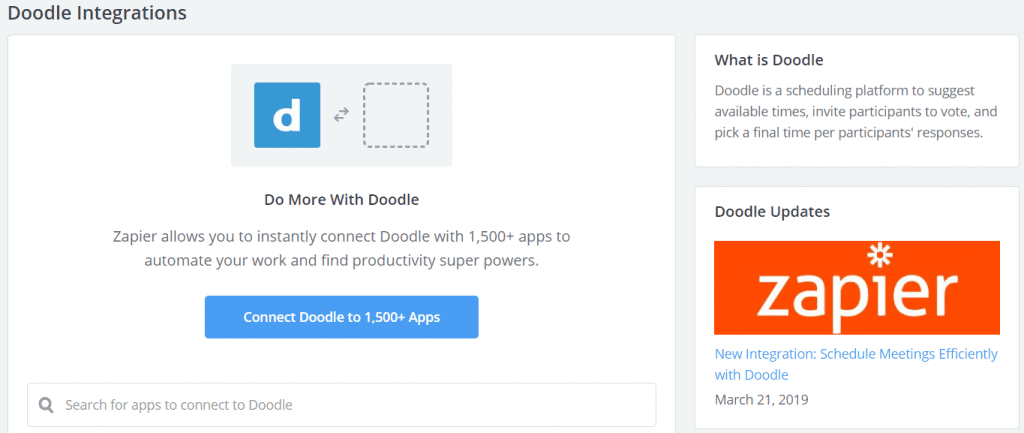
You’ll be able to sign up to Zapier, add your Doodle account, and start creating the connection. There’s no coding required and the core features, including up to three steps in an automated process, are free.
Integrating Doodle with Slack
One of the applications to which you can connect your Doodle account in Zapier is Slack. But Doodle comes with its own integration in Slack. Open your account settings in Doodle, and you’ll find Slack in the menu on the left. It’s the only integration that appears in the settings.
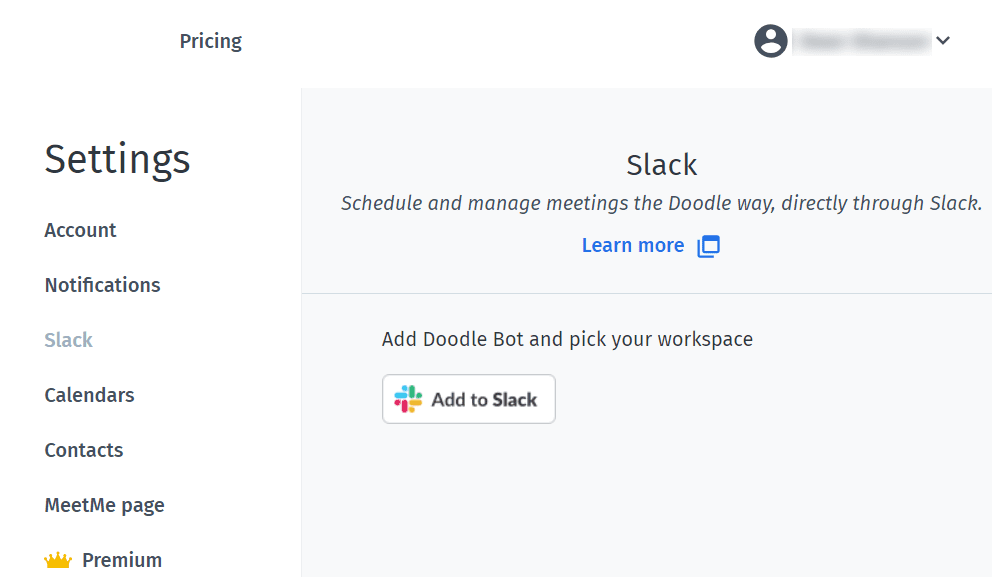
If you have a Slack account, you’ll be able to press the big “Add to Slack” button and connect your Doodle account to Slack.
Now you’ll be able to use Slack’s commands to connect with your Doodle activities while you’re using Slack. If you write “doodle list” into Slack’s message box, for example, you’ll be able to see a list of your Doodle polls. These polls include both those that you’ve created and those that you’ve been invited to join. You can even edit the poll’s details, such as the suggested times.
You can also write “doodle help” into Slack’s message box to see some quick tips and a short walk-through of Doodle. Write “doodle signup,” and you’ll get a registration link that you can use to sign up on Doodle or add more workspaces to your Doodle account. You’ll also be able to choose how you receive your notifications.
If you don’t have a Doodle account — using that link to sign-up will automatically connect your Doodle and Slack accounts.
Pros and Cons of Doodle
Pros
There are a ton of great things about Doodle. The primary perk is that you’re able to design something every easily and you can see when others are available. You can simply send out a link and get a group of people scheduled or all on the same page. It’s Doodle’s simplicity that makes it so powerful and easy to use.
Cons
The only cons when it comes to Doodle is that there will be occasional bugs. Sometimes it’ll miss events on people’s calendars or block polls.
Conclusion
Scheduling programs can be difficult. They can give users all sorts of ways to share calendars, find times, and allocate meetings. Scheduling programs can be used by friends to arrange times to meet for dinner and for companies to help the public book appointments with consultants.
Doodle is among the most straightforward of scheduling applications.
The Doodle application is better used for small businesses — rather than for large firms with big teams. Doodle branding provides for very few options. Integrating a public-facing booking page into a website, for example, is difficult — and there’s little flexibility in how appointments might be given, or handed out, to different team members.
Even the integrations add little to Doodle’s functionality. The application offers so few functions that Zapier’s extra apps and Slack’s commands have little to work with the actual process of Doodle. Keep in mind that the limitations of Doodle, keep it simple, and there’s plenty of demand from small groups to arrange meetings and appointments quickly.
As long as you don’t expect too much from Doodle — and your scheduling needs are relatively basic — Doodle should accomplish much of you what you need to do quickly and simply in 2023 and beyond.
Updated February 3, 2023
John Rampton
John’s goal in life is to make people’s lives much more productive. Upping productivity allows us to spend more time doing the things we enjoy most. John was recently recognized by Entrepreneur Magazine as being one of the top marketers in the World. John is co-founder of Calendar.