Digital calendars have two kinds of markets. On the one hand, every individual needs a way to keep track of their events and their schedules. A person wants reminders of upcoming birthdays, and they have to remember when they’re taking vacations. An individual also needs to make sure that they don’t schedule two meetings at the same time. A person might want different calendars, or schedules, for various activities: one for their work or team, another for their family, a third for their sports team, and so on.
Each person also needs to share at least some of their calendars with other people to make sure that a spouse or a colleague knows when they’re available.
Those kinds of calendars come built into every mobile phone. Companies as big as Google, Apple, and Microsoft give them away for free, with features varying between each platform.
There is a need for Calendar and for organizing your life.
On the other hand, it’s not just individuals who need calendars and schedules. Institutions and teams need them too. Conferences, colleges and universities, hotels, and offices all need to keep track of what’s taking place in different rooms at different times.
Businesses and institutions need to be able to see who’s meeting whom, when, and where. That’s a very different kind of calendar use. It’s not just that multiple people need to be able to access the calendar, add events, and invite others to attend. Users also need to be able to see numerous kinds of information from several different sources at the same time.
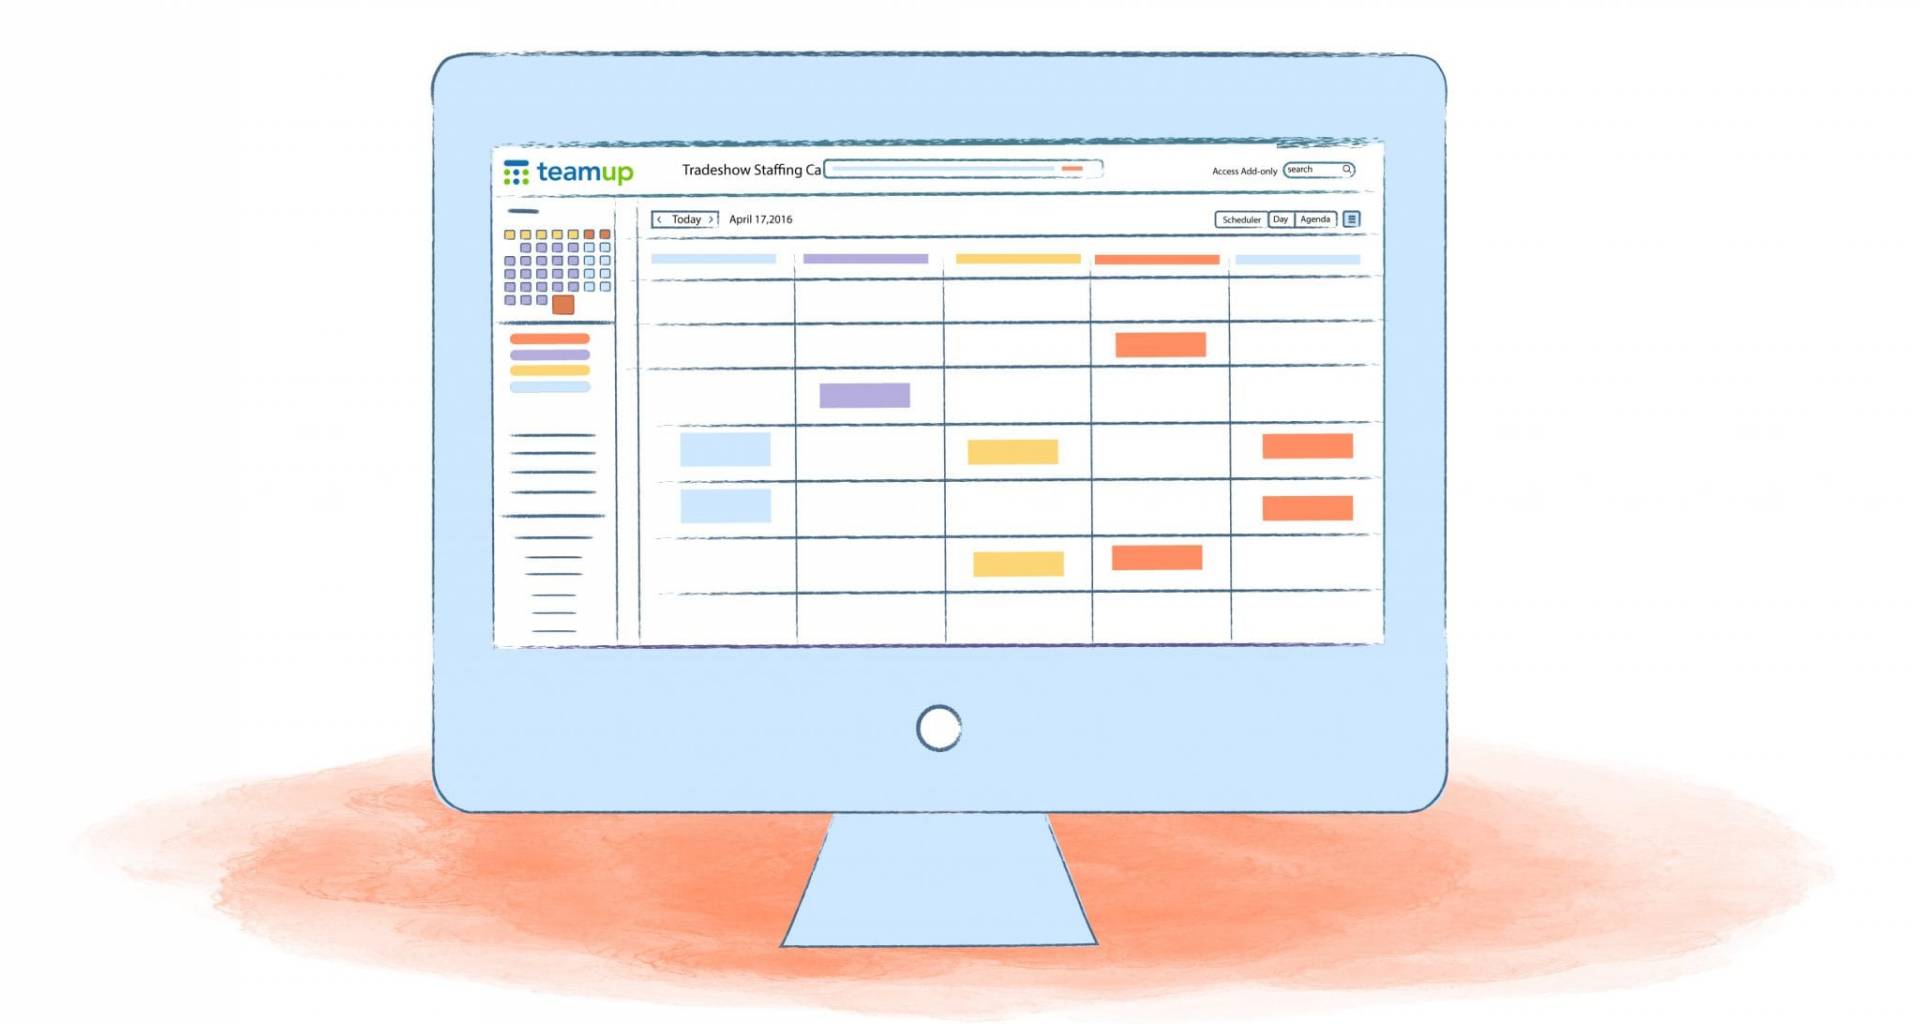
That’s what TeamUp tries to do. The service is aimed at teams rather than at individuals and institutions rather than at people. It’s a very different kind of calendar.
Who Is TeamUp For?
One benefit of TeamUp is that it provides a selection of live demonstrations, with images that show how the platform works. More than that, though, those live demos also show who the platform is for. The company provides no fewer than ten different demos.
The Team demo shows a list of four team members with an additional calendar for the team as a whole.
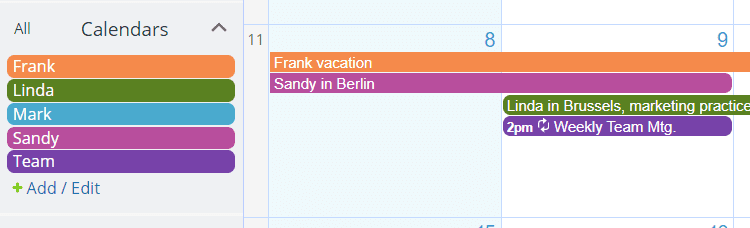
Each member of the team has different access and viewing rights. It’s easy to see, though, how a small group of people can use TeamUp to manage the time of each member of the team. TeamUp can also hold all the information about the whole team.
The Staff Scheduler works similarly, but instead of displaying a schedule with each team member’s events, it shows a list of each team member’s activities.
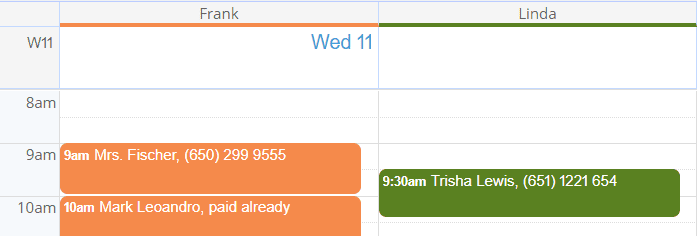
The manner of the display is essential — though it may not seem like a different usage — it is. The Team view shows how the team members are using the time ahead. The staff view shows the activities of employees. It’s easy to see how such a calendar could be useful for a school or classroom setting. It would also be ideal for a restaurant setting for drawing up a work rotation or for a soup kitchen or hospital listing the availability of volunteers.
The Room Reservation demo works in the same way as the team calendar. But instead of schedules for team members, the schedules are for rooms. The university, library, dance recital halls, musical rental rooms, etc., all need this kind of scheduling organization. Hotels, for example, would need to keep track of event rooms, though they could also use this system to track the guest rooms themselves.
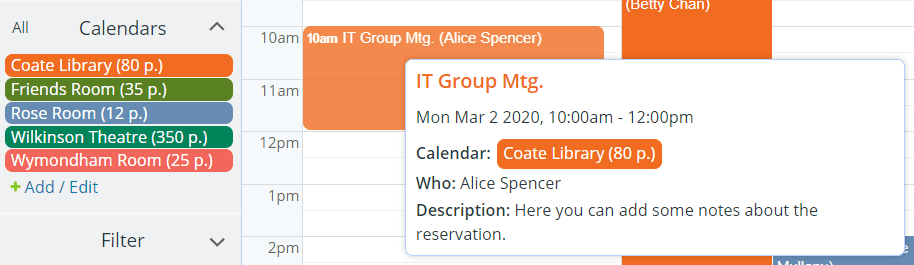
A different demo shows the calendar being used at a school so that teachers can book computer labs. In this demonstration, each teacher can make bookings and edit their own reservations, but they can’t change the bookings of any other teacher.
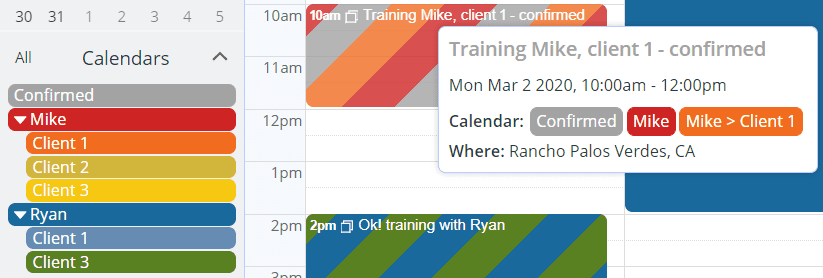
With the Trainer Availability and Booking Calendar, things start to get more complex. The idea is that users can see which person is doing what jobs or tasks, and when, and also which team member is working with whom. It’s a use case aimed at training firms, but it’s easy to see it is also used for consultancies as well as beauty salons and any other businesses with employees who work with clients.
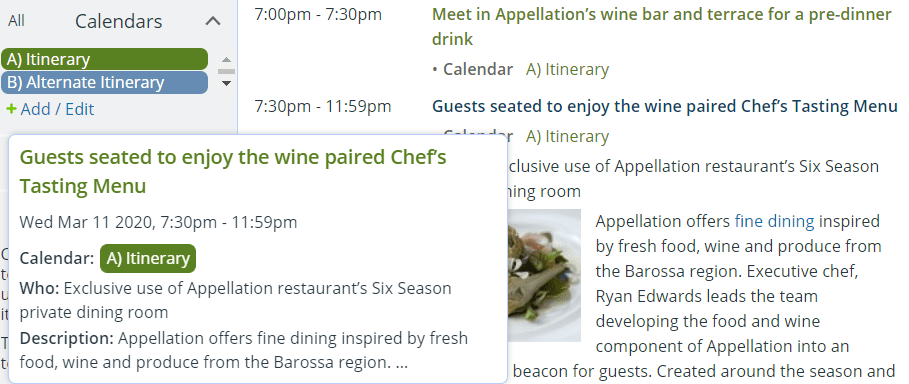
For the Event Itinerary demo, TeamUp suggests using the platform as an alternative to a Word document for planning an event itinerary. That’s probably a claim too far. Word processing software will always have far more formatting features than a calendar app can provide. And although this demonstration presents a very different appearance than the other demos, creating this view is only a matter of pressing the “Agenda” tab at the top of the page.
Other examples that TeamUp has created include a yearly planner that lets you see events spaced over a whole year, an industry planner to which anyone can submit entries without changing any of the events already included, and a conference agenda, which is where things get most complicated of all.

Here you can see both rooms and tracks, ensuring that anyone can find the talks they want to hear, and organizers can schedule events easily.
These demonstrations show two things. First, they show the broad range of use cases that TeamUp is targeting. It targets everyone from small teams and small businesses to giant conference organizers and educational institutions. And second, they show TeamUp’s flexibility.
Serving all of these use cases doesn’t mean using different versions of the same software. Although the platform does have different pricing levels that unlock various features, using TeamUp to manage a bed and breakfast instead of a marketing team is just a matter of how you create the events, assign permissions, and view the results. All of those different kinds of use are available using the same software.
So, where do you begin?
Getting Started with TeamUp
TeamUp provides a range of different pricing options, but you can start with its basic, free version. The free version is surprisingly generous. While other sophisticated calendar applications, such as Fantastical, severely limit what users can do with their free packages, TeamUp’s free trial is unlimited in time, offers a year of historical data, and an unlimited number of viewers.
The most significant difference between the free version and paid versions is the addition of a daily agenda and the number of sub-calendars, the new schedules you’ll need for team members, rooms, and conference tracks. The free version supplies just eight sub-calendars.
The fact that TeamUp doesn’t consider teams of eight or fewer within its market says much about who it believes its market is. The company is looking for much bigger teams and organizations. That provides plenty of space to try the platform before you buy it.
Select “Try,” and things start to get a little confusing. TeamUp asks for more than an email address and password. The selection offers a long-form with six different fields.
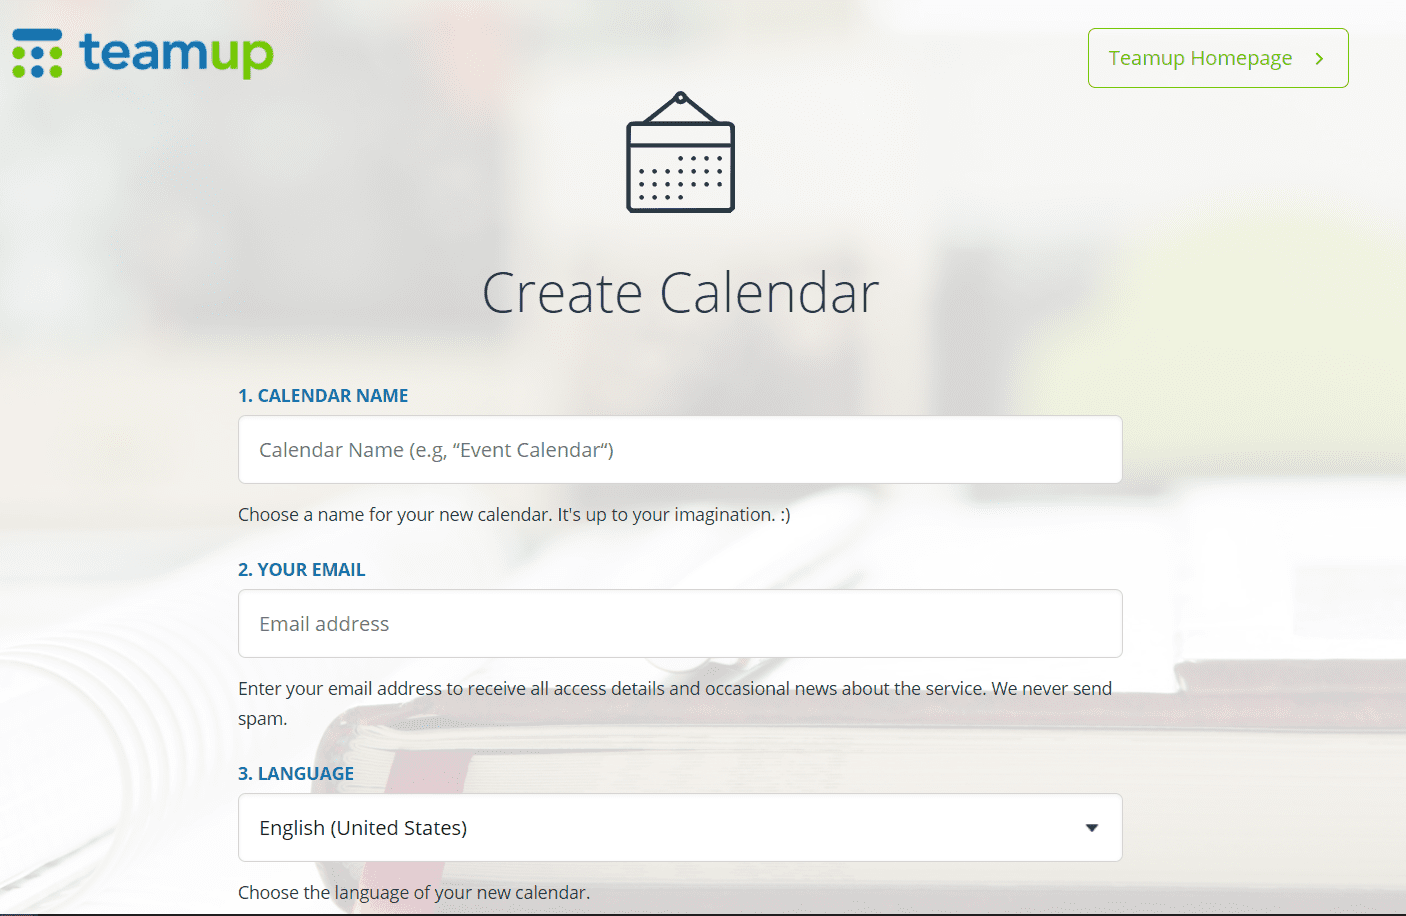
You need to give the calendar a name, enter your email address, choose a language, and a timezone (as though the platform couldn’t just take your current location as the default), and arrange a subscription plan.
You then have to pick a template. TeamUp offers five templates. The templates include an empty calendar, a team calendar, a reservation calendar, an events calendar, and a conference calendar.
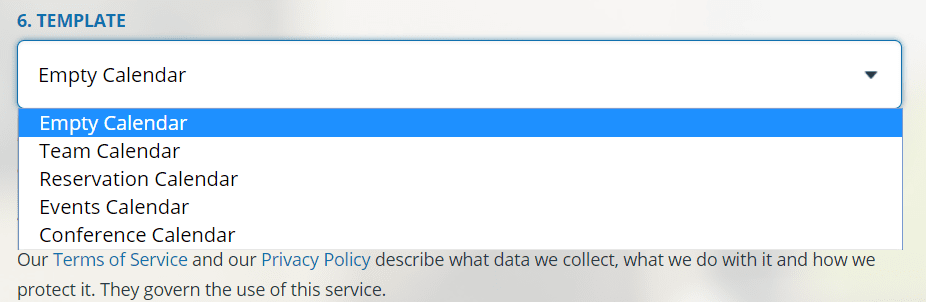
That’s TeamUp trying to be helpful, and it’s possible that one of those use cases is exactly what you have in mind, and choosing one will save you time. But it’s more likely that you’ll find yourself thinking that you have a team and it’s taking reservations for events so maybe you should pick three of them? The choice doesn’t matter. You can create any template from the empty calendar, and while it might take you a little longer to get up and running, you’ll learn a lot along the way.
Finally, you’ll need to accept TeamUp’s terms and conditions, but once you press “Create Calendar,” you’re not taken straight to your new calendar. Instead, TeamUp gives you a link so that you can use it to access your calendar.
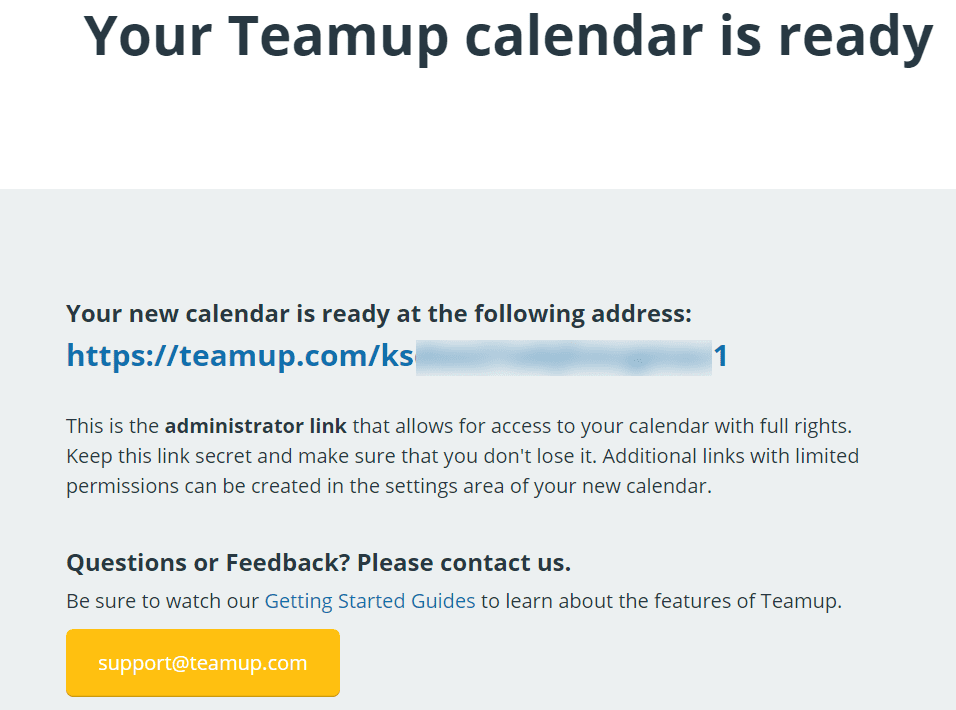
Unfortunately, that’s a little odd and a bit confusing. The link appears on a page filled with all sorts of information when all you really want is to get into your calendar and start adding events.
But it’s worth paying attention to what’s on this page — or at least the top half of it. The link that TeamUp provides here is an administrator link. It lets you use all the features on the calendar — including the ability to create more links with different permissions. The page acts as a useful reminder that you won’t be the only one using this calendar.
Press the link, and you will—finally—be taken to your new calendar.
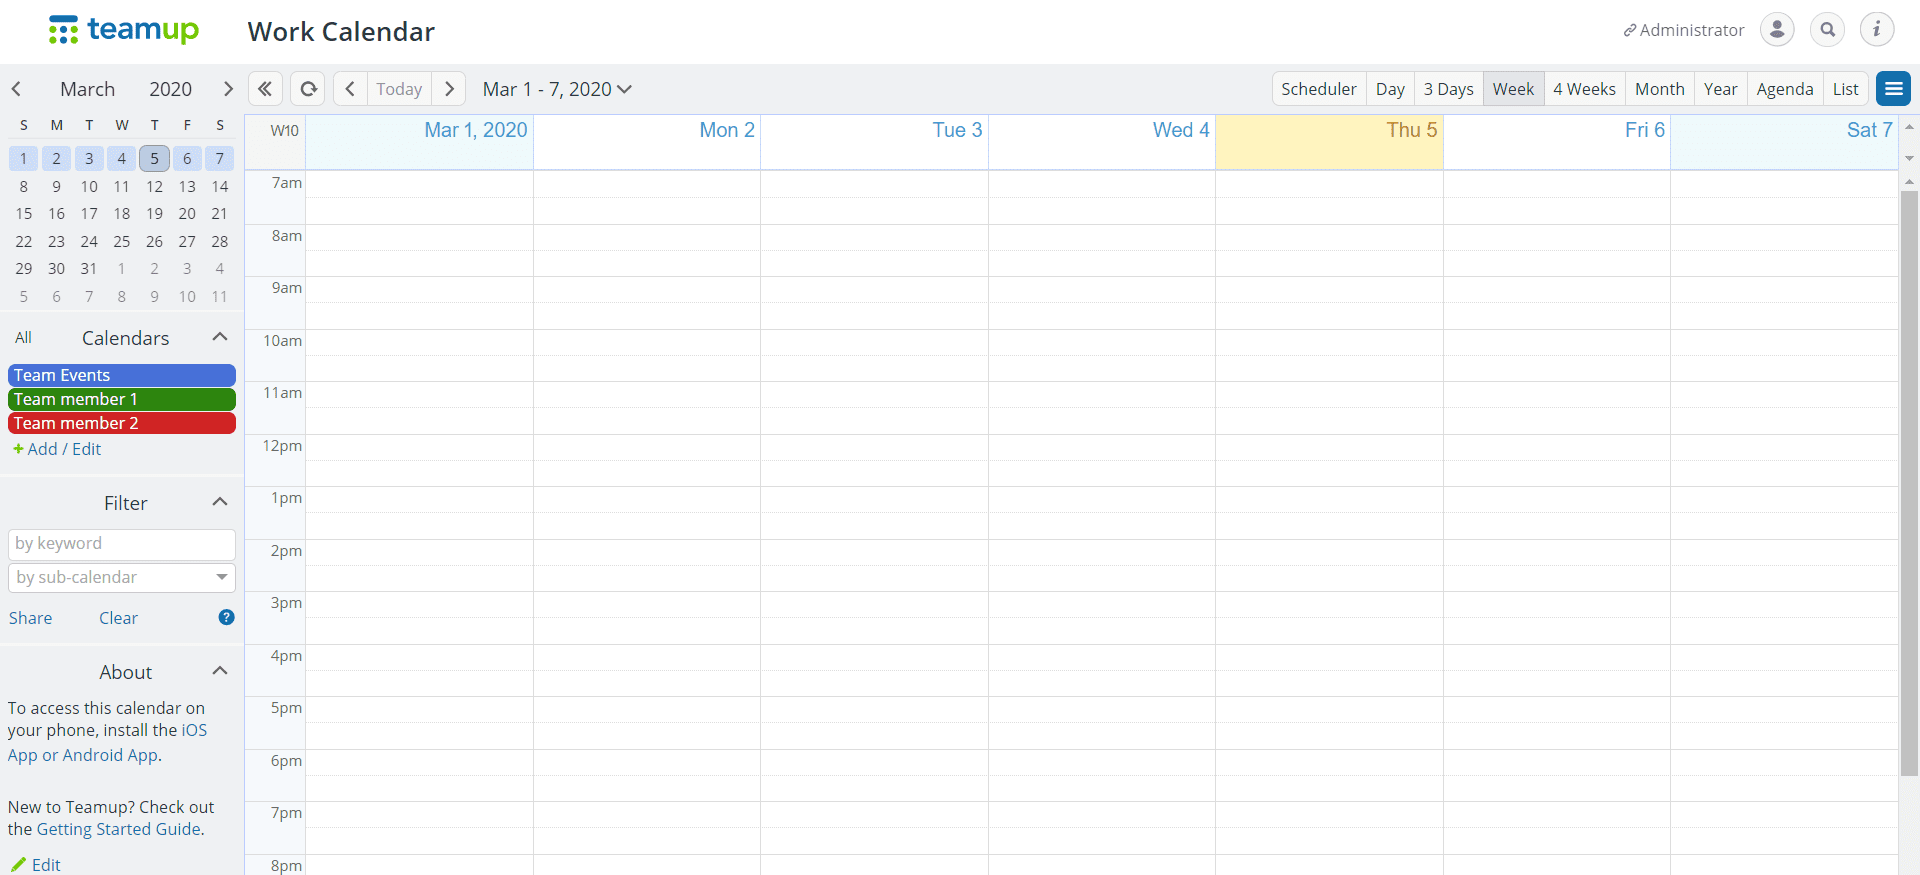
Now, there might be nothing in the schedule at this stage, but a lot is going on here. The name of the calendar is at the top. On the right is an indication that you’re looking at an administrator’s calendar, and beneath that title is a long list of different kinds of view.
On the left is a calendar overview, a list of your current calendars, with slots for team events and two team members, search fields, and an “About” section that includes a “Settings” link marked “Edit.”
Adjusting Your TeamUp Calendar View
TeamUp offers a remarkably long list of different kinds of views.
![]()
The Scheduler is the option that lets you organize events not by date or time but by team member — in effect by sub-calendar. The sub-calendar lets you see the forthcoming events of each member of your team.
We’ve already seen how that could be useful for staff scheduling: for matching mechanics to cars at an auto repair shop, for example, or seeing which trainers are working with which clients. On TeamUp, visualizing that kind of information is never more than a single click away.

The next six views all let you see different periods. It’s a generous selection, and we’ll see that these aren’t the only options that TeamUp provides. But if you’re looking to see the events you have lined up that day, over the next few days, over the coming week, weeks, month, or year, you can switch between those views with a click.
The Agenda and List views provide information about those events without using a calendar format. It’s a neat way to see what’s happening without feeling that you’re staring at a calendar.
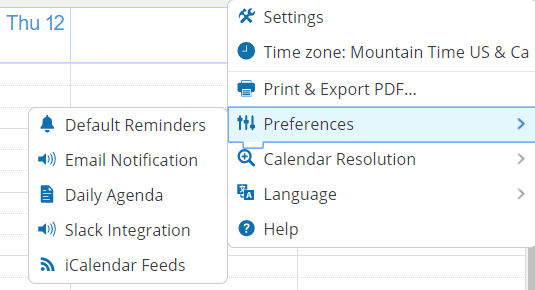
At the end of this line, though, is a particularly important button. The hamburger menu on the right opens a list of options.
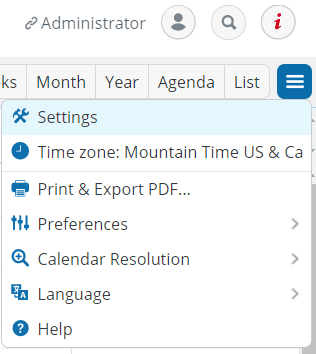
You can change the calendar’s time zone here. You can print the calendar or export it as a PDF if you want to get old school and create a static version of your schedule. And you can also change the calendar’s language (about eighteen are currently available, including two kinds of English, with more on the way). And you can get help for TeamUp’s features.
All of that is straightforward enough, but three options here stand out.
Calendar Resolution
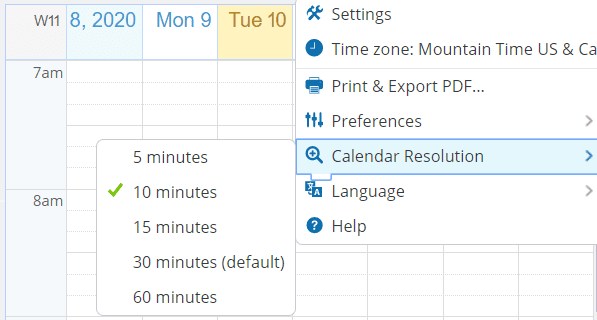
Calendar resolution makes a quick adjustment to the calendar’s scale. It adds or removes lines inside each hourly block. It’s only available in views of a week or shorter, and there are five options, from five-minute segments to sixty-minute blocks. If your events are likely to last less than an hour each, then adjusting the resolution will make it easier for you to create events of the right duration and see when those events start and finish.
Preferences
Preferences start to make things a little more complicated. Select this option, and you’re given five choices.
Choose any one of them, and you’re taken to an entirely new menu.
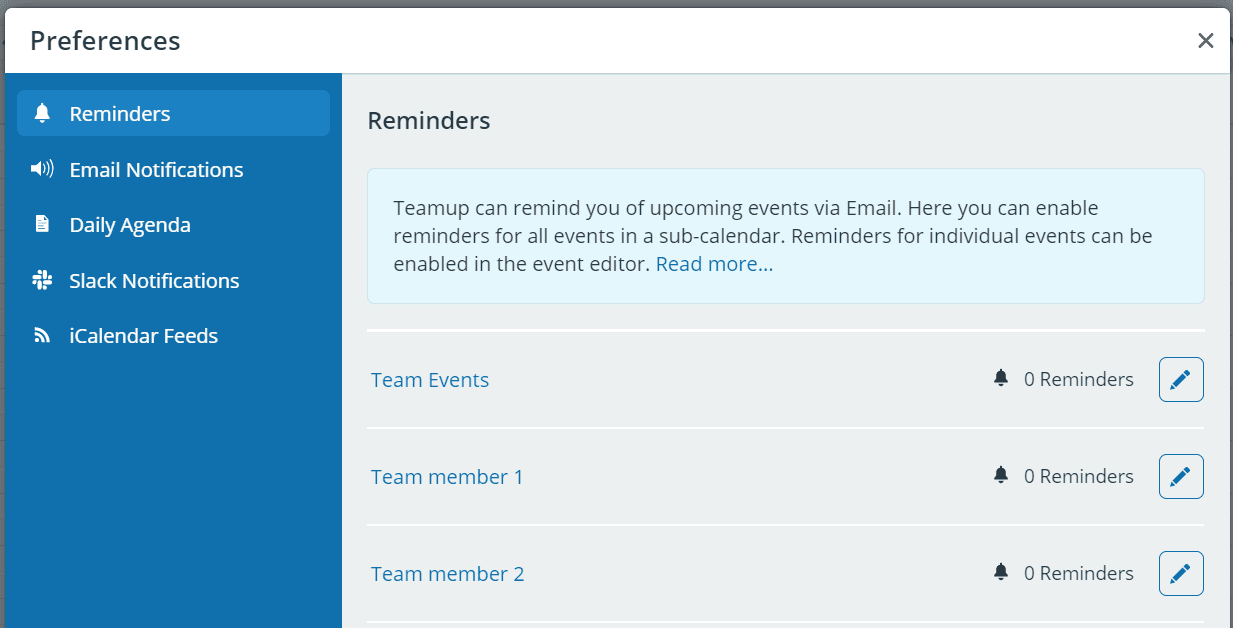
Reminders lets you set the sending of email messages at a determined period before the start of the event. As an administrator, you can set those reminders for each team member’s calendar. For hourly events, you can choose any number of hours, days, or weeks before the event to send the reminder. For all-day events, you can select any number of days or weeks and fix a time before which the reminder has to be sent.
You can also add more reminders. So you could send one reminder the day before the event, and another an hour before to make sure that you don’t forget.
Email Notifications
The email notification sound is similar to reminder, but they’re messages about changes to upcoming events on the calendar. You’ll need to slide the toggle to “active” then add three pieces of information. First, you’ll decide whether you want to be notified as soon as the change is made, or once per day. Then, you determine the calendars you want to send you the notifications, and if you wish to receive news of all changes, new events, or only significant changes such as new events, date and time changes, and deleted events.
The Daily Agenda
The daily agenda is only available with a paid plan, and it’s one of those unusual features in a paid calendar plan that might even be worth the money. The feature sends an email each morning that lists all the events coming up over the next one to three days. It means that you can start each day with an automated plan.
Digital calendars are supposed to make organizing work and time easier. They’re supposed to make businesses and teams more efficient and allow them to get things done with less effort. Emailing a daily agenda sounds like a small feature, but it really can change the way that teams work, setting them up for the day ahead.
Slack Notifications
Slack notifications are one of the two integrations that TeamUp offers here. Instead of receiving information about calendar changes in your email inbox, you can receive them in the team’s Slack messages. It’s a useful addition if you’re using Slack to manage your team’s events.
iCalendar Feeds
The iCalendar feeds maybe even more helpful. Here, you can pick up the Web addresses that you can use to bring events in TeamUp into any other digital calendar you might be using. So, if you wanted to see your TeamUp events in your Google Calendar, for example, you’d click the hamburger button in the top right corner.
Choose Preferences, then iCalendar Feeds. TeamUp will present a list of URLs for each of the calendars you’ve created.
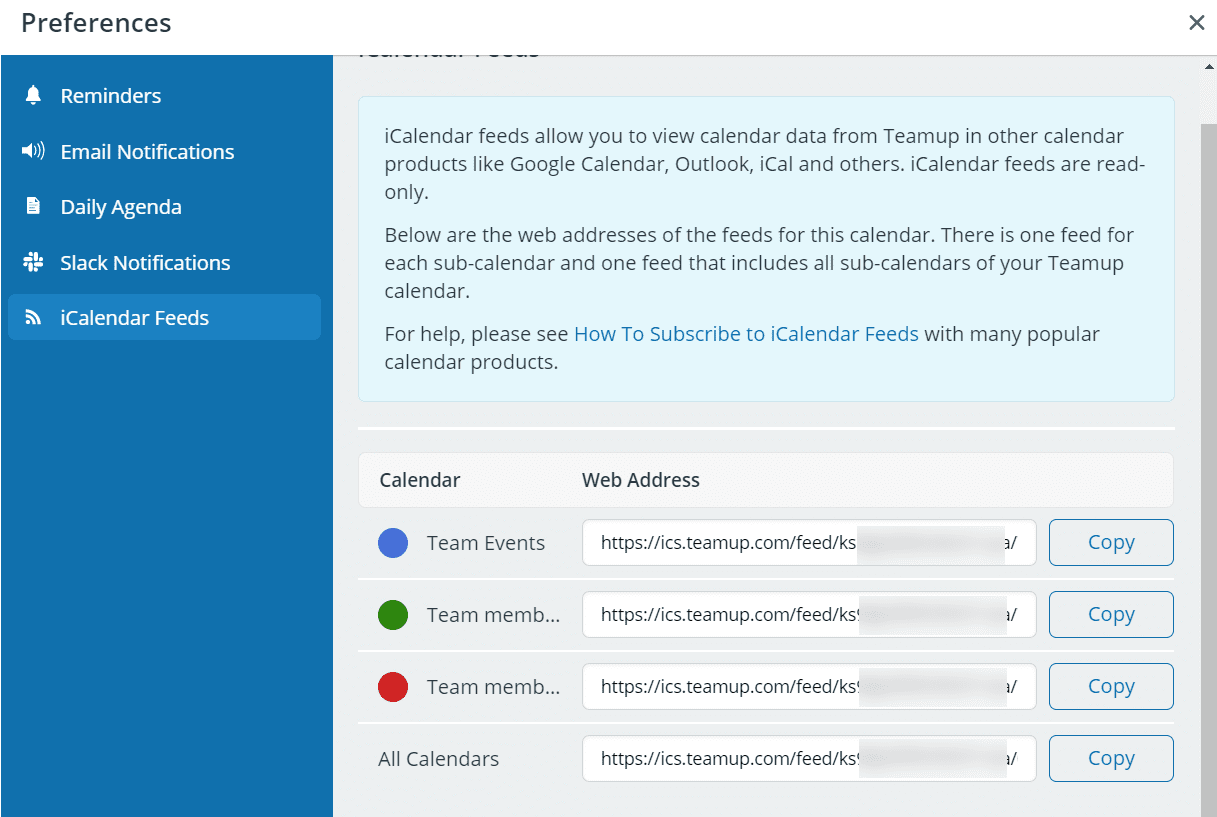
Press “Copy” to copy the URL you want to import, then open calendar.google.com. Scroll down the menu on the left until you can see the plus icon next to “Other calendars.” Select “From URL.”
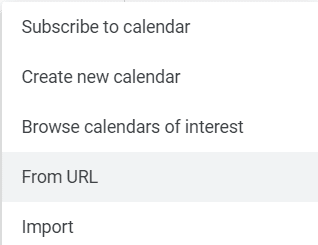
You can also click the gear icon in the top right corner, choose “Settings,” then “Add Calendar,” and “From URL.” When you paste the calendar’s URL from TeamUp, the events in that calendar will appear in Google Calendar — and you can follow a similar process on other digital calendars. But it’s important to note that the URL is read-only. You won’t be able to change any of those TeamUp events on different calendars. You’ll only be able to see what’s coming up.
Settings
You’d think that the options available in the Preferences would be sufficient. But TeamUp also has a separate list of Settings options. You can access them by clicking “Settings” at the top of the hamburger menu at the top right or by clicking the “Edit” link at the bottom left.
You’ll be presented with no fewer than eleven categories, each with a host of different options. Some of those options are clear. Others less so.
General Settings
The admin email will be the address you entered when you registered. TeamUp uses it to send announcements and to recover access, so you should make sure that it’s the address you want to use. You can change the platform’s language. TeamUp offers a wide choice — and you can determine whether team members can subscribe to notifications themselves, or whether only the admin can set the notifications.
TeamUp lets you turn off iCalendar feeds, which forces users to see events on the platform instead of using their preferred digital calendar. More interesting is the option to assign multiple calendars to the same event. You can choose to turn this feature on or off, and you can choose to see those calendars as neat, diagonal stripes or as vertical blocks.
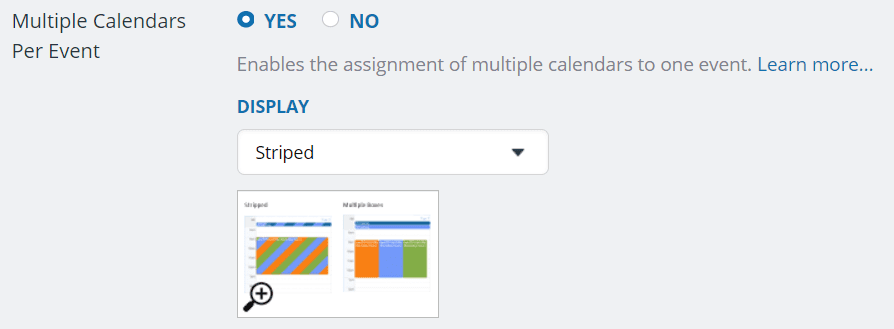
You’re going to want to keep this feature on. It lets you see at a glance who will be attending a particular event. If each member of your team had their own TeamUp calendar, for example, and you wanted to organize a planning meeting, the calendar would show everyone who needed to attend. And it makes the calendar look pretty and colorful too.
Event Sharing looks simple. It appears to be a toggle that allows users to share their events with others. But if you press the “Configure” button, you’ll get a long list of additional toggles that determine how users can share an event.
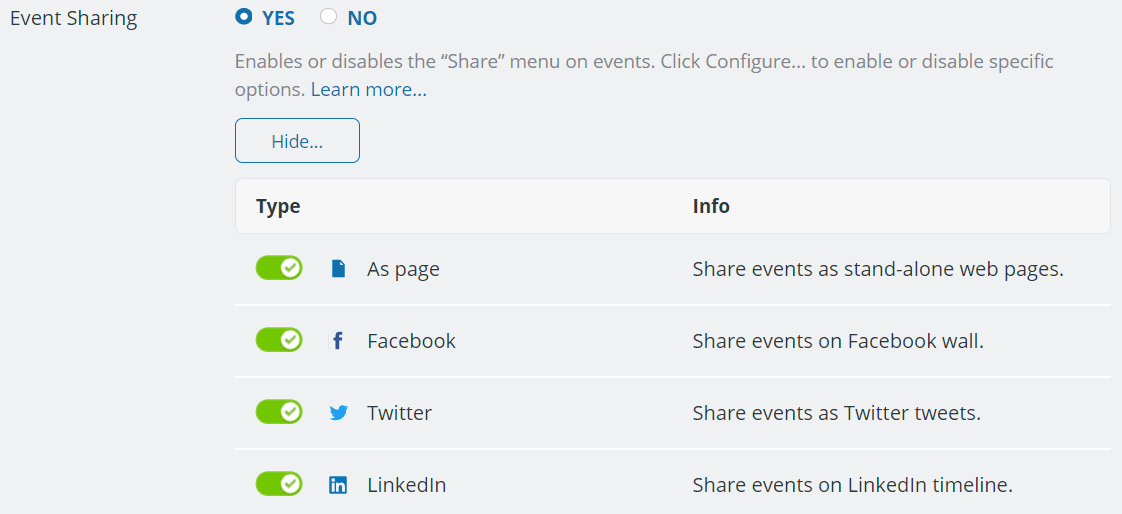
There are a lot of options here. You can share your events as a Web page, on Facebook, on Twitter, on LinkedIn, and via WhatsApp. You can send it by email, add it to Outlook, turn it into an ICS file, and so on.
The list on “event sharing” doesn’t just make sharing convenient. It also turns calendar events into public events that can be publicized. A conference could create an event for a talk, and share it as a Web page on the speaker’s website or place it on their Facebook stream. With this feature, buried in the Settings menu, TeamUp turns sharing from a way of informing other people involved in an event, to a way to invite everyone to attend an event. It provides plenty of opportunities.
TeamUp also lets you require confirmation before deleting an event. That’s worth keeping on if only to prevent accidental deletion. The option to collapse or keep visible the sidebar is probably superfluous. A double arrow above the calendar lets you toggle the sidebar without having to enter the settings, and while you might want to hide the date picker that you can access above the calendar, there’s no need. It’s a useful way to skip through your dates.
More useful is the ability to change the About box that appears in the bottom left of the calendar. This is worth doing because that box looks unprofessional.
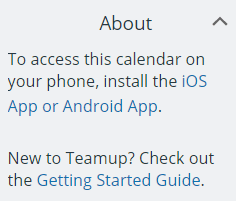
Press the “Edit” button beneath this box in the Settings menu, and you’ll be able to change all of the box’s contents. You can even add formatting, complete with bold, italics, links, bullets, and numbering. You don’t have a lot of space, but you can use this area to tell the rest of the team what the calendar is about and how they should use it.
And finally, in this section, you can delete the calendar. But you don’t want to do that just yet!
Date & Time
The Date and Time options are both detailed and precise. You can choose whether or not to show a time zone, and you can let TeamUp detect your time zone automatically. If you’re going to be traveling around, it’s worth showing your time zone so that you’re clear about the hours the calendar displays.
TeamUp also offers five different date formats, so you can choose whether you want to put the day, the month, or the year first and divide the numbers with dots, slashes, or hyphens. You can also make the clock 24-hour if that’s your preference.
TeamUp lets you start the week on any day, and this is also where you can set the time range available in calendar views, and the calendar’s start date. The default is the current date, but if you’re using the calendar for a specific set of events—a conference, for example—then you can set the calendar to open, showing the start of that period.
The calendar also lets you suggest a start hour. The start hour is different from the time range, which limits the calendar’s display completely. Set a time range of 6 am to 7 pm, for example, and the calendar will only be able to show those hours. If you then make the start hour 9 am, the calendar will start its display at 9 am, but you’ll be able to scroll up to see the first three hours of the day. You won’t be able to see anything before 6 am, however.
The Default Event Duration lets you select in advance the default length of an event. The options range from five minutes (which might be useful for organizing speed dating events) to three hours. The default is “automatic,” which means that the default duration of the event will depend on the time resolution that you’ve selected for the calendar.
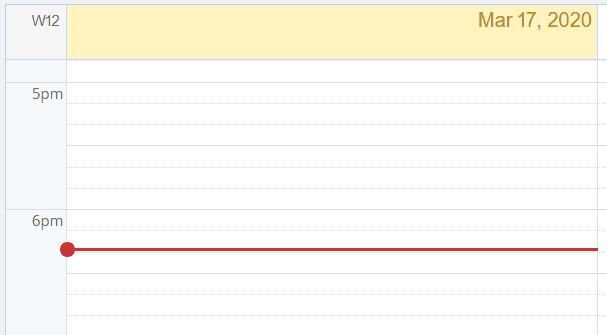
Finally, in this section, you can show a current-time indicator. The current time-indicator will appear as a red line across the current day in the calendar at the current time. It’s a useful way to keep track of how far you are through the day’s schedule.
Calendar Views
We’ve already seen how TeamUp offers a long list of different ways of viewing the calendar: week view, month view; three days; four weeks, and so on. TeamUp also lets you edit these views. You can set the default view, and, like the Preferences menu, you can also adjust the calendar resolution. If you want to remove any of the view options from the menu above the calendar, just toggle the switches.
A few options here stand out. TeamUp offers a three-day view, but it’s possible to change that number to any between two and six.
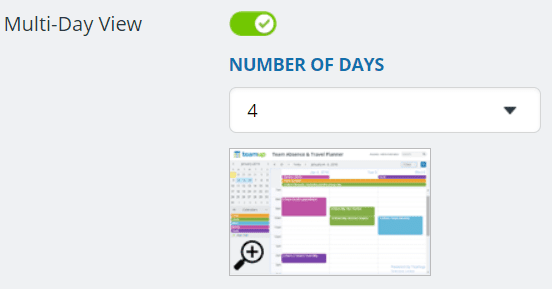
Similarly, the multi-week and the year views let you adjust the number of weeks and months to display, respectively.
There is also a new option here. The “Timeline” displays the calendar in a horizontal format instead of a vertical format. The timeline is the first hour and day of the week that are shown on the left of the screen, with the events stretching towards the right side of the screen.
Identity
Identity is really all about branding, and finding this option buried a third of the way down the Settings menu is surprising.
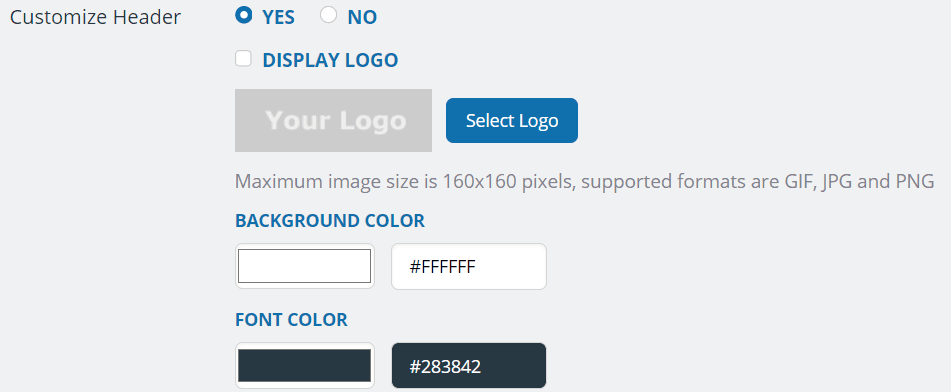
First, set the header for the calendar, then choose “Yes,” next to “Customize Header.” You’ll then be able to upload a logo, set the background and font colors, and add them to the calendar by checking the “Display Logo” box.
If your calendar is public-facing, this is an option you’ll want to use. Add your logo and make the colors match your brand.
Calendars
In the sidebar on the left of the calendar, you’ll see a list of the calendars that other team members are using. Beneath that list is a link marked “Add/Edit” which leads you to the list of current calendars.
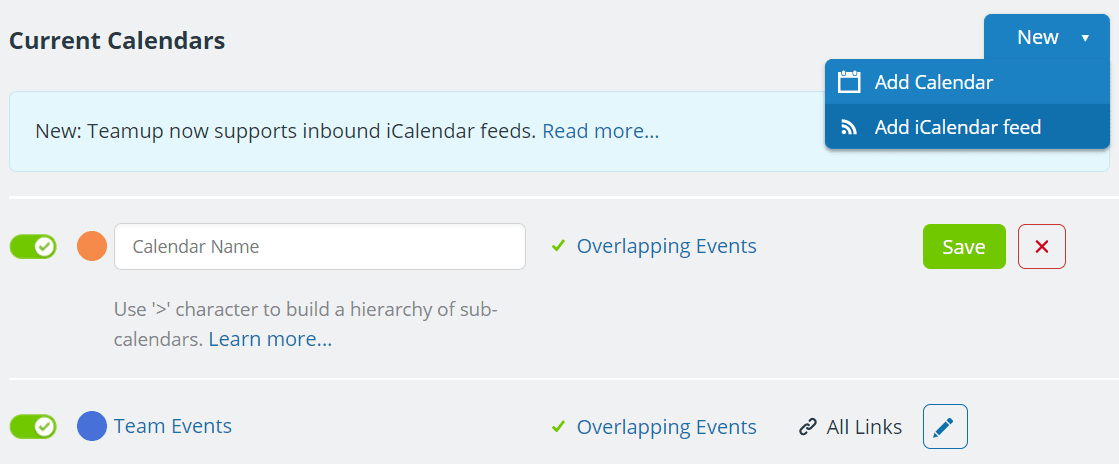
Creating Calendar Folders
The “New” button on the right does two things. First, it lets you add a new calendar. You’ll need to give the calendar a name and decide whether that calendar can have overlapping events. The default setting is to allow events to overlap. You should de-select that option. It will enable the calendar owner to accept double-bookings. It’s challenging to think of a situation when that would be a good idea.
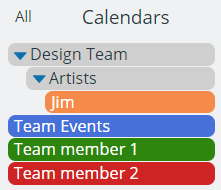
The new button is also where you can create folders and even sub-folders for your calendars. Add “>” after each name you add to a calendar, and you’ll create a new level of category. So if you wanted to create a set of calendars for your design team, instead of merely listing the members of the team, you could also categorize them.
In the calendar name, if you wrote “Design Team > Artists > Jim,” for example when you return to the calendar, you’ll see those calendars as a nested list.
Add a new iCalendar Feed
The other thing that you can do with the “New” button is to add an iCalendar feed. You’ll need the iCal URL of your digital calendar. Give the calendar a name (you can use those “>” characters here, too, to create folders.) Select a color and choose whether this calendar will be active. You’ll then just have to paste in the URL and select your refresh interval.
Your refreshing interval depends on your subscription plan. Premium plans can refresh as quickly as every fifteen minutes, every hour or every four hours. Everyone else has to settle for twice daily, once a week, or once a month.
Editing a Calendar
At the end of each calendar line, is an edit icon. Select that icon, and you’ll receive the same lists of options that you used to create the calendar: the calendar name, color, activity, and overlapping event option.
But you’ll also be able to set permissions here — and TeamUp provides no fewer than eight different options.
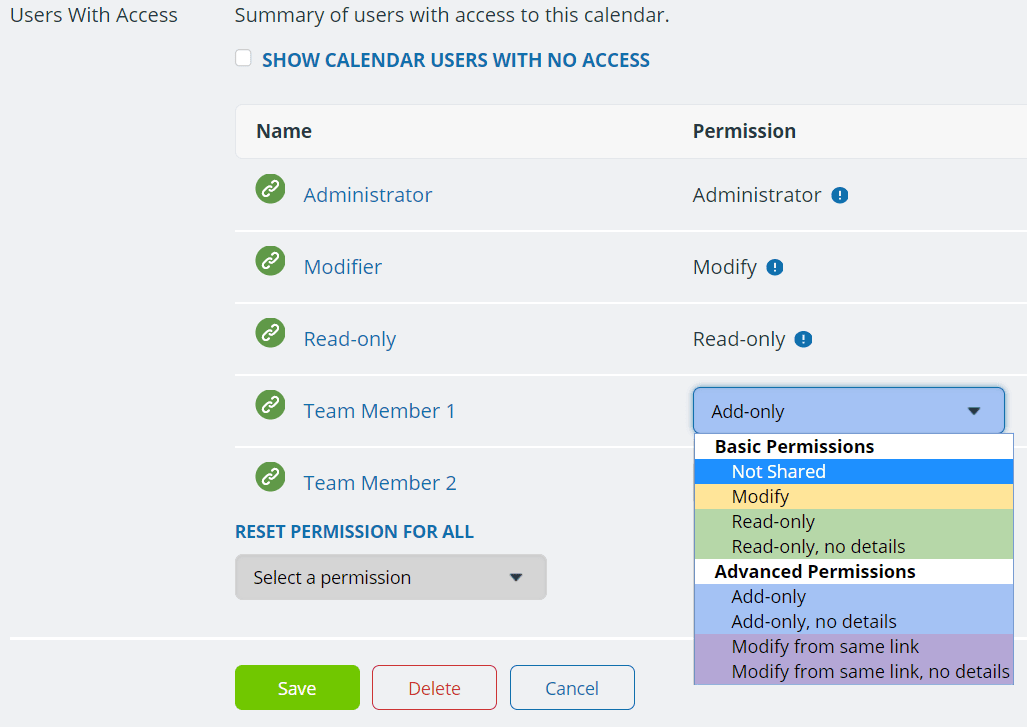
- Only the Administrator can access the calendar’s settings.
- Modify lets users view, modify, create, and delete calendar events.
- Read-only lets users see the events but not change any of them.
- Read-only, no-details lets users see that blocks of time have been reserved but doesn’t say what is taking place during those times. It also doesn’t allow changes.
- Add-only lets users add new events, and read but not change any existing events. If a user does add an event, they have one browser session, about half an hour, to make changes.
- Add-only, no-details also let users add new events, but they can’t see the contents of current events.
- Modify-from-same-link is useful if the user reaches the calendar from a link. The user will be able to add new events and change any events that were created through the same link. But they can’t change any of the other events on the calendar.
- Modify-from-same-link, no details lets users who reach the calendar through a link make changes to that calendar but hides the details of any other events.
- Not shared means that users won’t be able to see the calendar at all.
Sharing
The next item in the Settings menu is critical. TeamUp depends on the ability to allow multiple users access to the same calendar. Multiple users mean that an administrator — the person with the most permissions for the calendar — needs to be able to share it with others and determine their permissions.
It gets complicated.
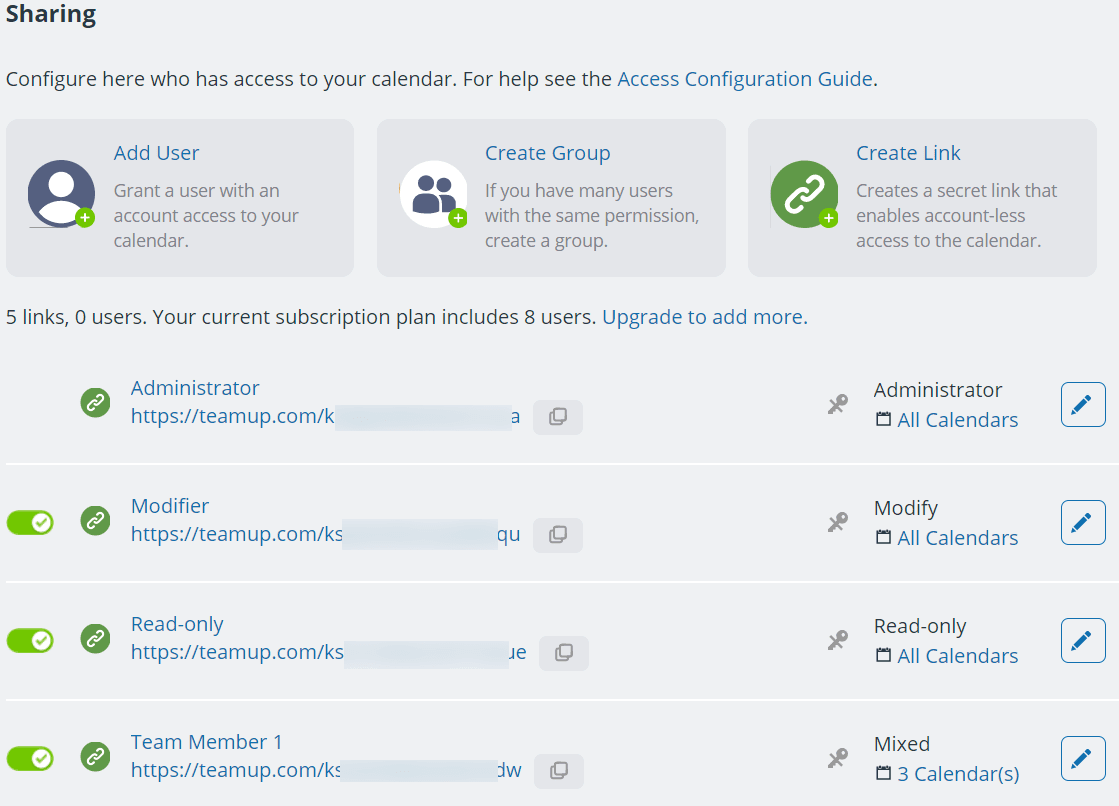
You can take three actions:
Add User
The most straightforward response is to add a user. The number of users who can share the calendar depends on your subscription plan, but you start with eight, which will be sufficient for small teams. Select “Add User,” and you’ll just need to type in the user’s email address. If they already have a TeamUp account, the platform will add them to the calendar. If they don’t have an account, they’ll receive an email inviting them to register.
If someone has received an email inviting them to register, then you’ll need to fill in their details. You’ll have to add the user’s name, determine whether they’re active, decide which calendars they can share, and set their permission level.
The next option is to place them in a group. That’s the second action you can take here.
Create a Group
Groups let you grant the same access to the same calendars to several different people. So if you had created a calendar for the design team, instead of inviting all the designers and artists in the team manually to join the calendar, you could select “Create Group.”
When you create a group, you’ll need to name the group, make it active, assign it a calendar, and set the permissions. Then you’ll just need to add the names or email addresses of the people you want to join the group.
Once they’ve joined, you’ll see them listed in the group with trashcan icons next to their names. Click the trashcans, and you’ll remove them from the group.
Create Link
Finally, you can also create a link to your calendar. Again, you’ll need to give the link a name and select the calendars to which the link grants access.
The link allows you to grant anyone access to the calendar. So if you set the permission level of the calendar to “Add-Only,” you could allow members of the public to reach the calendar and set appointments. You could send them an email suggesting that they make a booking and send them the link to the calendar.
Second, you can also set a password for the link. The password will help to keep your calendar private and prevent the link being shared too widely.
When you’re done, you’ll see a list of all your links, groups, and users, and you’ll be able to edit each of them.
Event Fields
Share a calendar on Google Calendar, and allow other people to add their events, and they’ll have little choice about how they do it. Google has already decided what the event-form will contain. The company has determined which information people are likely to want to supply and which questions it needs to ask. Users get to decide whether or not to answer those questions.
TeamUp is more flexible, and it’s a remarkably clever feature. Event fields let administrators design the “add event” forms.
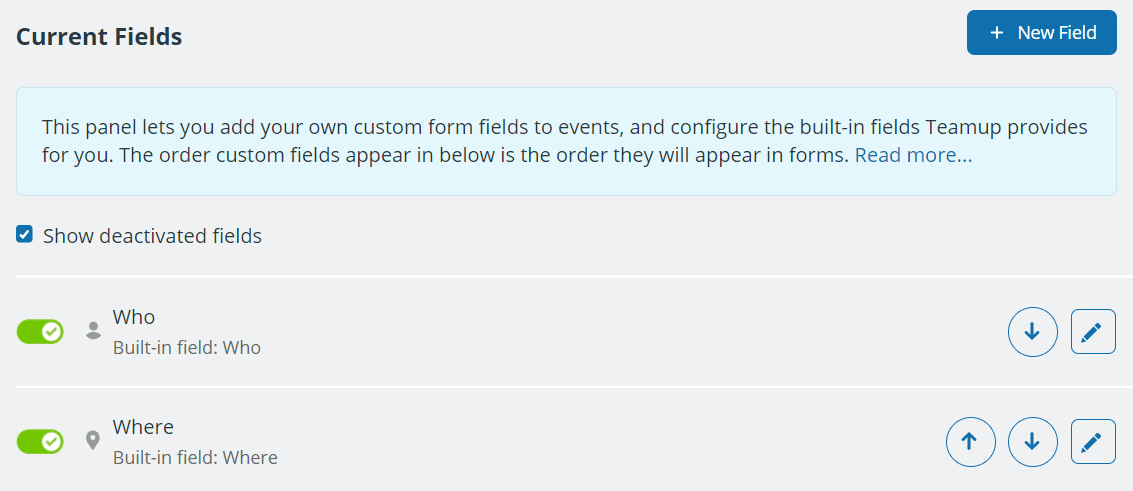
You start with five fields already designed and active: who, where (location), description, signup, and comments. You can change the order of these fields, and you can also edit them by pressing the pencil icon.
Editing doesn’t allow you to make very many changes, though. You can decide whether the field is active, required, will show in the event title, and rename it. But you can’t reconfigure this field. If you really want to change a field, a better option is to make it inactive. Press the “New Field” button at the top of the page, and create an entirely new field to make it inactive.
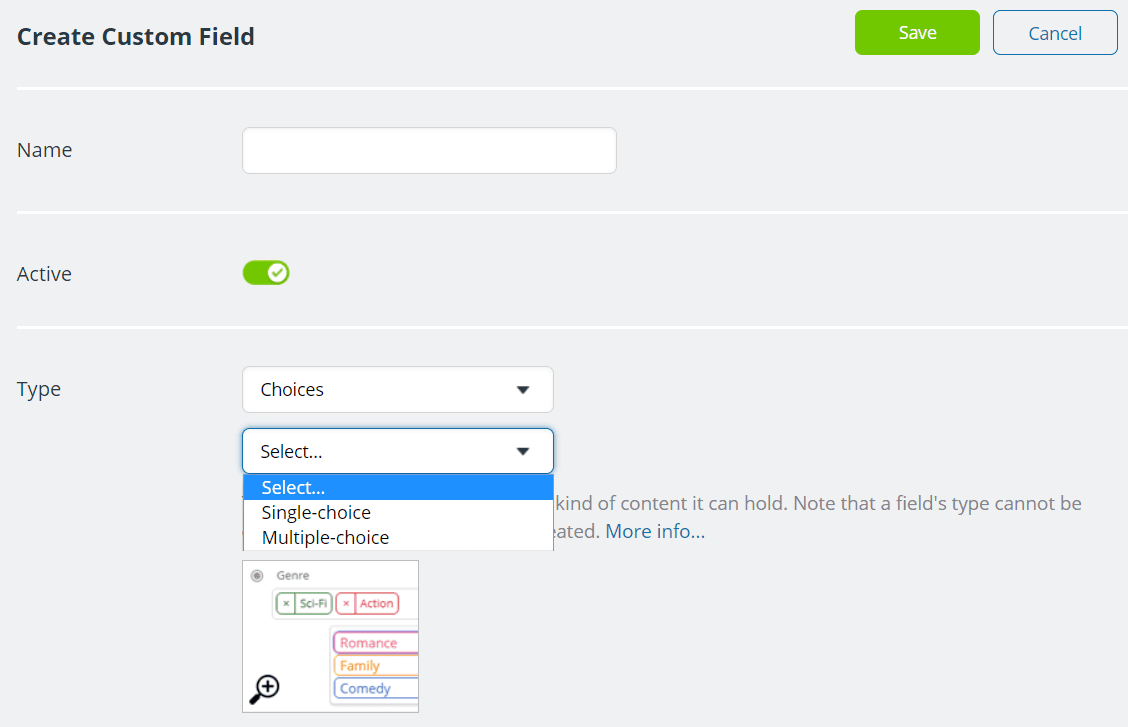
The big difference here is the ability to set the type of field. TeamUp offers two types. A single-line text allows the user to add a single line of text. So you could give the field a name in the form of a question that a user can answer in a single line when they add their event. For example, a restaurant using the calendar to take bookings could call the field “Please specify any food allergies,” and let users describe their lactose or gluten intolerance or enter the words, “none.”
Alternatively, you can offer users a list of options. The user can either make a single choice or a multiple choice. So instead of asking people to describe their food allergies, the restaurant could offer a list of food allergies and invite diners to select any that are relevant to their party.
Finally, you can also a little emoji to the title of the field, and by that, TeamUp means a graphical icon.
Notifications
TeamUp also lets you see how each calendar using is receiving notifications and when. Enter each user’s email address, select the calendar link, time zone, and whether they receive a notification immediately after a change is made or once per day.
You’ll also need to determine which calendars will send them notifications and whether the notifications should be for all the changes on a calendar, for new events, or for significant changes such as new events, date or time changes, and deleted events.
Import and Export Events
The next two menus in the Settings enable you to import and export events from other calendars. You can import and export the events in iCalendar format or as comma-separated values. Importing can take place from a file or from a URL, and exporting can take place from all or a selection of calendars. You can also choose to only export the events in a specified date range.
Creating Events
When you open most digital calendars you find a big button for creating events. On Google Calendar, the big button is marked “Create,” and appears at the top left of the screen on desktop versions. On mobile versions of Google Calendar, it’s a smaller button in the bottom right corner with a plus icon. However, the action button appears on a digital calendar — it’s usually there, ready to make creating new events inviting and simple.
There is no equivalent button on TeamUp. The calendar is clean. Buttons let you navigate. Edit links let you create new calendars, add team members, and open that complex Settings menu. There is no menu that lets you create events.
To create an event, you’ll need to click somewhere on the calendar. Drag down, and you’ll have already set the date, time, and duration of the event.
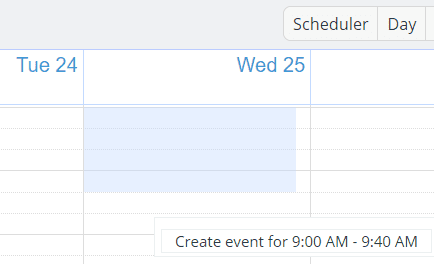
Release the mouse, and TeamUp offers a pop-up that requests your event information. You’ll have already entered the date and times, but you can change them if you want. Remember that the rest of the information that TeamUp requests will depend on the event fields you’ve created and edited.
The default form will ask for the event title, the names of attendees, a location, and a description. You can also mark the event as lasting all day, and whether it repeats. And you can add reminders here too.
A couple of additional options stand out here.
On the right of the form, below the “Save” button, is a button marked “Options.” There are only two options.
The first option lets you require people to sign up for the event.
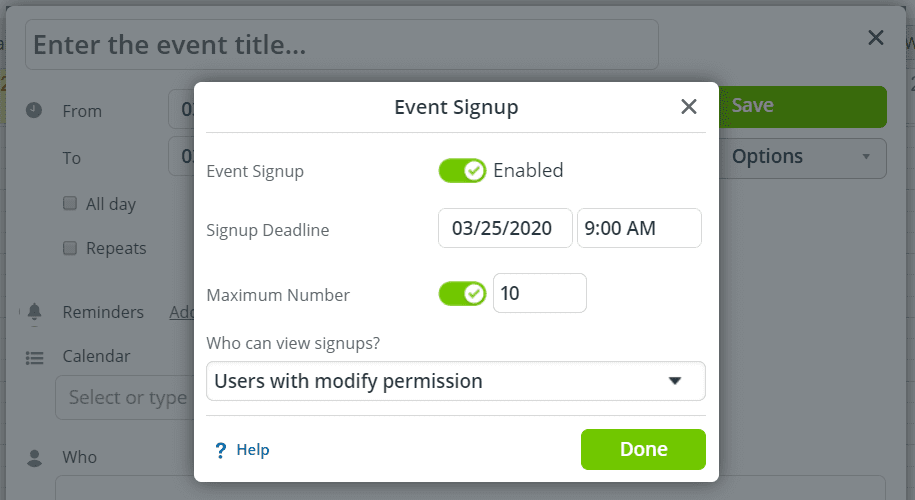
You can set a deadline and a limit for registrees, and you can also limit who can see who has registered. This option can provide some valuable marketing opportunities. Set a limit of ten registrees for a Webinar, and as the number of signups rises, you can tell your market, and create a sense of urgency.
The other option is the ability to add comments to an event, which lets a discussion take place before the event happens.
Conclusion
Most digital calendars are aimed at individuals. The calendar also allows other people who might share an interest in someone’s activities to use the calendar. Still, their target audience is an individual who needs to keep track of their events.
TeamUp assumes that its calendar will be used by a team of people. It’s geared towards organizations, institutions, and public events. For individuals, it’s overkill with too many features that would be of little use. But for conferences, colleges, and institutions with lots of colleagues who use and can take advantage of TeamUp’s different viewing options and sub-calendars — those team features could prove very valuable.
Deanna Ritchie
Editor-in-Chief at Calendar. Former Editor-in-Chief, ReadWrite, Editor-in-Chief and writer at Startup Grind. Freelance editor at Entrepreneur.com. Deanna loves to help build startups, and guide them to discover the business value of their online content and social media marketing.