
Excel is a place to crunch numbers and review data, but it can also be so much more. It can be a calendar. Here’s how to create a calendar in Excel.
When you create a calendar in an Excel sheet, you’ll click on the green X down in your list of browser choices at the bottom of your computer screen.
- Always start in Row 2 as shown below.
- Enter the name of a day of the week under each of the columns from A to G. I usually skip the first column and start with column B. That way I can add a name or some other unexpected notation that almost always comes up for me.
- Next, format the days so that they fit in the cells and look clear. You do this by clicking on the line in-between each alphabet letter. Like the line between B and C. You’ll see an arrow. Click and drag to the length you want each cell to be.
- Select the row, then under the Home tab, choose “Format” from the group Cells group.
- Set the column width to about 15.

The days of the week lined up and looking good.
Next:
- Click any of the cells in the top row, then open the fx field.
- Type in =TODAY() to tell Excel to enter today’s date. It won’t look pretty, so click that cell.
- Then under the Home tab, choose the Number group.
- Then select, “Date.”
- You’ll be able to give the date a whole new look.
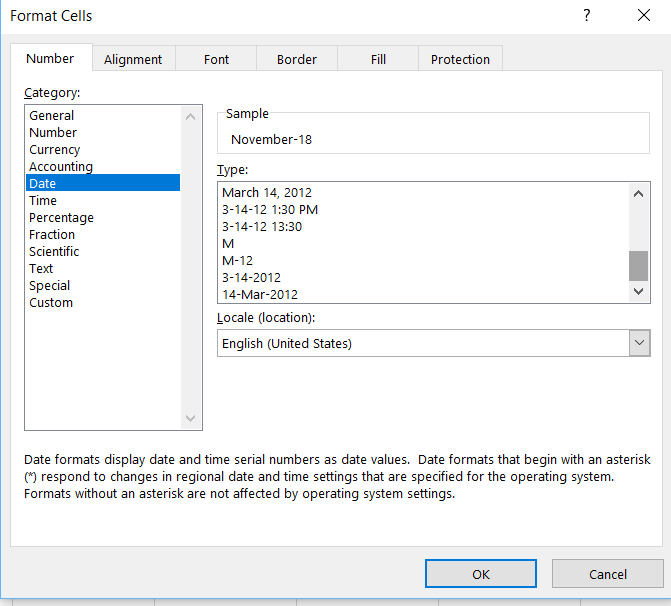
Enter an automatic date.
Select the row then choose “Merge & Center” to place the date in the middle of the top row. (Alternatively, you can just place the name of a month in this row.)
Now it’s time to start populating the cells with dates. Unlike creating a calendar with Word, you don’t have to do this manually for every cell.
First, select the whole spreadsheet and press the paint icon to paint it all white and eliminate the cell borders.
Highlight about five rows under the first day of the week.
Under the Home tab, in the Font group, select the border icon and choose “Outside Borders”.
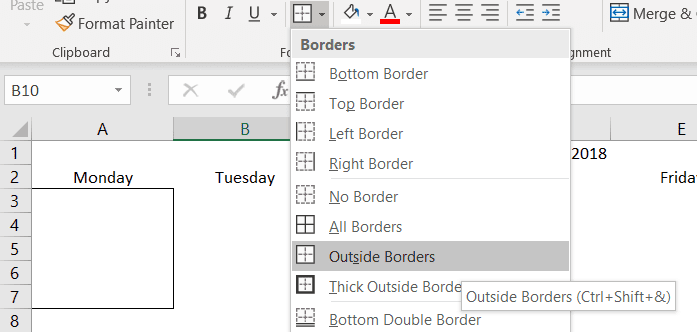
Create the calendar cells.
Select the field you’ve just created and paste it across the week and for five rows. (The process can be a little fiddly.)
At this point, you could just place consecutive numbers in each of the cells… or after entering the first two numbers, you can press Shift and select those two dates. When you drag the cursor across the row, Excel should fill in the rest of the numbers for you. Again, it’s a bit fiddly and it doesn’t always work as well as you’d like. You might find it faster just to type in the numbers manually.
You’ll now have created one month. To create a complete calendar, press the tab marked “Sheet 1” at the bottom of the calendar and choose “Move or Copy.” Mark the box called “Create a copy”, press “OK”, and repeat ten times to create twelve pages.
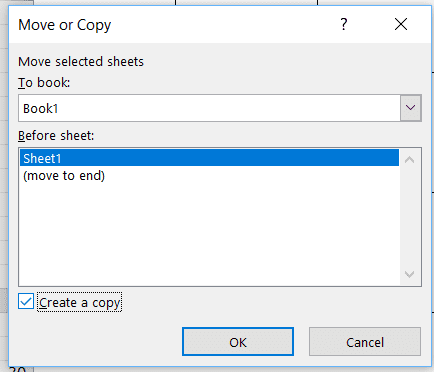
Copy each month, then adjust the dates.
You can then return to each page individually, adjusting the dates and the month, and playing with the formatting to make the calendar look pretty.
It’s not a process that takes too long but it’s not the most enjoyable way to spend a Sunday afternoon. If you want to save yourself a bit of time, there is an easier way.
Under the File tab, choose “New” then search for a “calendar”. You’ll find that you can download more than a hundred different pre-formatted calendars. It might not be as much fun as dragging boxes and picking colors to paint cells as you design it yourself, but it takes a lot less time.
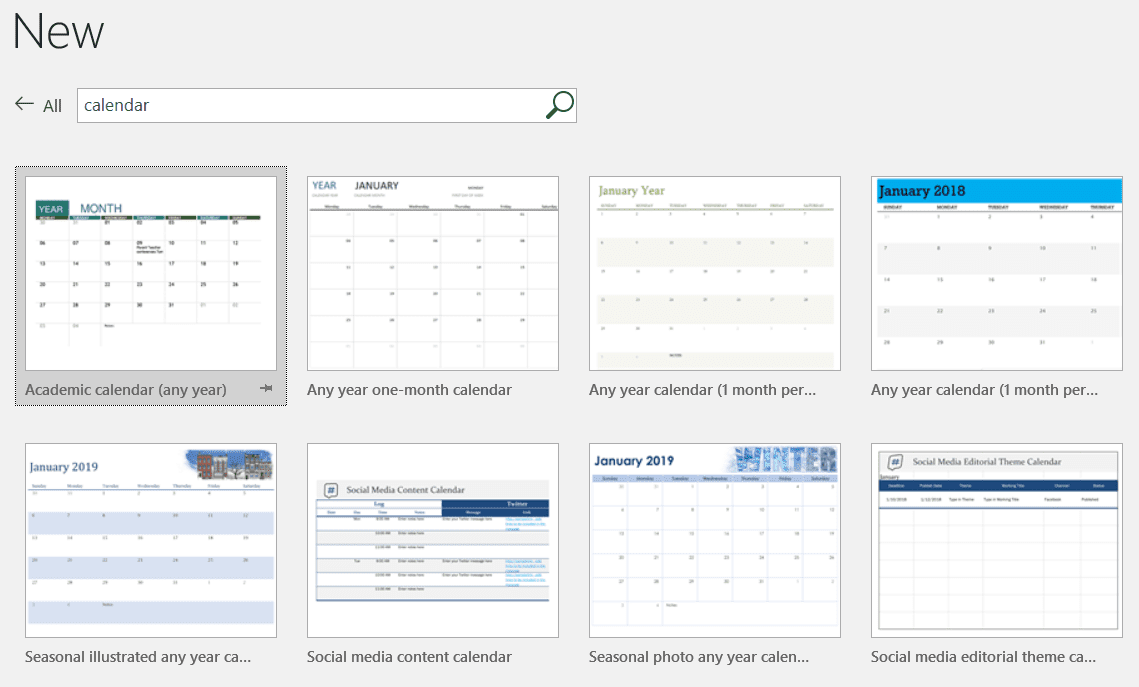
Or use an Excel calendar template.


Howie Jones
My name is Howie and I'm a Customer Success Manager at Calendar. I like to ensure our customers get the best experience using our product. If you have questions email me howie at calendar.com