
With a variety of online calendar at your fingertips, creating a calendar using a spreadsheet seems not only antiquated but also a lengthy endeavor. After all, can’t your current calendar be used for whatever’s going on in your life? In most cases, this is true. But, there are always exceptions.
Using a spreadsheet is ideal if you require a more customized view for specific activities. For example, you can use this type of calendar for creating an employee schedule, timesheet, content calendar, fiscal year, or whatever else your heart desires. However for things like a meeting scheduler, you may need something more customizable.
Moreover, spreadsheets can be customized however you like. It can be something as simple as selecting the timeframe, such as a monthly or yearly calendar, to something more complex like its design.
Up until 2006, you most likely had to use Excel when creating a spreadsheet-based calendar. However, as a part of the Google Docs Suite, you have a much-improved upon option called Google Sheets. If you haven’t tried it out yet, here’s why you might want to give it a spin.
- Google Sheets is 100% free and comes together with Drive, Docs, and Slides. As you know, this makes sharing and collaborating with others a breeze.
- It can be accessed from anywhere — even your Android or iOS devices.
- You can automatically collect and insert data from several online sources.
- Some add-ons and templates make creating a Google Sheet event easier. Or, if you have the skills, you can design your own code.
- And, if you already know the basics of Excel, there isn’t much of a learning curve since the functions are similar.
And, it’s pretty straightforward to create a calendar in Google Sheets. If you want to know how, then here’s a step by step guide to get you on your way.
Step 1
The first thing you have to go is head over to your Google Drive. You can go directly there by visiting https://www.google.com/drive/. Or, if you’re in Gmail, click on the Google apps icon in the top right corner of the page. Of course, you can only do this if you have an account. If you don’t have an account, go ahead and sign-up, it’s free.
Step 2
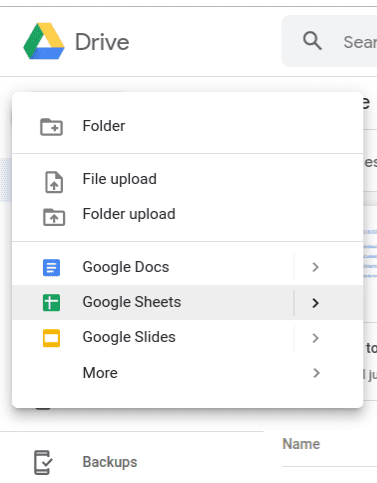
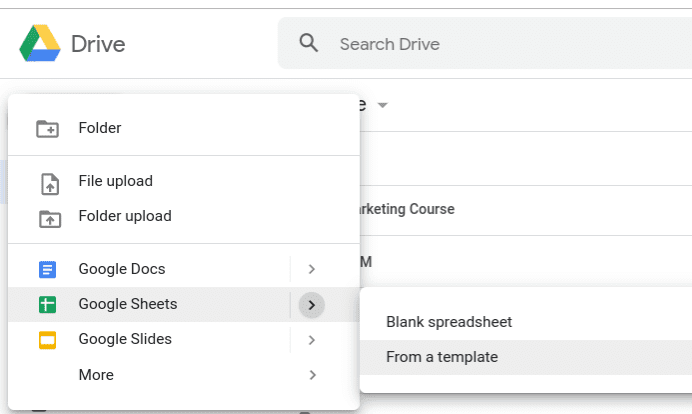
When in Drive, select New. You’ll see Google Sheets appear in the pop-up. When you scroll over this option, you’ll see that you can choose between a blank spreadsheet or template. For the time being, select the blank spreadsheet.
Step 3
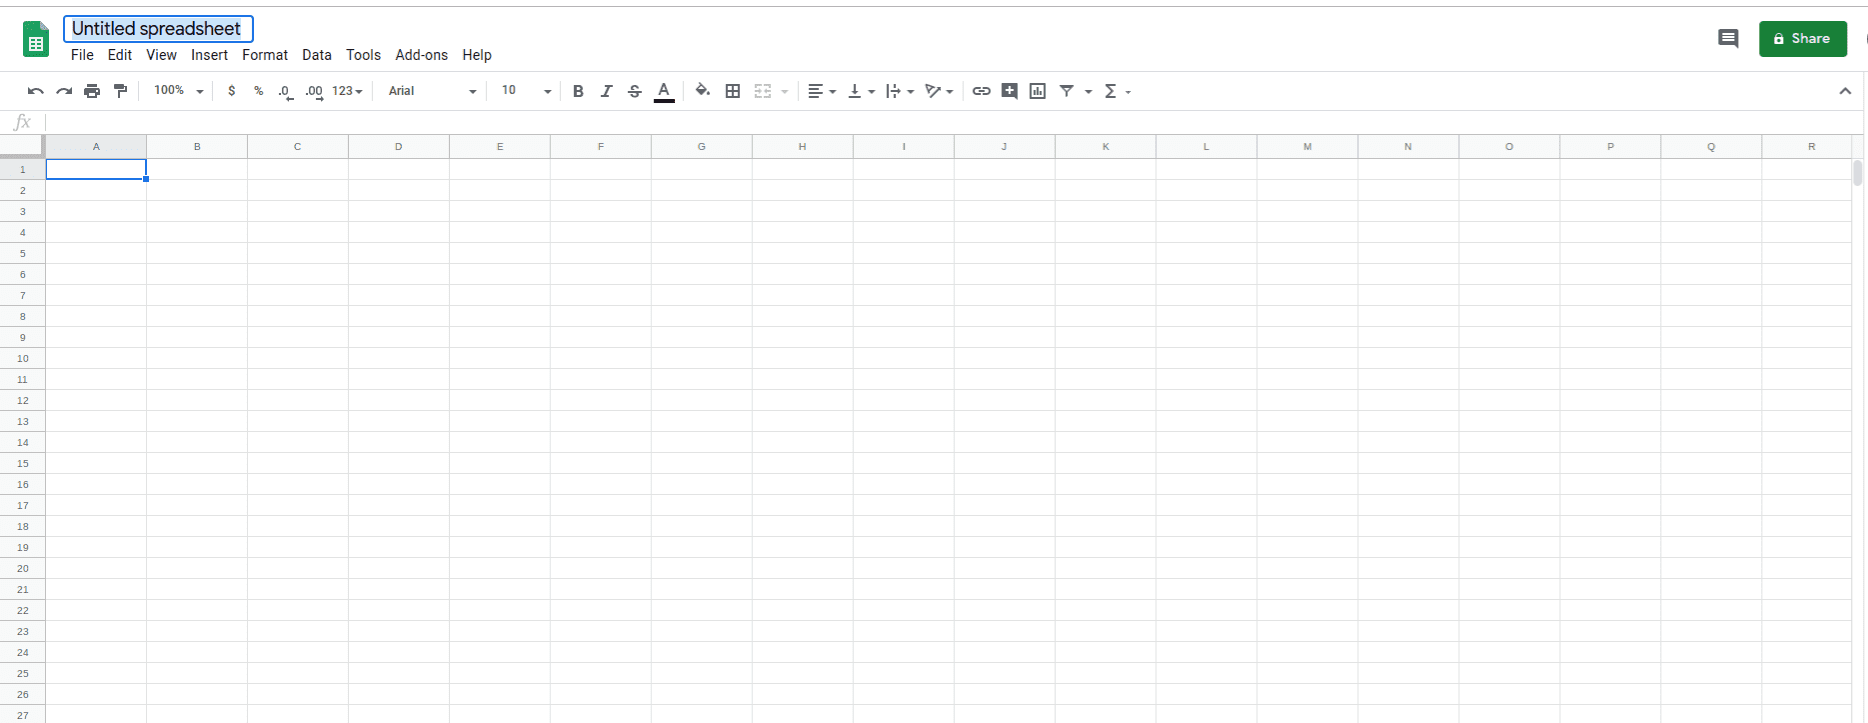
You should now have a beautiful blank spreadsheet on your screen. Retitle it to whatever the calendar is going to be used for.
To rename the calendar, click on Untitled spreadsheet and type in the new title.
Step 4
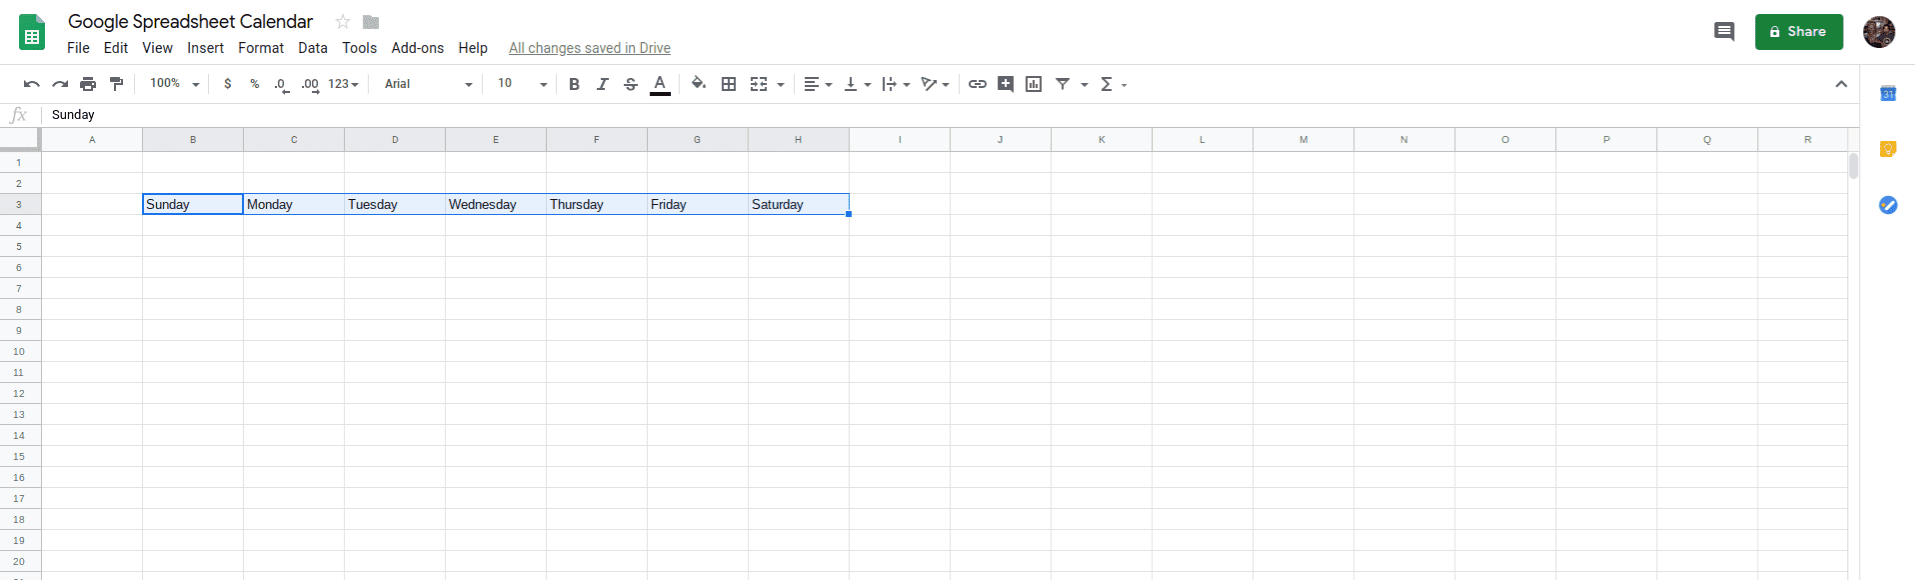
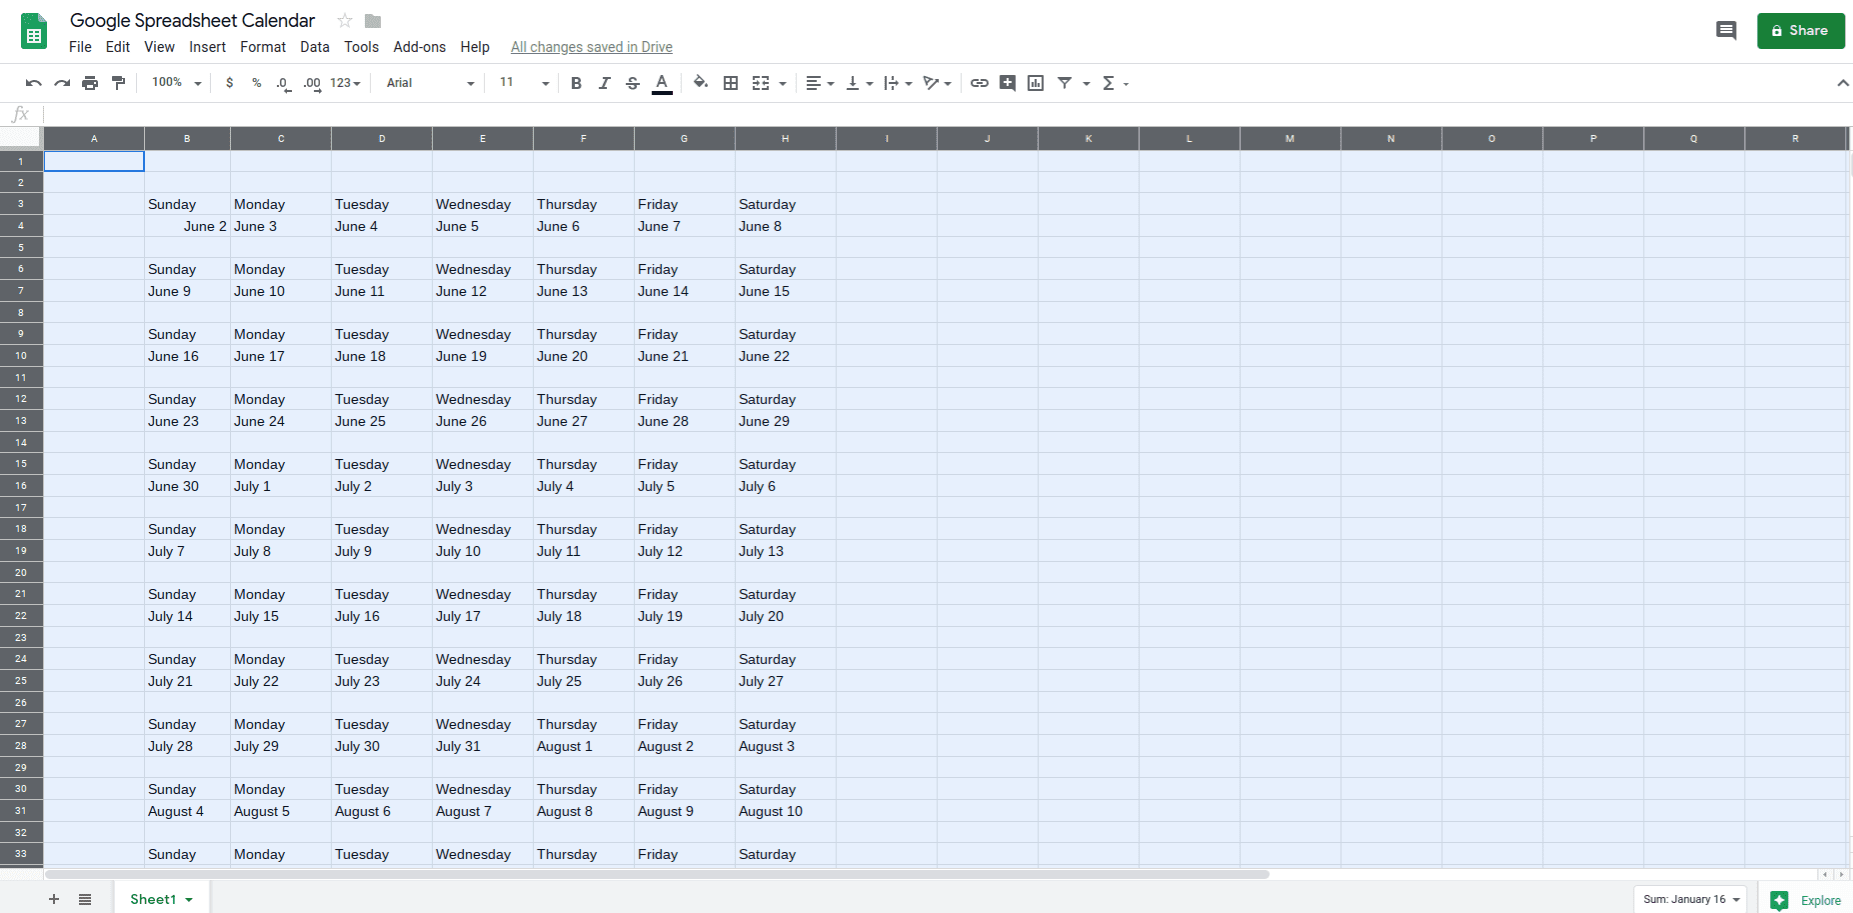
Now it’s time to fill in your calendar. You can start in any cell and insert whatever information you like. But I recommend that you begin at B3. It’s not because of the appearance. Instead, because of Google Sheets formulas, you end up saving a ton of time creating your calendar.
So, go ahead and insert Sunday, for example, into the B3 cell. Next, click on the cell and look for the blue rectangle at the bottom right corner. Highlight the bullseye looking icon and drag it over to the H3 cell. The action will automatically fill in the rest of the days of the week for you.
Step 5
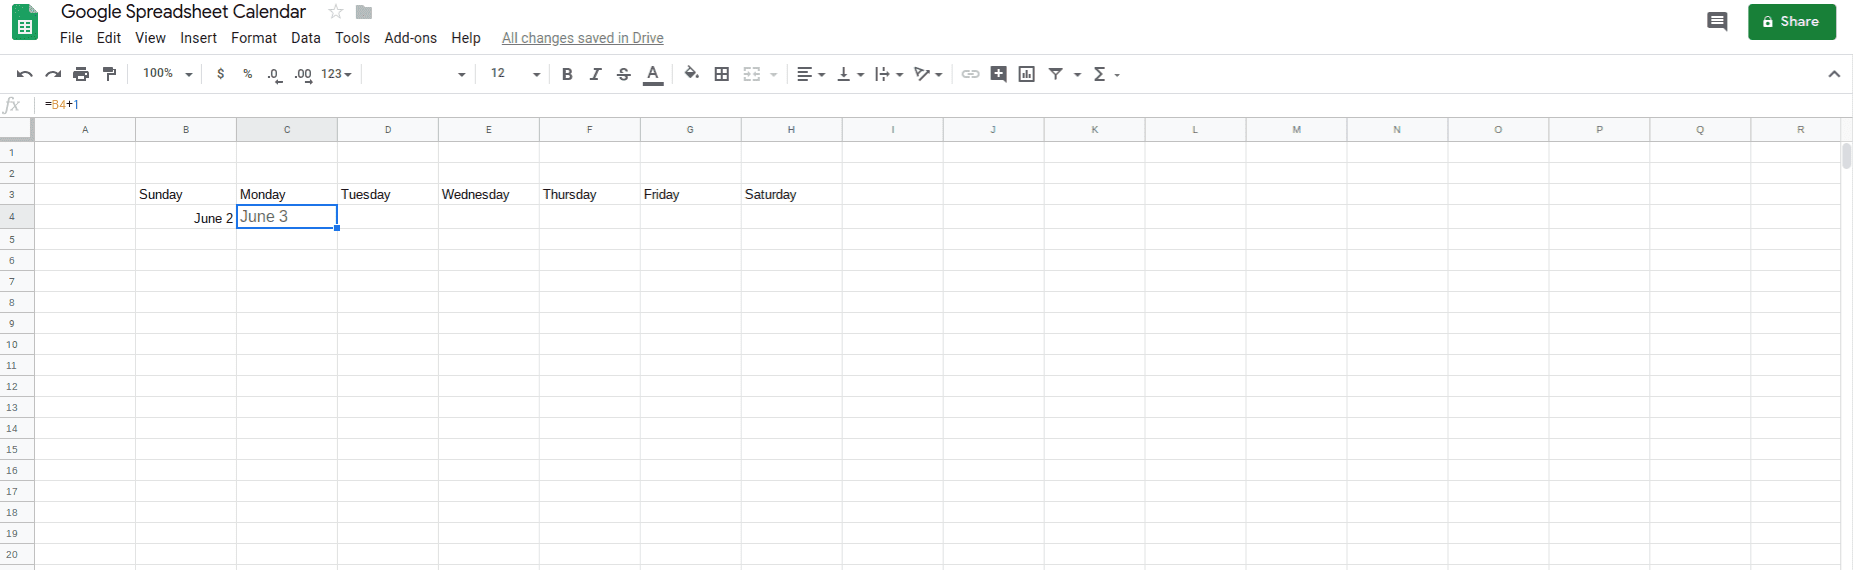
Jump down to the B4 cell and enter the correct date. I wrote this in June 2019, so I’ll kick things off on June 2. If you’re online, Sheets will know which year it is automatically.
Here’s where things get cool. In the next cell, enter the following formula: =B4+1. If you notice, June 3 will appear. You can highlight that cell and click on the bullseye icon and drag it across for the remainder of the week. Sheets then insert the rest of the dates of the week.
Step 6
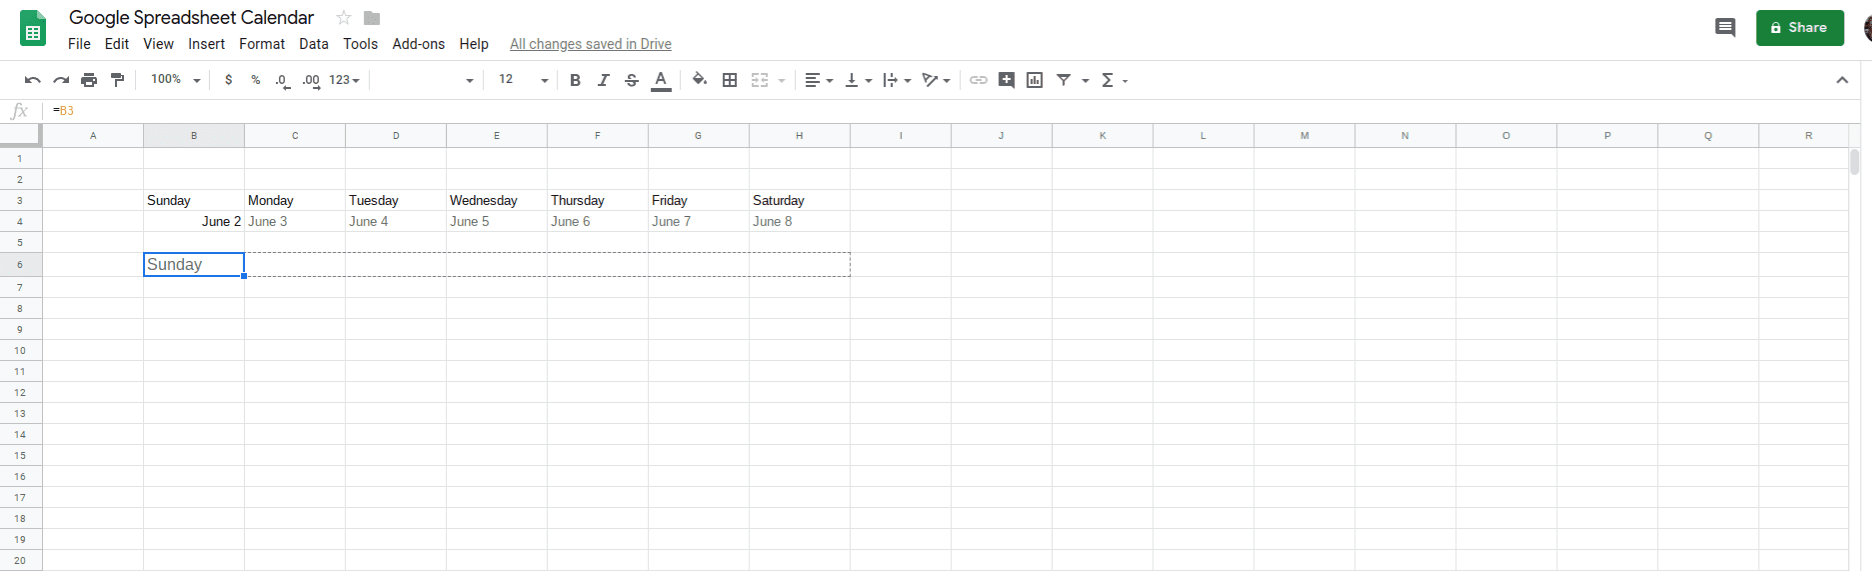
Skip a row and enter =B3. This will add Sunday to the sheet. You can then highlight that and drag it across to the H cell like you did the first time.
Step 7
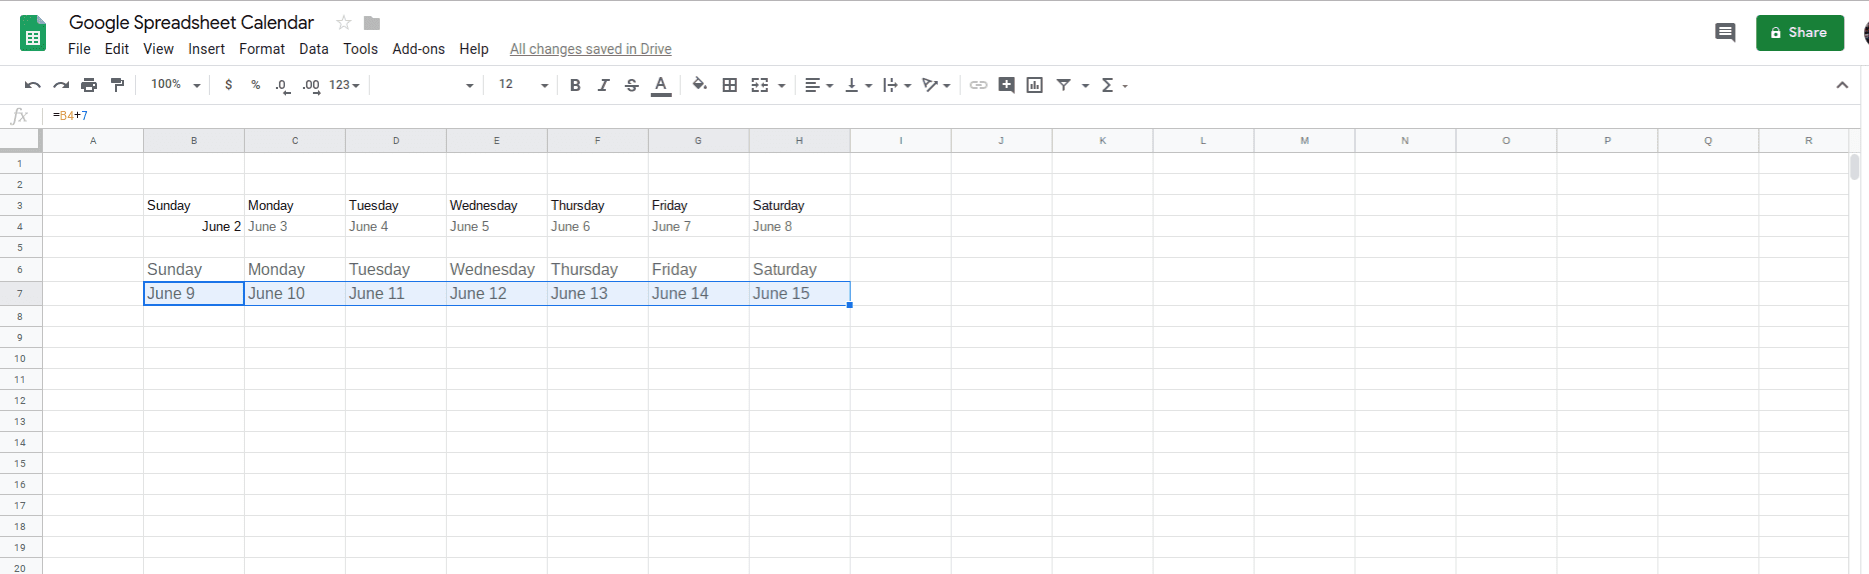
In the cell beneath that, copy and paste =B4+7. As usual, drag that over to the appropriate cell.
Step 8
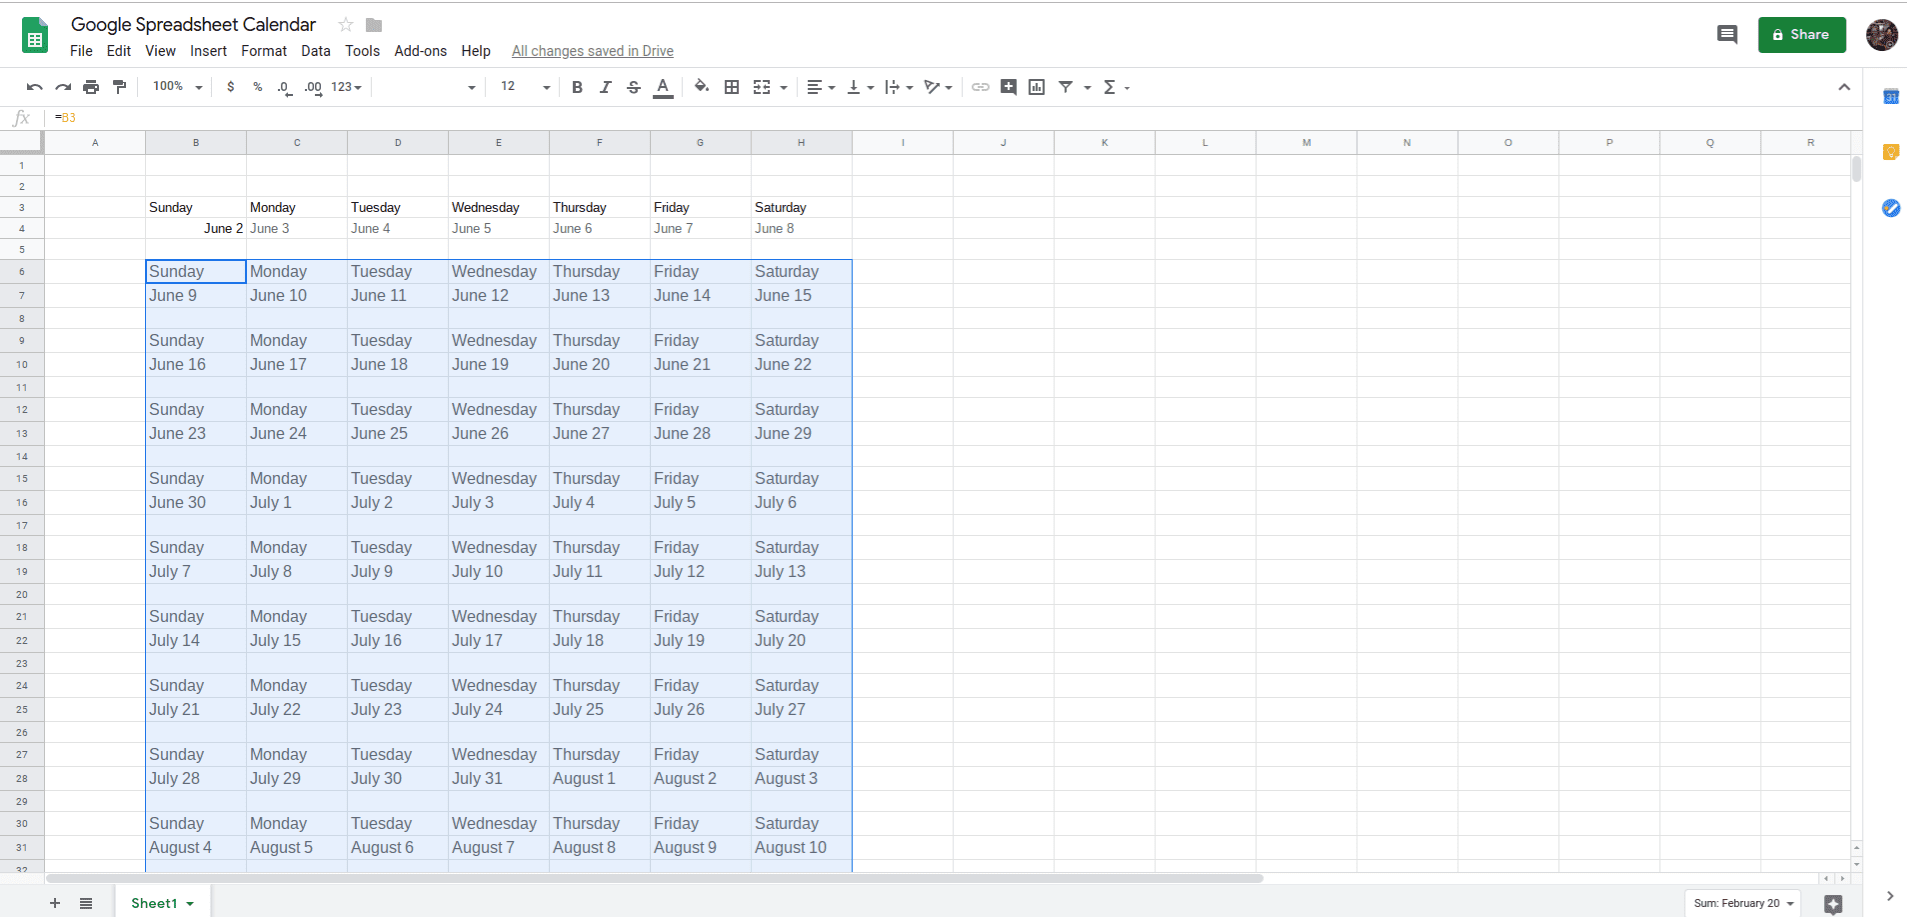
If you’re thinking that you have to keep doing this for the remainder of the calendar, you would be wrong. Simply highlight the days of the week, the dates, and a blank row from the 2nd set only — do not select the first set.
With these cells selected, grab the corner and pull down as far as you would like. Sheets with then fill out the rest of the cells with the day of the week and the correct dates.
Step 9
Finally, go ahead and customize your calendar. In the blank spaces, insert relevant information, such as task assignments or essential deadlines.
If you click on the blank rectangle found above row number 1 and to the left of Column A you can select all of the data in the sheet. It’s a quick way to make sure that everything is the same color, size, or font. But, you can also color-code your calendar or use different fonts for different weeks. Honestly, the sky is the limit.
If you need a little inspiration, I suggest you check out the content calendar created by Megan Minns. On the left side of the sheet, she created a calendar for each month. Making a calendar for each month means that the first row was the name of the month (January), the second the days of the week (Sunday to Saturday), and then the third to seventh were the dates. February would then begin in row nine and so forth.
The column next to the months are left blank, but in I is “events,” K “podcast title, L “CTA,” N “YouTube title, and O “URL.” The remaining columns are used for listing on what social channels the content is being promoted on and when.
To be honest. You can design your calendar in any way you see fit. Just follow Willy Wonka’s advice and follow your imagination. Personally, the best way to learn is to get in there and try it — it’s fun. Tinker around with Google Sheets and see what you can do. If you don’t like the changes you made, you can use the handy Undo button — it’s the arrow pointing towards the left under File.
Is There an Easier Way to Create a Calendar in Google Sheets?
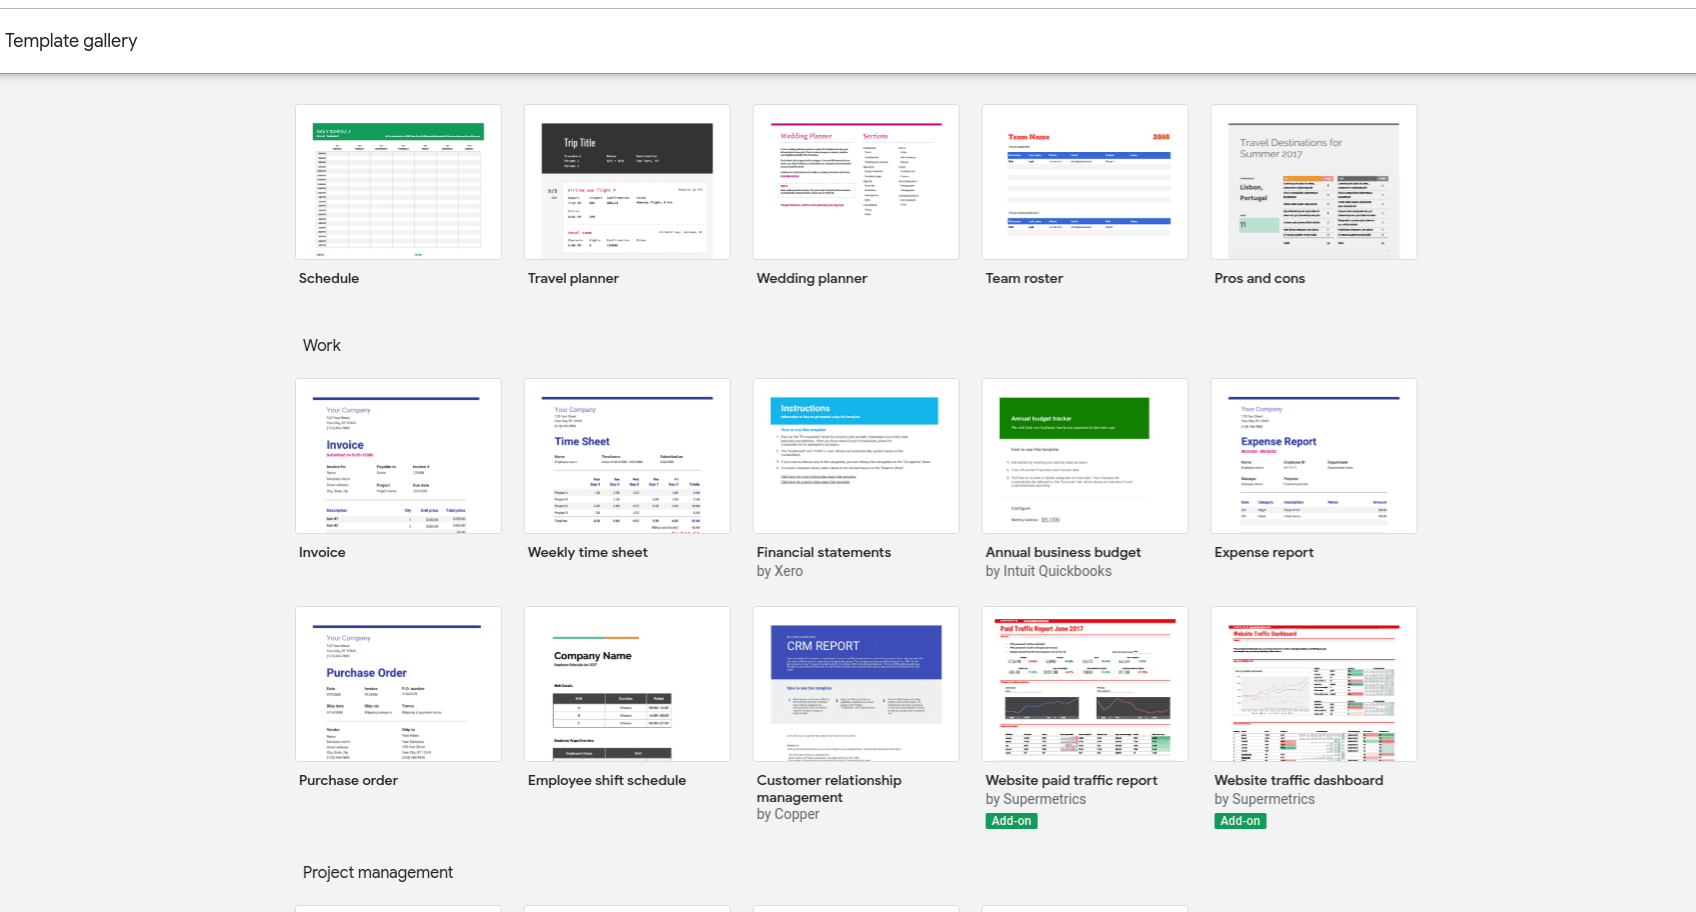
Since we’re talking about the Big G here, of course, there are other options. The first is to use a template. If you recall, you can access these when going into Drive, scroll down to Google Sheets, and select From a template. Here you will find a wide range of premade calendar templates instead of making one from scratch.
Examples include a monthly budget, schedule, project tracker, travel planner, and invoice. The only thing that you have to do is input the dates you need for your specific calendar. Google Sheets will automatically change the rest of the calendar to the correct dates.
Also, if you use a tool like Zapier or Automate.io, you can sync any events from your Google Calendar to Sheets in just a matter of seconds. Besides helping you fill out your calendar, every time a new row is added to Sheets, it will automatically create a new Google Calendar event.
I’ll be glad when it’s not so difficult to put images or little swirlies on a calendar in Google Sheets — and everywhere else.


Deanna Ritchie
Editor-in-Chief at Calendar. Former Editor-in-Chief, ReadWrite, Former Editor-in-Chief and writer at Startup Grind. Freelance editor at Entrepreneur.com. Deanna loves to help build startups, and guide them to discover their business value and the "how to" of their online content and social media marketing.