
Finding a time to meet with your team can be an annoying and time-wasting ordeal. Luckily, Calendar.com has the perfect feature to make this process a breeze: “Find a Time.” In this article, we will discuss the following: what makes Calendar’s “Find a Time” tool unique, the best way for a user to set up their team workspace to maximize the effectiveness of “Find a Time,” and lastly, the best practices on how to use “Find a Time” – depending on the different use cases out there.
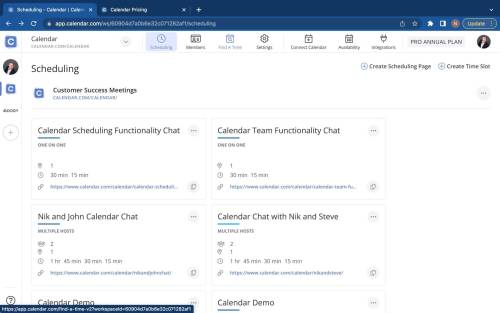
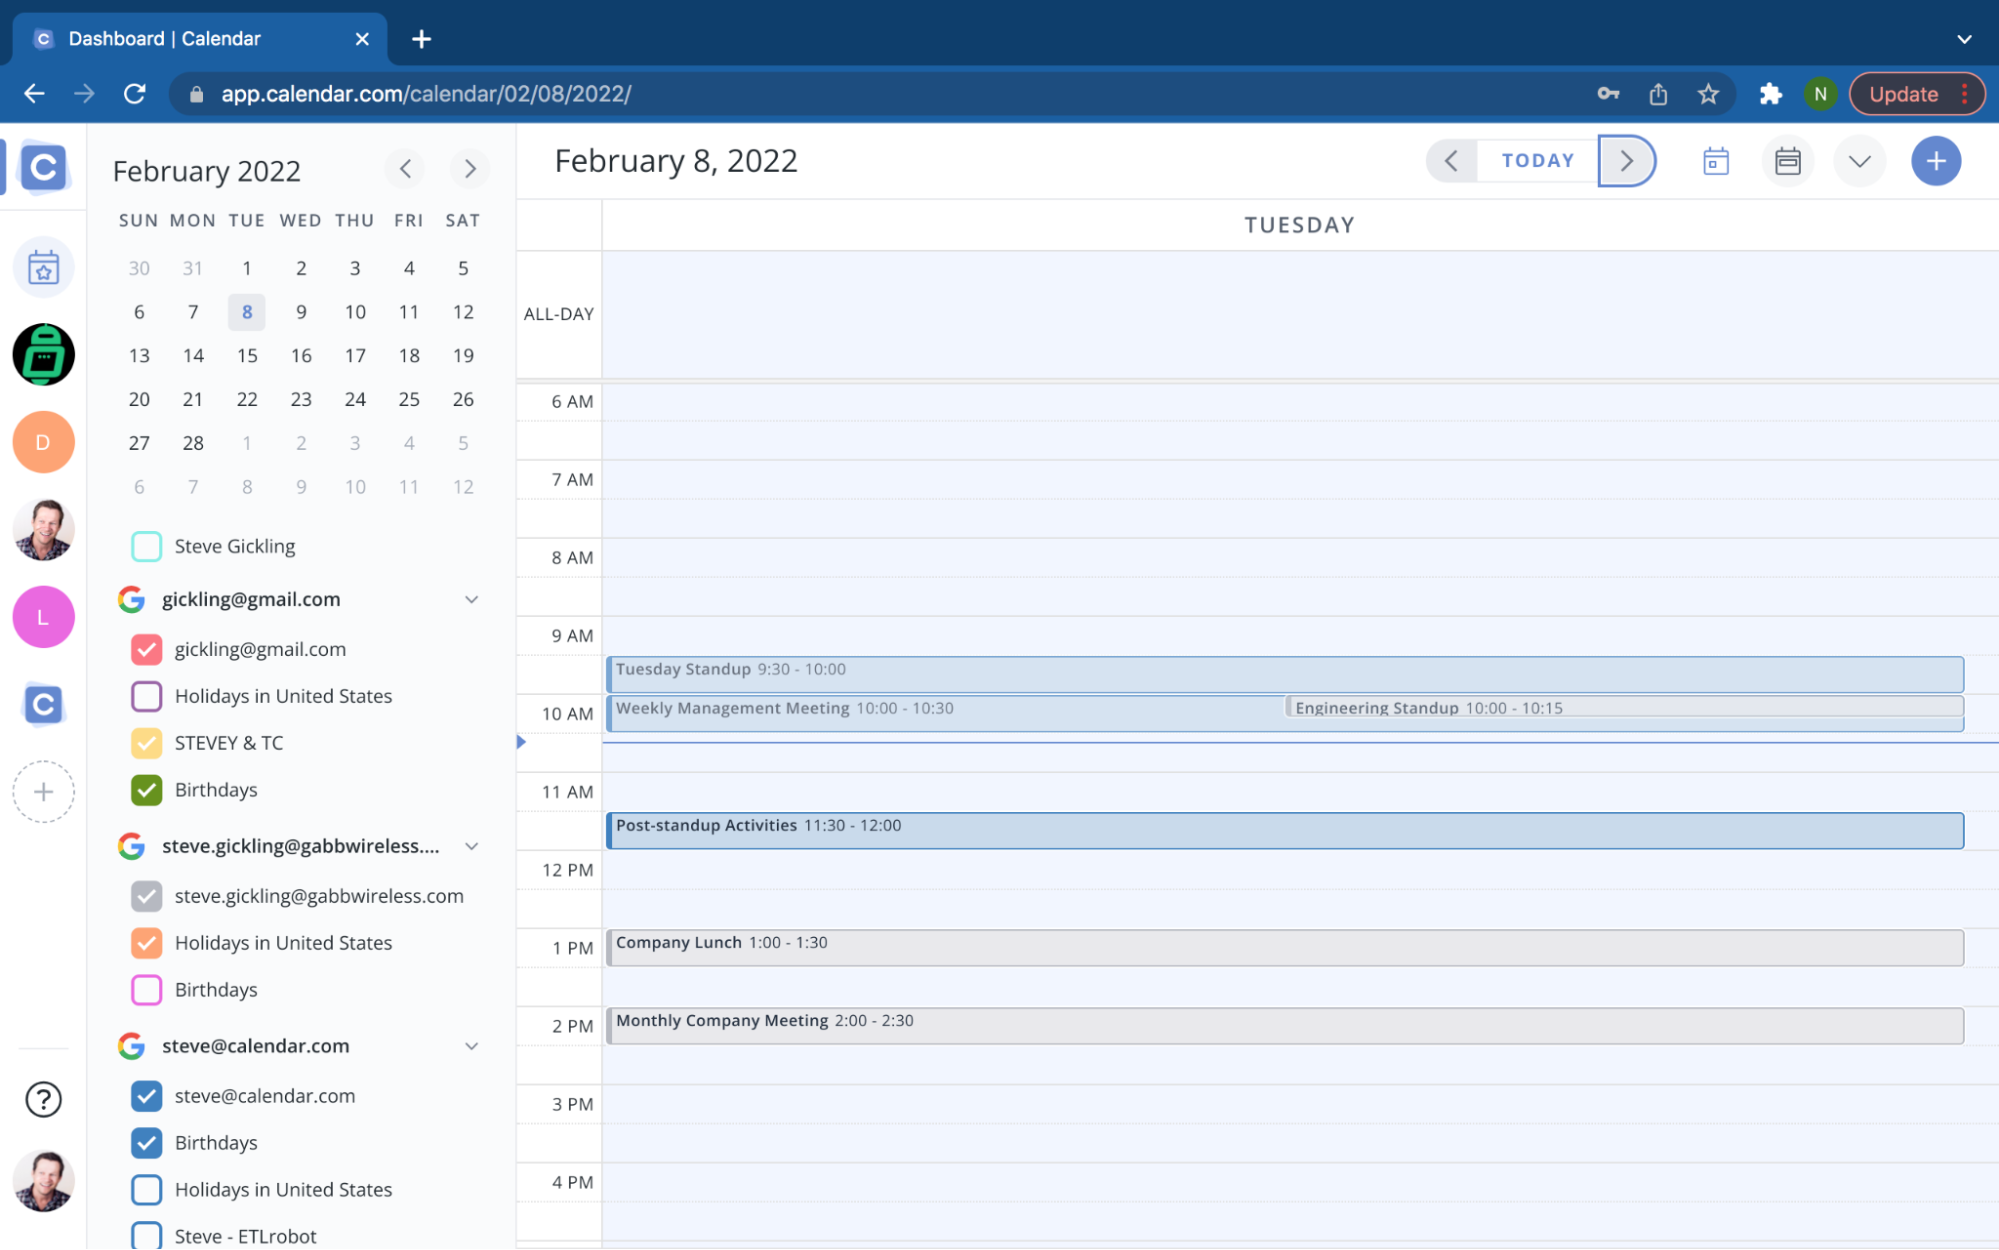
As you can see in the screenshot below, “Find a Time” is located in the workspace screen next to the “Scheduling” and “Members” icon.
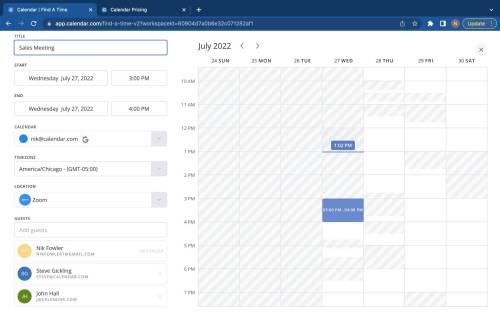
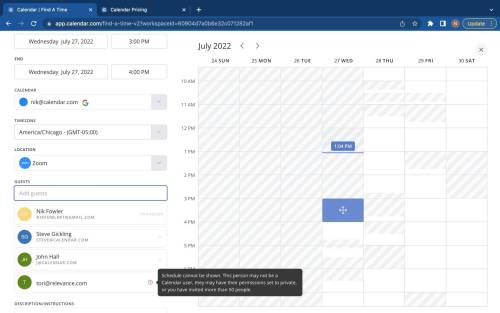
When you select “Find a Time,” Calendar will take you to a screen that allows you to input the details of the meeting you’re trying to schedule. These details include the name of the meeting, the location of the meeting, and the duration of the meeting. Once those are filled out, Calendar takes you to the screen in which you can add your members and see their availability.
That’s where the real magic happens. When you add a team member, all the times they are busy are grayed out and not clickable. Essentially, this means that all the times that are not grayed out are times that work for everyone to meet.
Find a Time
In the below image, you can see the first screen of “Find a Time,” where you add all of the details of the meeting you are trying to schedule.
What Makes Calendar’s “Find a Time” Tool Unique?
So why is Calendar’s “Find a Time” tool superior to what is already out? The answer is simple: It offers true availability. Calendar is unique in that it has a unified calendar, meaning that each user can hook up as many calendars as they like, in order to affect their availability. Examples of these calendars could be a work calendar, a personal calendar, or a side hustle calendar. This includes Google Calendar, Microsoft Calendar, Apple Calendar, Samsung Calendar, Zoho Calendar, Doodle, Calendly, and Schedule Once.
Most people have more than one calendar they are operating from, and with most tools, you can only view one calendar at a time. That’s where Calendar’s unified calendar comes in; allowing you to have multiple calendars to view your availability. You are guaranteed that “Find a Time” is using your true availability of all your calendars, not just one at a time.
Additional Security
Because Calendar is looking at more than just your work calendar for availability, they have added an extra layer of security; where when using “Find a Time,” you are just able to see when people are busy and free. You cannot see the names of the events themselves, keeping all of your personal information from one of your calendars private.
Your team will have the ability to know when you are busy and free but not what you are doing. Of course, if you choose to share your calendar with your team, then they can see the events. But with Calendar’s extra layer of security, people have the ability to share their true availability — without having to give up any privacy.
In the screenshot below, you can see an example of what a meeting in “Find a Time” might look like with all the not available times grayed out and an available time selected.
How to Maximize the Effectiveness of “Find a Time”
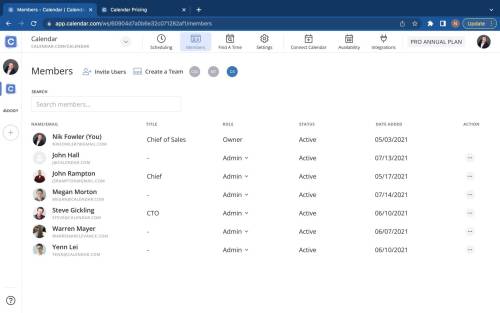
Setting up your workspace correctly is a very simple – but essential – way to make sure you can optimize the success of “Find a Time.” The first thing you are going to want to do is add all of your team members or people you meet with regularly into the workspace. This can be done by clicking the “Members” icon right to the left of the “Find a Time” icon.
Once you are in the “Members” tab, you can simply click “invite users.” From there, you can enter the email addresses of the people you wish to be in your workspace. You can add them one at a time, or you can copy and paste a list.
Then, your team will get an email saying they have been invited to join the workspace. When they click accept, they can go through the fast and easy on-boarding sequence of creating their profile and hooking up the calendars they want to use for their availability. Once your members are in your workspace, you are then able to see their availability in “Find a Time.”
This screenshot shows where you can access the “Members” tab in your workspace to add your team and edit their roles.

Setting Team Members Up for Success
Another way to set your team members up for success is to make sure you invite them using the email that they most frequently use. Even though they will have the ability to add several calendars to affect their availability, the events scheduled with “Find a Time” will go to the calendar you’re invited to. And by default, the scheduled events will also go to the calendar dashboard.
Calendar allows users to be named as “admins” or “users.” The person who creates the workspace, also known as the “owner,” has the same abilities as an admin. And, they would also be considered the workspace’s first admin. A couple of success tips: Make sure you have the right people as “admins,” and also as “users.”
All members will be able to be used, or they will be granted access to use “Find a Time.” But, only admins have the ability to create scheduling events or invite people to the workspace. So, be sure to assign those roles first, starting with who would need it the most.
Maximizing Team Efficiency
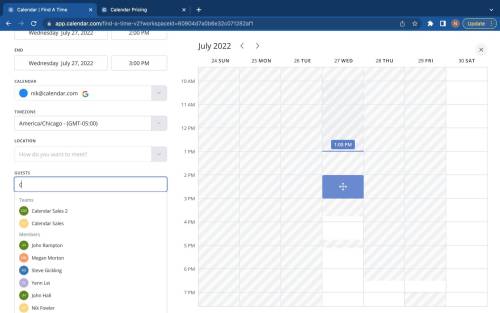
Now that you have set up your workspace correctly and have your team members added, let’s look at some best practices to really maximize efficiency. A great way to optimize “Find a Time” is to create teams. Teams are groups of people in your workspace that often meet together or schedule together.
For example, if five people in your workspace are in sales, you can create a team for them. Now, if you want to meet with your sales team, you can just type in “sales team,” and it will populate every member of that team in “Find a Time.” As a result, this saves you the hassle of having to type in each person’s name.
Creating Your Team
Creating a team is very simple; Just select the “Create a Team” icon that is located under the members tab.
As you can see in the screenshot below, “Create a Team” is at the top of the members screen. This is where you will go in order to create teams out of the members of your workspace.
This screenshot shows how adding the “Sales Team” will auto-fill the whole group, allowing the user to just type the beginning of the team name. This saves the trouble of having to add each person.
Best Practices of “Find a Time”
Another way to maximize the benefits of “Find a Time” is to really know who is in your workspace. Most people think that in order to be in the workspace, you need to be in the same company or group. But, virtually anyone you meet with regularly or semi-regularly can be in your workspace.
Consultants and advisors are groups that tend to run into this issue. They have many people they want to include in the workspace, but they don’t want those people to see each other within the workspace. Additionally, they do not want their clients to see each other.
Calendar fixes this issue by giving you the ability to have multiple workspaces. This allows you to use “Find a Time” with different groups that may – or may not – be in your actual company. Group scheduling can be such a headache but with this functionality, it is only a few clicks away.
All you need to do to add another workspace is simply click the circle button that displays a “+” on it. This is located on the far left of your events screen – right under the workspace that you already have.
Here, you can see an example of a user who has multiple workspaces that he can use to organize all of the different people he works within different organizations.
Multiple Workspace Example
Additional Best-Practice Tips
“Find a Time” can also be used for people who aren’t in your workspace, but still use Calendar. For example, let’s say that a group of people you are trying to meet with is not in your workspace, but they are calendar users. You’re in luck; because Calendar is able to use everyone in the system’s availability for “Find a Time,” which allows you to meet with a network of hundreds of thousands. So, it turns out you can actually view more users’ “true” availability than you thought. This is true for all types of office calendars.
In addition, you can even use “Find a Time” for people who are neither in your workspace nor are Calendar users. In this case, though, their availability would not be displayed. When you add a non-Calendar user to “Find a Time,” there will be a red circle next to the email. That red circle just signifies that even though their ability is not being looked at, they will still be invited to the event and receive all the details.
Below, you can see how [email protected] does not have a Calendar account to show her availability, but she can still be invited to the meeting.
Concluding Thoughts
In summary, finding a time to meet with a group of people has never been easier with Calendar’s “Find a Time” feature. The ability for Calendar to show people’s true availability — instead of one calendar at a time — really sets it apart from other related tools. And, with the workspace being set up correctly, Calendar can help you and your team become more time-efficient and organized than ever before.
“Find a Time” is only the tip of the iceberg in scheduling functionalities Calendar offers. Additionally, every user in the workspace has access to these functionalities — like customizable scheduling events links that show external users when you are an entire team is free. This is in addition to having advanced analytics access, so you know how you and your team are spending your time.


Nik Fowler-Hainen
Nik is at Calendar.com. He guides people on using Calendar to make scheduling a breeze and to save valuable time. He is always looking for new challenges and ways to better himself as well as the lives of people around him.