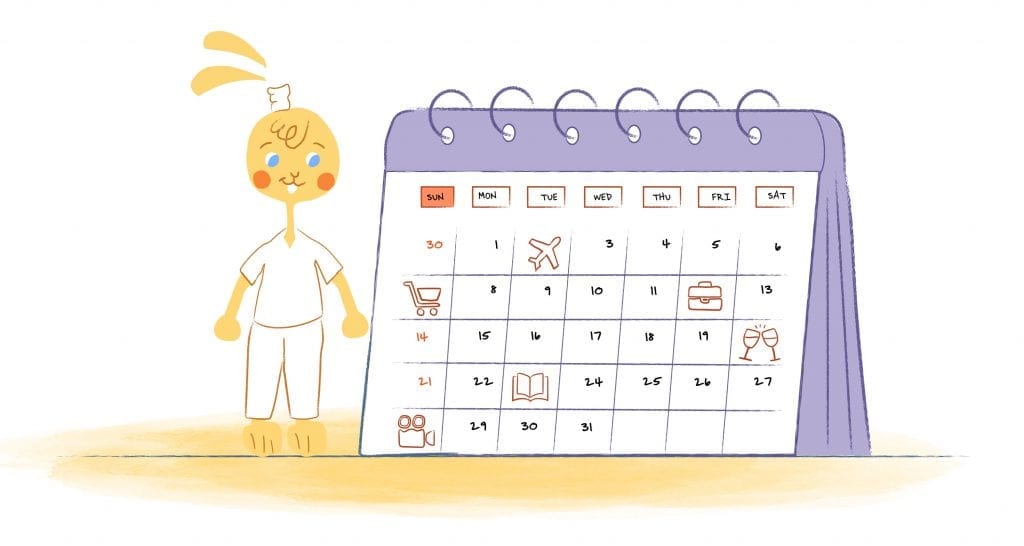
Released to the general public in July 2009, Google Calendar is one of the favored time management and scheduling apps available. And, for a good reason. Here are 25 Google calendar hacks to maximize productivity.
Lauded for its design and simplicity, users have also found Google Calendar to be one of the best tools to keep their personal and professional lives organized. Organization of your calendar will be your ally for productivity. Google’s powerful features, such as the ability to create multiple calendars, share your schedule with others, and receive reminders will be a great teacher for you. This calendar also integrates seamlessly with a wide range of other useful tools.
Google Calendar can be severely underutilized. To ensure that you get the most out of this calendar, here are 25 hacks that will maximize your productivity.
1. Drag and drop events.
What happens when an event, such as a meeting, has to be moved to another date? No problem. You can simply drag and drop the details to the new date and time. Now you don’t have to completely create a new event from scratch.
Just click on the event and relocate it using your cursor to the new appointment slot.
2. Don’t type, speak when adding new events.
Let’s say that you’re away on a business trip, and you need to schedule an appointment. Instead of opening the app and typing the details into your calendar, you can use voice technology. In other words, you can use your voice to add the event.
For example, you could say, “Okay Google, create a calendar event: lunch meeting with Bob Smith Wednesday at noon at Mary’s Coffee Shop.” All of this information will then be added to your calendar. Even better, you may be asked follow-up questions so that you can input all relevant data into the event fields.
3. Color-code each of your calendars.
Like most people, balancing the various projects and different parts of your life can be a challenge. If you rely on one calendar to tackle everything in your life, it can become cluttered and unmanageable. Thankfully, Google Calendar lets you color-code each of these areas of your life. You could use red for all of your work-related tasks, blue for social engagements, and green for meetings.
Color-coding gives you a chance to quickly glance at your schedule so that you can identify what your day, week, or month looks like. It also helps you better understand how you’re spending your time and which areas frequently intersect with each other.
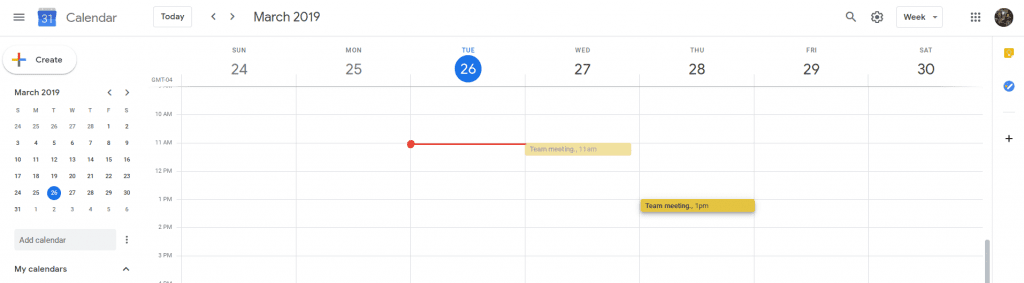
4. Customize your calendar view.
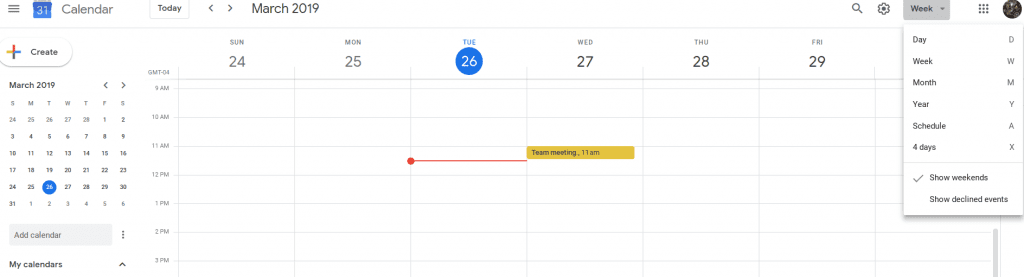
You can further customize your Google Calendar by changing the calendar view. Google gives you the following options: Day, Week, Month, Year, Schedule, and four days. Customization is a simple way to avoid distractions. For instance, if you select the day view, you will only see what you have scheduled for that specific day — as opposed to seeing all the things you have planned for the following week or month.
You also have the option to hide/display weekends and declined events.
5. Use appointment slots.
If you have a school or work account, then you can create appointment slots so that you can block off specific times for a task or events. You can do this by taking the following steps:
- Open your calendar and go into either Week or Day view.
- Click anywhere you want in the calendar. When the event box appears, click Appointment slots.
- Enter the details, such as title, and select the calendar where you want the event to be displayed.
- If you want to add more information, like a location, just on click More options.
6. Share Google Calendar with others.
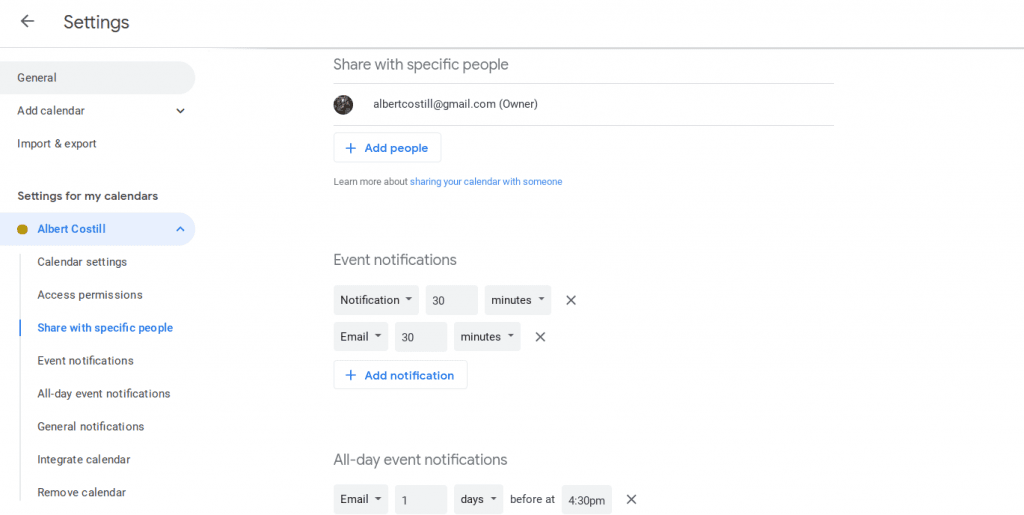
Sharing your calendar with others can be beneficial if you’re working with others. Having a calendar that you share with everyone guarantees that all of your people are aware of important deadlines and dates. Using a sharable view also eliminates any confusion like arriving late to a meeting or missing a due date.
A shared calendar can also be useful in your personal life. For example, your family can view your calendar to see your upcoming travel itinerary. If you have a group of friends planning a night out, everyone can see when you’re free and when you aren’t available.
To share your Google Calendar, go into Settings and add the email addresses of the people you want to share your calendar with. You can also copy the shareable link of your calendar and send it via email.
7. Embed your calendar.
Another way that you can share your availability is to embed your calendar on your website. Go to Settings, scroll down to Integrate calendar, and copy your calendar’s embed code. Embedding your calendar will allow you to place your calendar directly on your website. Embedding is a real time saver if people regularly book appointments with you; it eliminates the back and forth emails when finding a common date and time.
8. Sync your calendar everywhere.
One of the best features with online calendars is that they can be imported and exported virtually anywhere. For example, if you use Google Calendar for work and Apple Calendar for your personal life, then you can export your work calendar so that it syncs with your personal life. While you won’t be able to edit your Google Calendar, you can view it without bouncing between apps.
Check this link so that you will know how you can export a Google Calendar to Outlook or Apple. Also, check out the article on how to import events into Google Calendar if you want to know how to do this action. Learning how to sync your calendar with voice assistants, check out this link: Google Home.
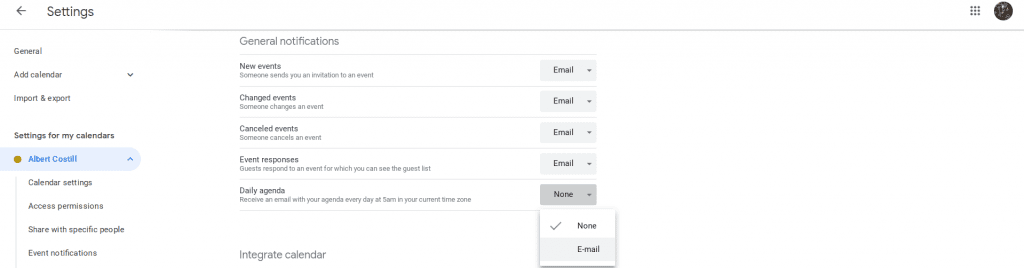
9. Add reminders.
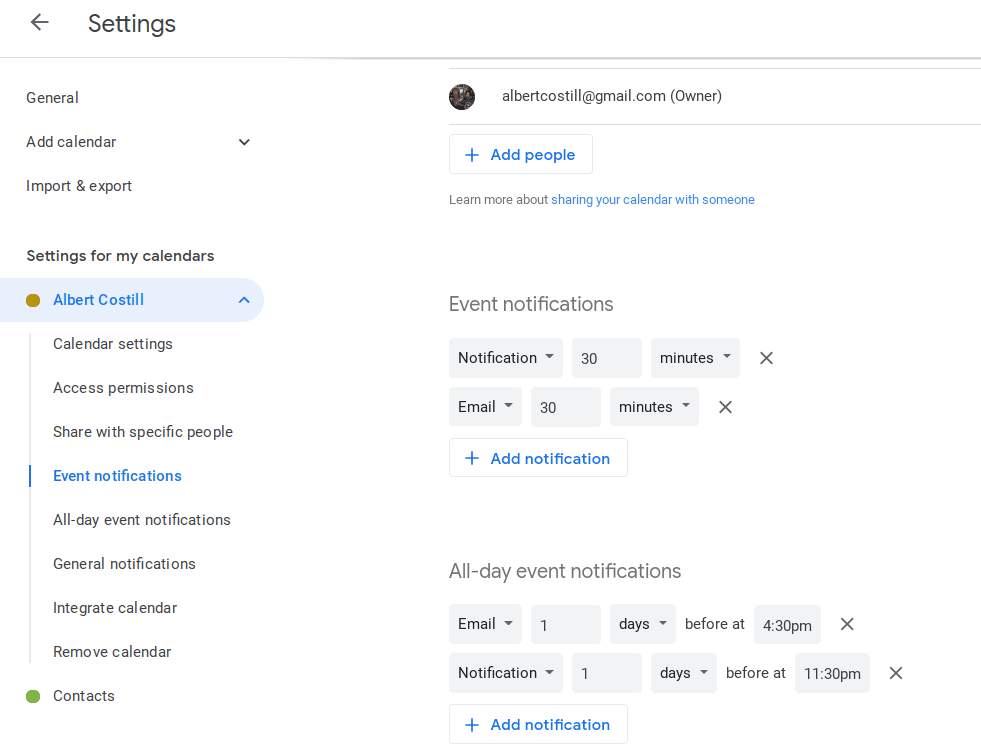
There are times when you add an event to your calendar months in advance. Examples include a save the date for a wedding or a meeting with a client following a conference you’re attending. Because the date has been set so far in advance, it may be easy to forget all about being in attendance. Thankfully, you can set auto reminders in your Google Calendar.
If you click on the Settings gear and scroll down to Settings for my calendars you can change your event notifications. You have the opportunity to pick how much notice you need before the event, is 25-minutes enough, or do you need 48 hours? You also have the choice to receive a notification or email.
10. Use desktop notifications.
Google Calendar isn’t perfect. Case in point; workflow interruptions.
If you have your calendar option and you are receiving notifications — that notification is going to take over your entire screen. You may be right in the middle of composing an email or reviewing your meeting agenda — if there’s an event in 10-minutes — a giant pop-up appears and directs your attention to your calendar.
You can change this option by going into your Settings and scrolling to Event settings and change the view to Desktop Notifications. Now you’ll receive a more gentle reminder — found on the top right-hand corner of your screen.
11. Set an out-of-office message.
Everyone should be aware of the “out-of-office” message option. This selection will help you better balance work and life. Google Calendar allows you to set specific working hours. If someone requests a meeting when you are not during your particular working hours — your calendar will automatically decline the request. Having this message come up is especially helpful when you are on vacation — and will not be responding to calls, invites or meetings.
Additionally, you can set an out-of-office message whenever you’re not available. That may not sound like a big deal, but, it will inform the other party when you’ll be in the office and what steps to take in the meantime. For instance, your message could direct a client to call your co-partner in case there’s an emergency.
Here’s a handy guide on how to set up an out-of-office message in Google Calendar.
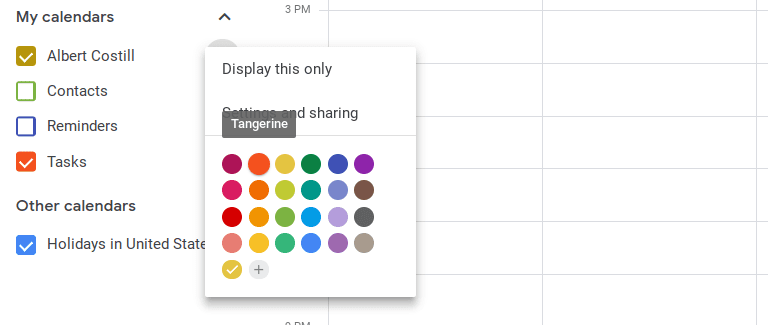
12. Hide calendars and events.
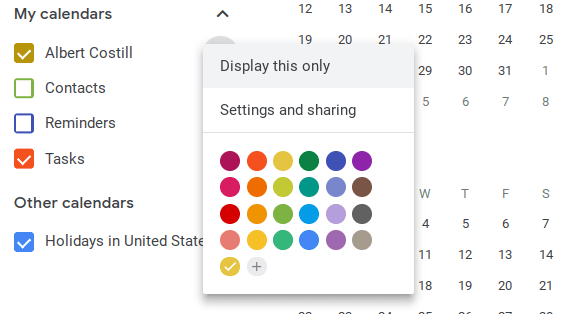
Even after you’ve color-coded your calendar, you may feel that it’s still too cluttered and overwhelming. The good news is that you can hide calendars and events so that they aren’t visually distracting you. For instance, you can display only your work calendar and hide your contacts so that your not looking at birthday reminders all day.
If you go into Settings, you can also choose whether or not to view declined events — or whatever activities you have penciled in for the weekend.
13. Receive your daily agenda via email.
Wouldn’t it be great if you had your own personal assistant? That’s a luxury most of us can’t afford — even if we use a virtual assistant. However, the feature of a daily agenda email comes pretty darn close.
Head into Settings and on the left-side menu, select the calendar view that you would like to have emailed to you. Once you have selected what view you want to be sent to you, your daily agenda will be emailed to you — every morning at five a.m. Having this arrive in your email each day is an excellent way to see what your day will look like.
14. Enable tasks.
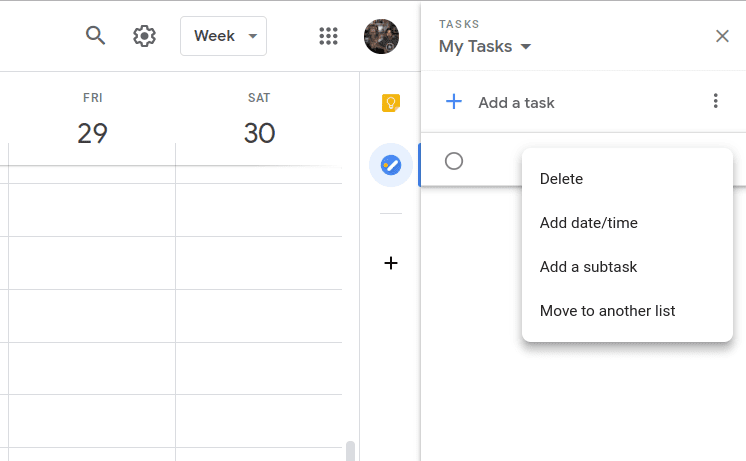
If you need assistance organizing specific events, like a more significant project that could be broken down into smaller actions — then this is a useful feature that you can start using. Visit the right side of your calendar, and you’ll spot small blue Tasks icon. Click on that task icon to add a title, event details, date and time, and subtasks.
After you’ve enabled Tasks, you can sort these actions by the order or date — which can be used to help you prioritize your most important tasks. Once you’ve completed a task — you’ll receive a message congratulating you on finishing your tasks and that it’s time to recharge.
15. Add events from Gmail.
Did you book a flight for your vacation? How about booking those dinner reservations at the trendy new restaurant that a prospective client has requested?
If you used your Gmail account, these events would automatically be added to your calendar. You’ll also receive a notification before the event. While this isn’t a trick, per se, it’s a great reminder that you should have all emails sent to your Gmail account so that they’ll be input into Google Calendar for you.
16. Learn keyboard shortcuts.
Keyboard shortcuts will let you quickly edit and manage your calendar — even if the shortcuts are saving you a couple of seconds.
Here are the following Google Calendar keyboard shortcuts you should master:
- Create an event – c
- Event details – e
- Delete event – Backspace or Delete
- Undo last (if possible) – Ctrl+Z or z
- Go to the previous time period – k or p
- Go to next time period – j or n
- Refresh the page – r
- Go to today’s view – t
- Day view – 1 or d
- Week view – 2 or w
- Month view – 3 or m
- Custom view – 4 or x
- Agenda view – 5 or a
- Search – /
- Add a calendar – shift += or +
- Quick add – q
- Print – ctrl + p or command + p
- Settings – s
- Keyboard shortcuts menu – ctrl +? / command + ? or ?
17. Add a specific meeting location.
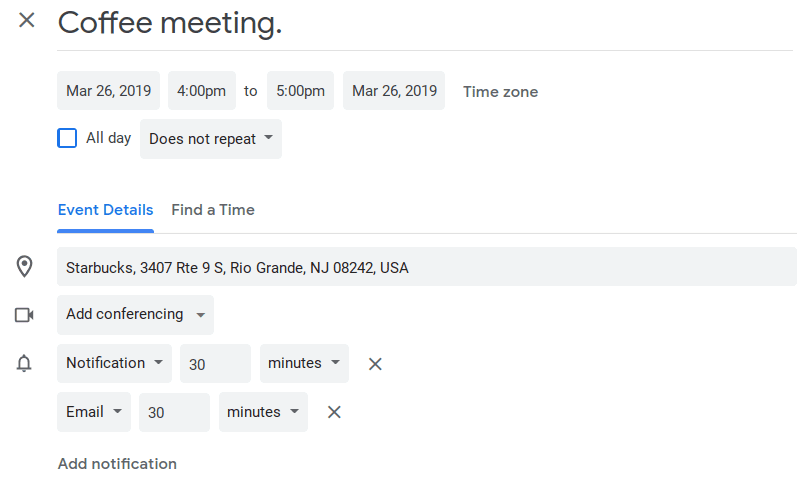
If you’ve ever planned a meeting, you know that the logistics can get a bit hairy. On top of agreeing on a date and time, you also have to determine a location. When you create a new event in Google Calendar, you can add a specific meeting location address to avoid any confusion. If you want a mess — tell everyone you’re meeting at a Starbucks. Everyone glances at their calendar — but they don’t notice that a location has not been entered until about thirty minutes before the meeting. The time suck is unbelievable as each person calls you to ask which Starbucks — also everyone will arrive late.
Do everyone, including yourself, a favor. Add the location. After you’ve added a location, your calendar will integrate with Google Maps so that everyone will receive directions automatically, as opposed to searching for directions themselves.
18. Find a time that works for everyone.
A scheduling tool like Calendar can make this process more manageable — and you can coordinate schedules. Another tool is the Find a time feature. Note that “find a time feature” is only available if you have a Google account through work, school, or a group.
To find a meeting time, open an existing event in your calendar. Next, click on the Find a time tab located at the bottom right corner. You can then view the calendars that were shared with you. You can now navigate between days to find an appropriate time slot for all attendees. When the time has been chosen, click the area within the calendar grid, and it will be added.
If someone hasn’t shared their calendar with you, type their name in the Add calendar field. They’ll permit you to access their calendar.
19. Add attachments.
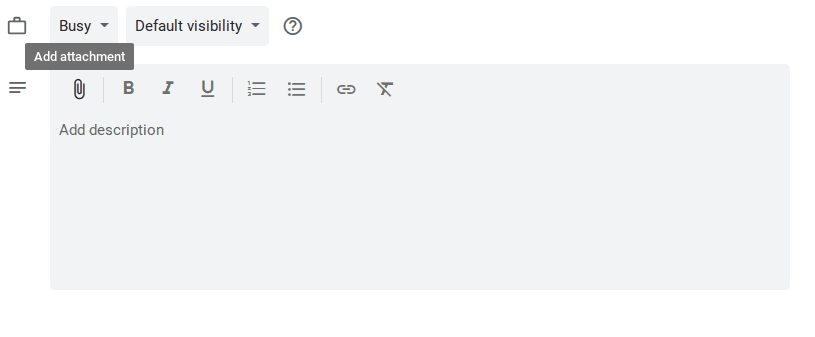
Whether it’s a meeting agenda or a document needed to complete a task, you can easily add attachments to an event. This way, everyone involved has the proper materials without asking you to share them.
To add an attachment, click on the paper clip within the description of the event. Then, add the appropriate file that needs to be shared.
20. Change the starting day of the week.
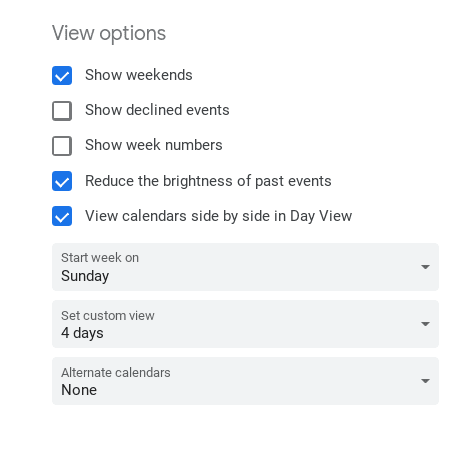
I prefer to plan my week on Sundays — and want my Google Calendar to start on that day. Some people may wish to their week to begin on Saturday or Monday. Google Calendar gives you this option when you’re in Settings. Scroll down to View options to select the day of the week you want to kick off your week.
21. Use Google Calendar when offline.
Although we live in a world where we’re seemingly online 24/7, there will be moments when you’re completely offline. Thankfully, you can see your calendar when not connected to the internet. However, you can only have this view when using the app.
When you have selected “offline mode,” you can view your schedules, make edits, and create, edit, or respond to events. When you’re back online — any updates you made while offline will then be synched to your calendar.
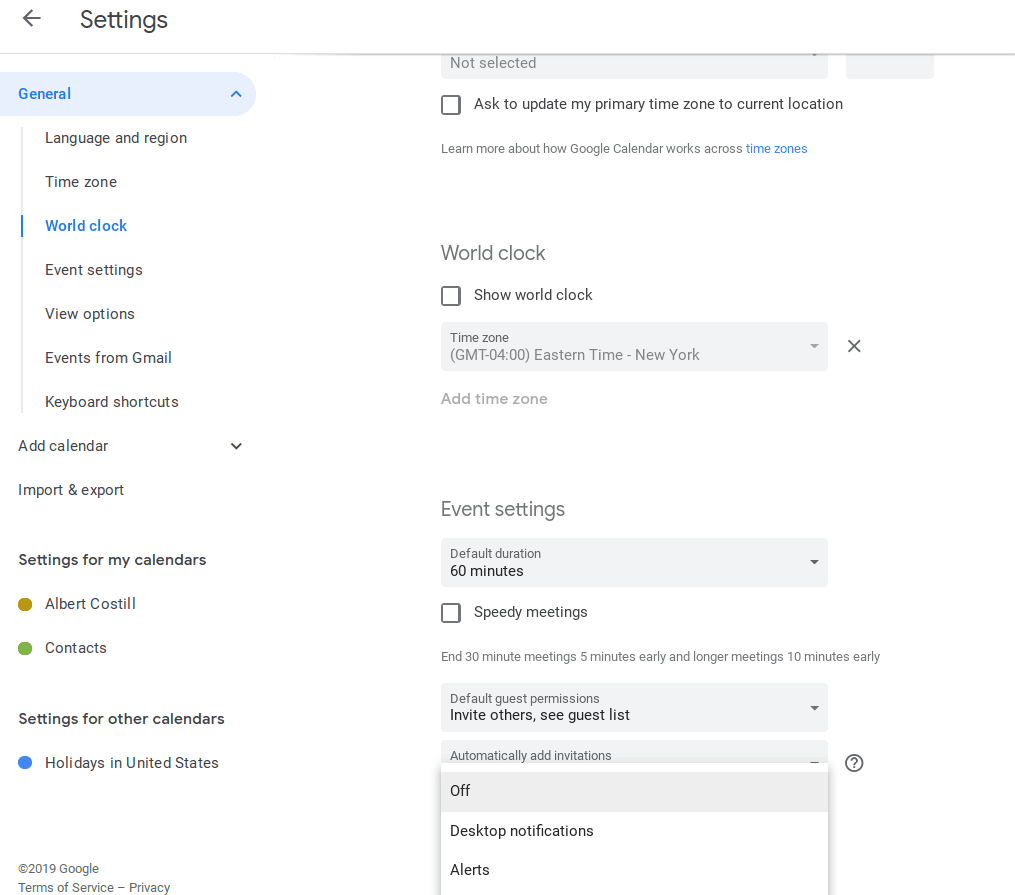
22. Enable the world clock and time zones.
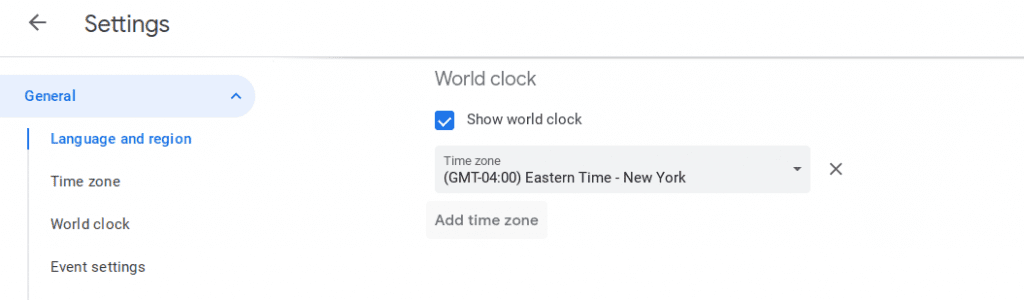
If you’re working with a virtual team that’s located across the world — it can get tricky planning and tracking appointments. You don’t want to plan to host a conference call when the rest of your colleagues are still in bed.
To resolve this issue, go into your settings and enable the World Clock. You can add the time zones of each team member to prevent any confusion.
23. Set up recurring events.
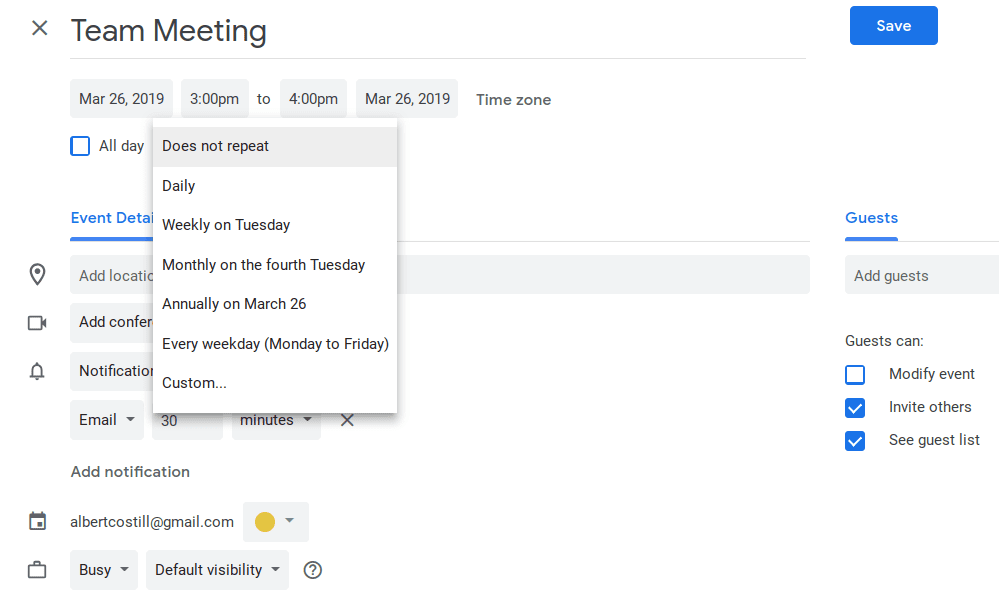
Do you have any events or tasks that take place at the same time every day, week, month, quarter, or year? If so, when you create the event the first time around — select how often you want this same event to repeat — so that you’re not continually adding in the same information.
24. Restore deleted events.
If you accidentally deleted an event you can quickly restore the deletion by tapping on the Settings gear and clicking into Trash (the small garbage can at the end of your dock). You then click, restore, and the deleted item will be placed back onto your calendar. Keep in mind that trashed items are only saved for 30 days, and you can only restore events that you had access to in the first place.
25. Integrate Google Calendar with other tools.
Finally, integrate your Google Calendar with the other productivity tools you frequently use. Examples include:
- Calendar to handle all of your scheduling.
- Slack for communicating with others.
- Zapier to connect your apps in order to automate workflows.
- Zoom for video conferencing.
- Todoist for managing your to-do-lists.
- HubSpot for your CRM needs.
That’s in no way an extensive list. But, Google Calendar syncs with almost everything to make your life a whole lot easier.


John Rampton
John’s goal in life is to make people’s lives much more productive. Upping productivity allows us to spend more time doing the things we enjoy most. John was recently recognized by Entrepreneur Magazine as being one of the top marketers in the World. John is co-founder of Calendar.